nut free

Banana Tahini Bread

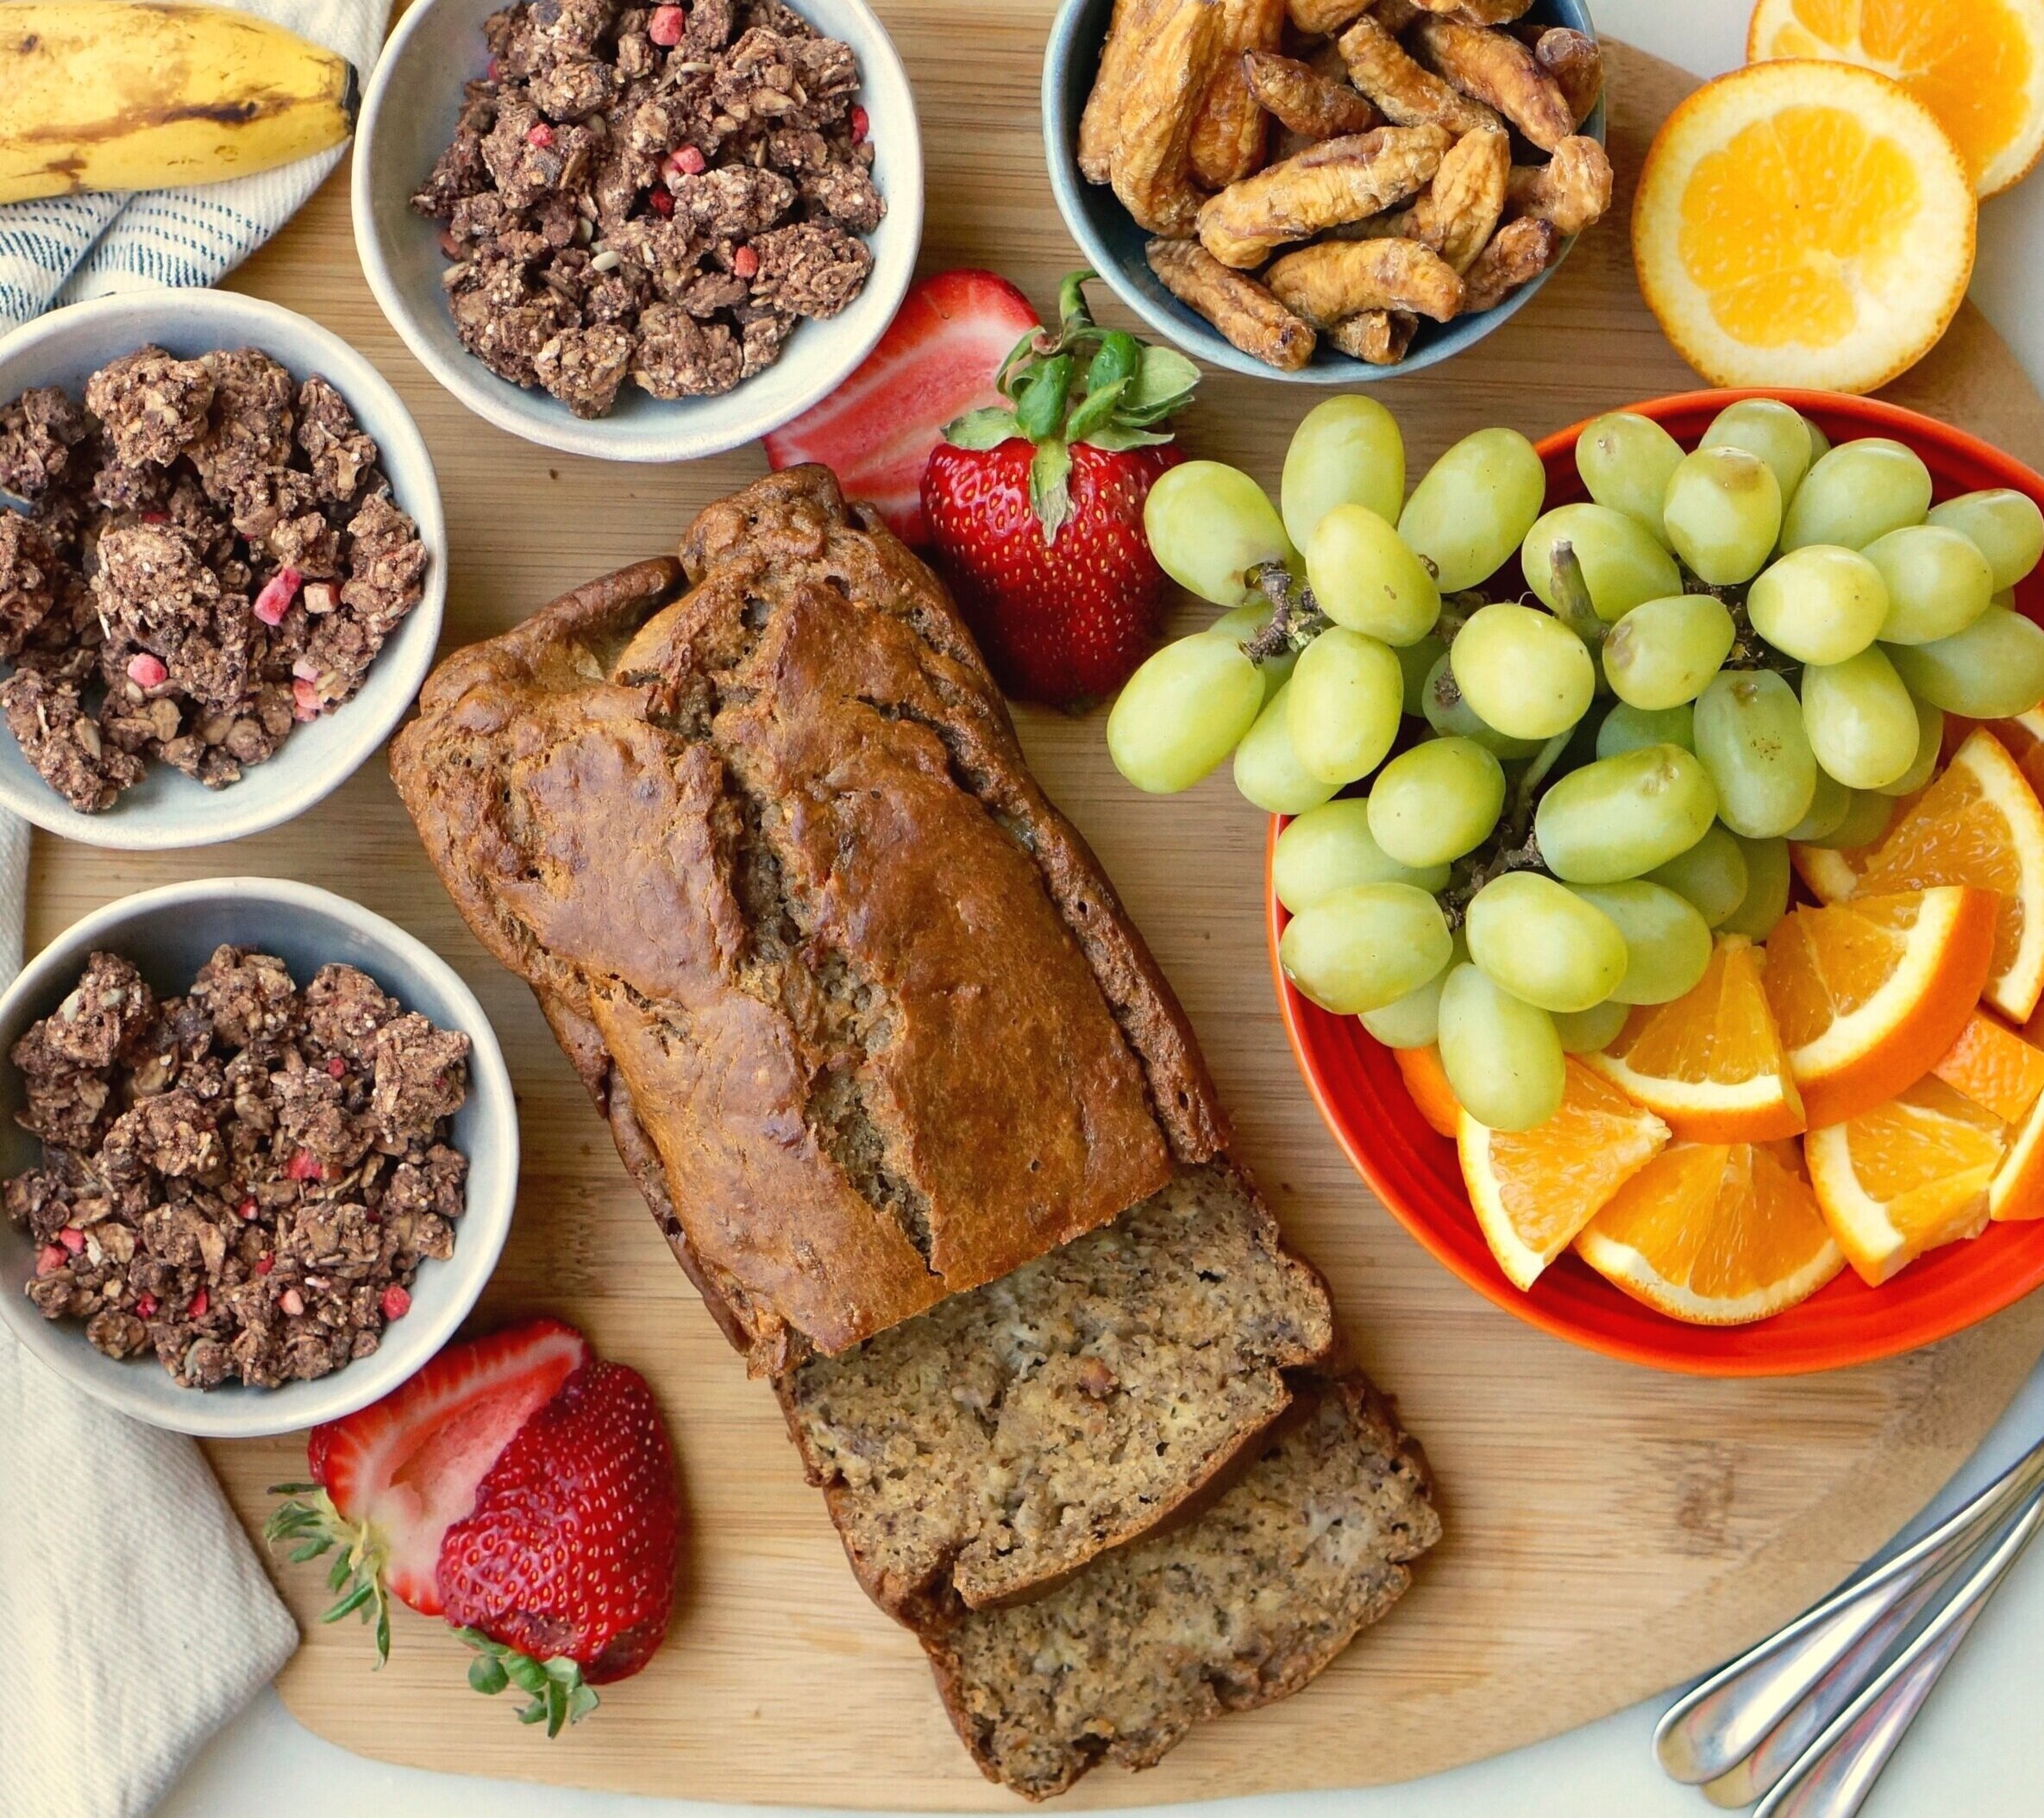
Banana bread just hits the spot sometimes, right? Right.

Nut Free Banana Tahini Bread

Nut Free Banana Tahini Bread

It’s easy to understand why banana bread is so universally loved; When done right, the texture has an inviting richness, with a smooth banana taste throughout. It begs you to take the next bite. The tahini in this recipe adds an earthy depth to the banana bread, which I absolutely adore. It’s hearty. It’s flavorful. It’s well balanced on the sweet/unsweet scale. It’s almost confusing… you’ll want to savor a slice of it, and yet shove it in your mouth as fast as possible. Yeah, it is that good.

banana tahini bread

banana tahini bread

I cut myself a slice yesterday, toasted it and smeared on some butter and flake salt. The melty chocolate chips with the salted butter was a revelation! Give this one a try. You won’t regret it. Most recently I’ve been making this with fairly bruised, but not super ripe bananas and I might prefer it! The result is a slightly less sweet but equally delicious loaf. This recipe is dairy free and nut free, and can easily be made vegan by substituting flax eggs for eggs. It packs up beautifully in a lunchbox, and you can serve this any time of day.

Banana Tahini Bread ingredients

I’ve made this multiple times, both with and without chocolate chips, and no surprise, my kids usually vote to include the chocolate chips.

If you make this, tag @lalalunchbox #lalalunchbox so that I can marvel at its beauty!

mashed banana

mashed banana

Banana Tahini Bread

3 ripe bananas + 1 banana for the top (optional)
1/4 cup tahini, well stirred 
1/4 cup coconut oil
3 tablespoons oat milk (you can use any milk here)
3 tablespoons maple syrup
2 large eggs
2 teaspoons vanilla extract
1/2 teaspoon apple cider vinegar 
1 teaspoon cinnamon 
1/2 teaspoon salt
1 teaspoon baking soda
1 1/4 cups whole wheat flour 
1/2 cup chocolate chips (optional) 

  • Preheat the oven to 350 F and grease a loaf pan with neutral oil.

  • Mash 3 very ripe bananas against the side of a large bowl. Add the wet ingredients to the bowl: tahini, coconut oil, oat milk, maple syrup, eggs, vanilla extract and apple cider vinegar.

  • Mix thoroughly. I always make sure to leave some lumps of banana, because that’s how I prefer it, but you can use a mixer if you prefer a smoother textured bread.

  • Add the cinnamon, salt and baking soda and stir gently.

  • Slowly add the flour, and continue to stir gently until it is fully combined.

  • Add the optional chocolate chips and give it one final mix.

  • Pour into your prepared loaf pan.

  • Slice the 4th banana in half lengthwise. Place each half on the top of the bread before baking.

  • Bake for 50-55 minutes, or until a tester comes out clean.

*to make this recipe vegan and egg free, replace the two eggs with 2 tablespoons of flax meal mixed thoroughly with 6 tablespoons of water. Let that sit for at least 5 minutes before adding to the batter.

*to make these into muffins, simply adjust the time. Bake for 20-25 minutes for regular sized muffins. To make these into mini muffins, bake for 12-16 minutes.

Banana Tahini Bread ready to bake

Easy Veggie Waffles

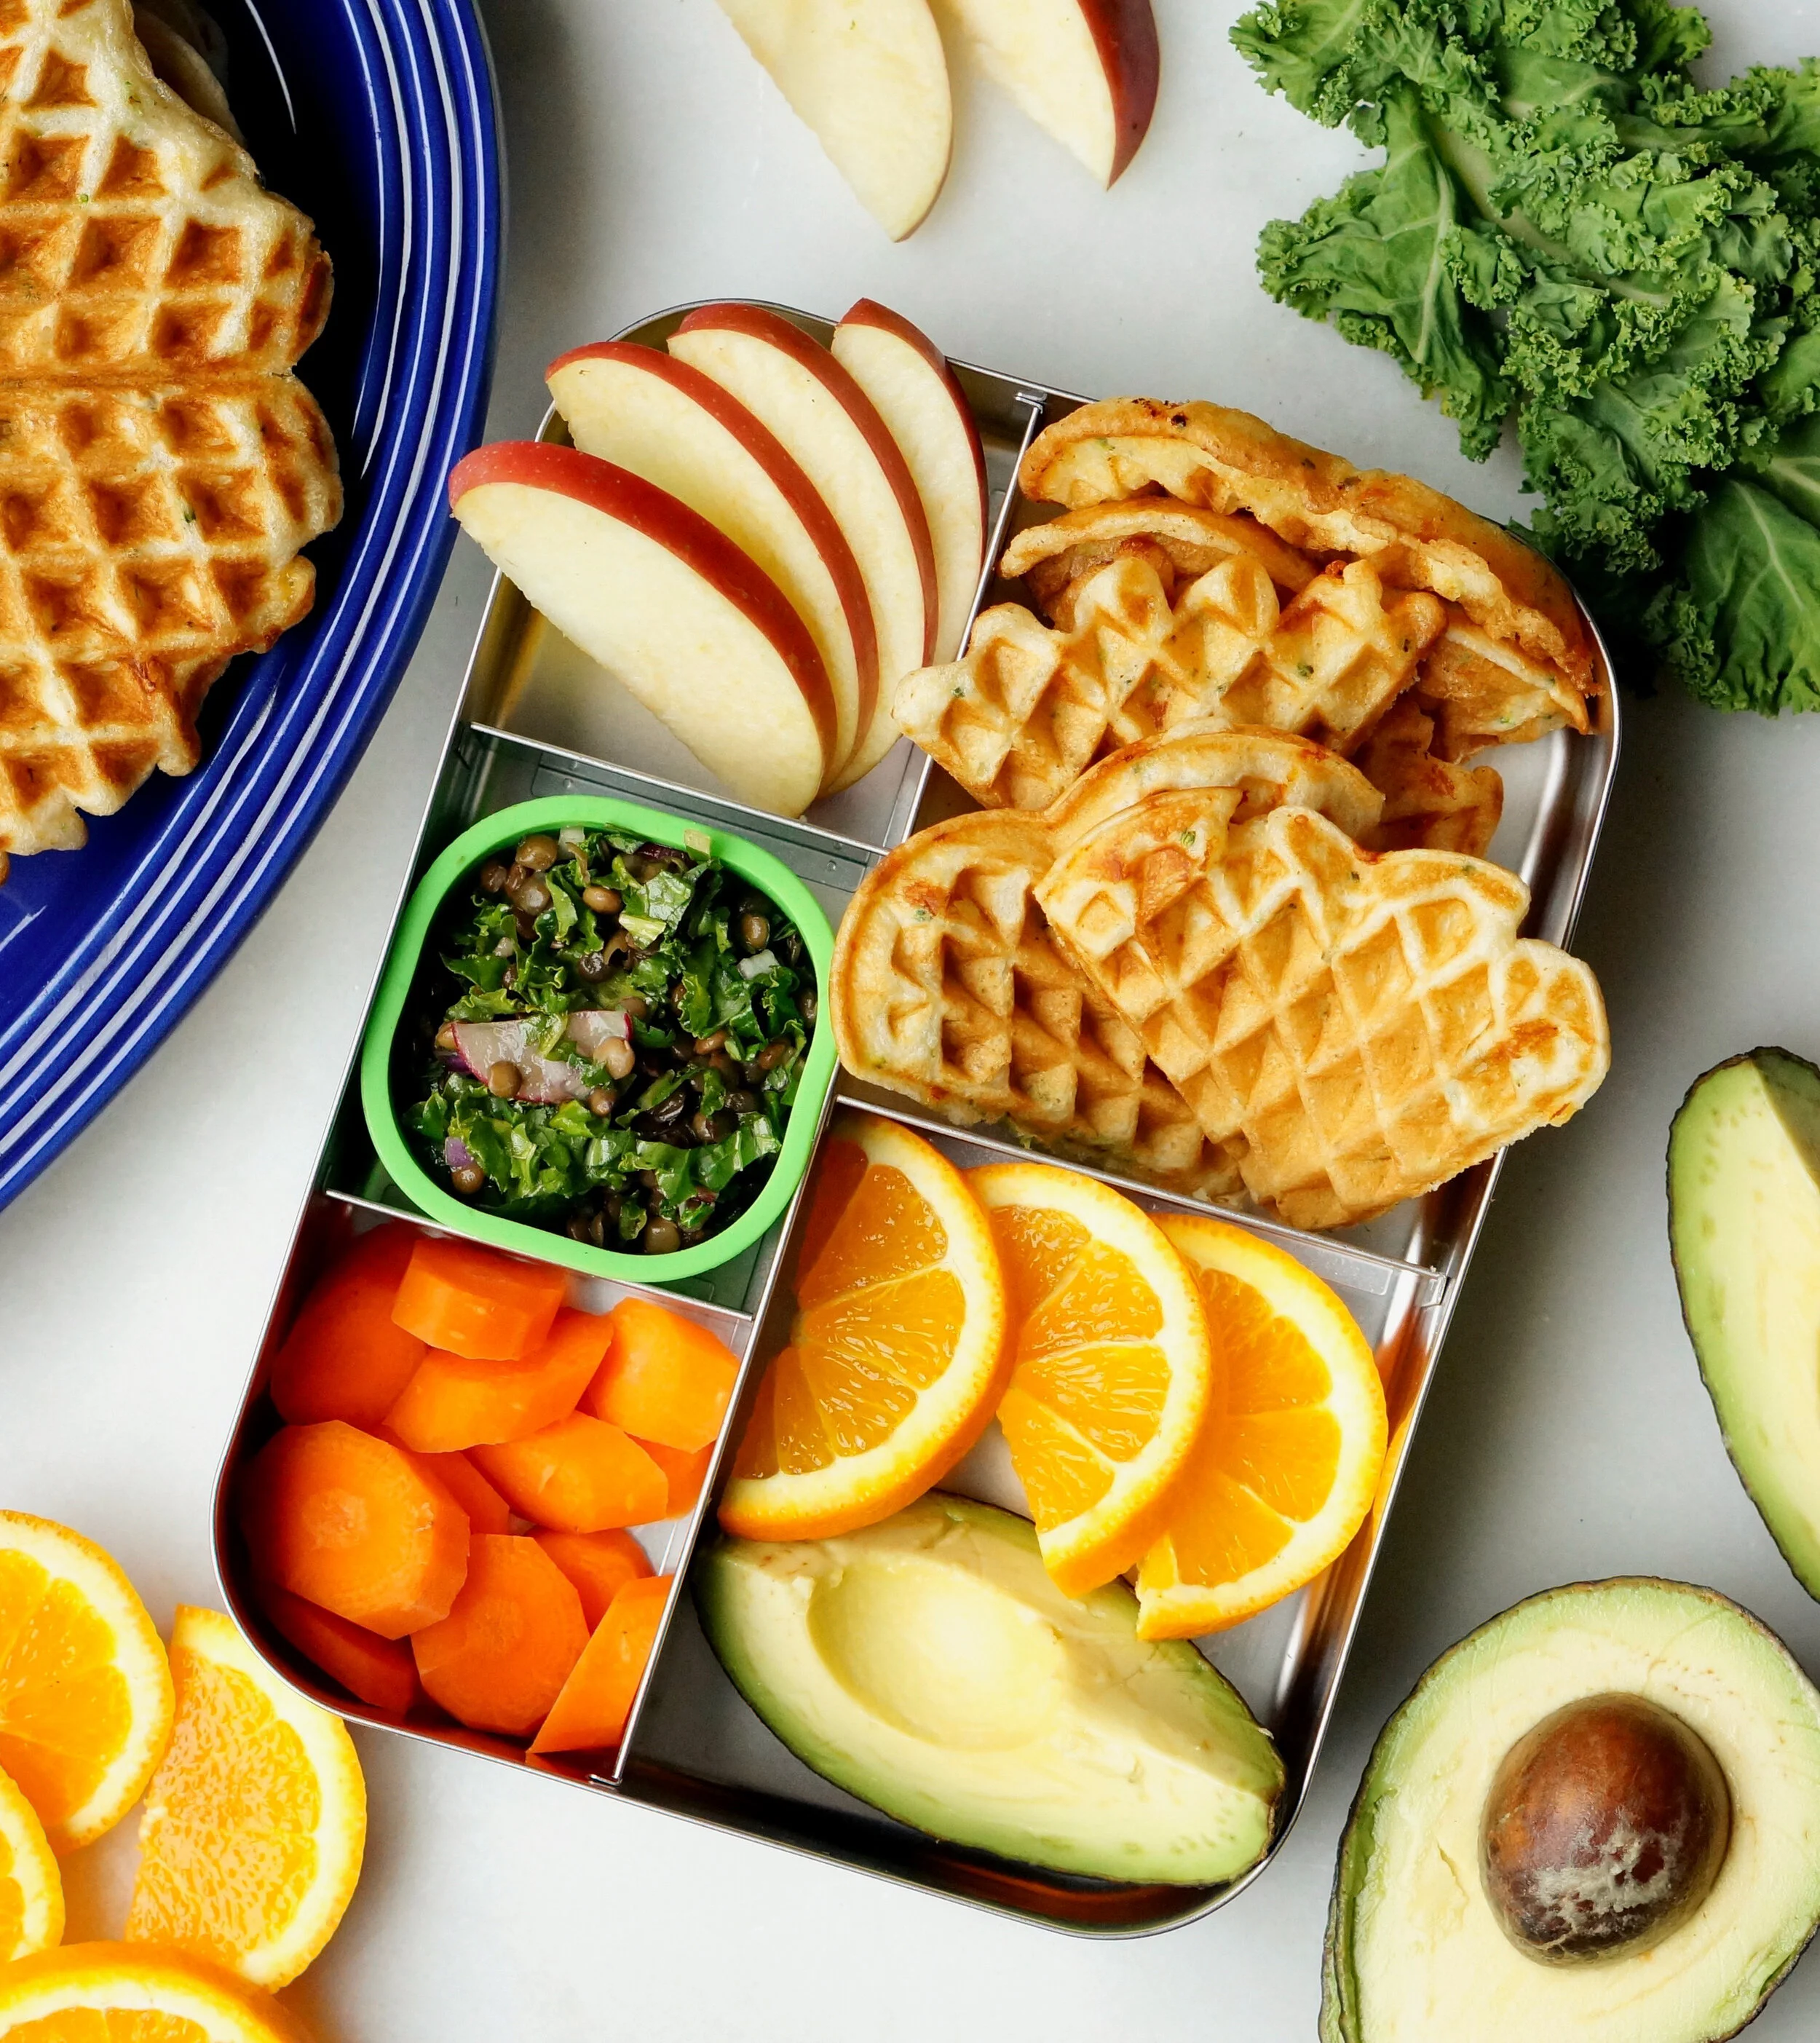
Savory Waffles are one of my favorite things to pack in a lunchbox. They’re the delicious leftovers from a relaxing weekend breakfast. My kids are not going to school these days, due to the novel corona virus, but in an effort to find some routine and sanity, I started packing lunchboxes again.

My kids grab their lunchboxes out of the fridge when online school has a lunch break, and we can all sit around the table together, because I’m no longer a line cook. This is what’s working for us now. These Veggie Waffles are easy to make, easy to freeze and easy to love. I hope you give them a go.

Veggie Waffles

Veggie Waffles

I love this recipe because the waffle base (the ingredients minus the veggies and cheese) is so versatile. There’s flour and cornstarch, plus raising agents like baking powder and baking soda, eggs to make them fluffy and buttermilk to give them that perfect acid balance.

From there, I’m free to customize the flavors however I’d like. Cinnamon + cardamom + turmeric make a delicious dairy free and nut free Golden Milk Waffle. Add cheese + paprika and garlic powder for a cheesy waffle. Depending on the additions, I can adjust the cornstarch and flour to get the right texture.

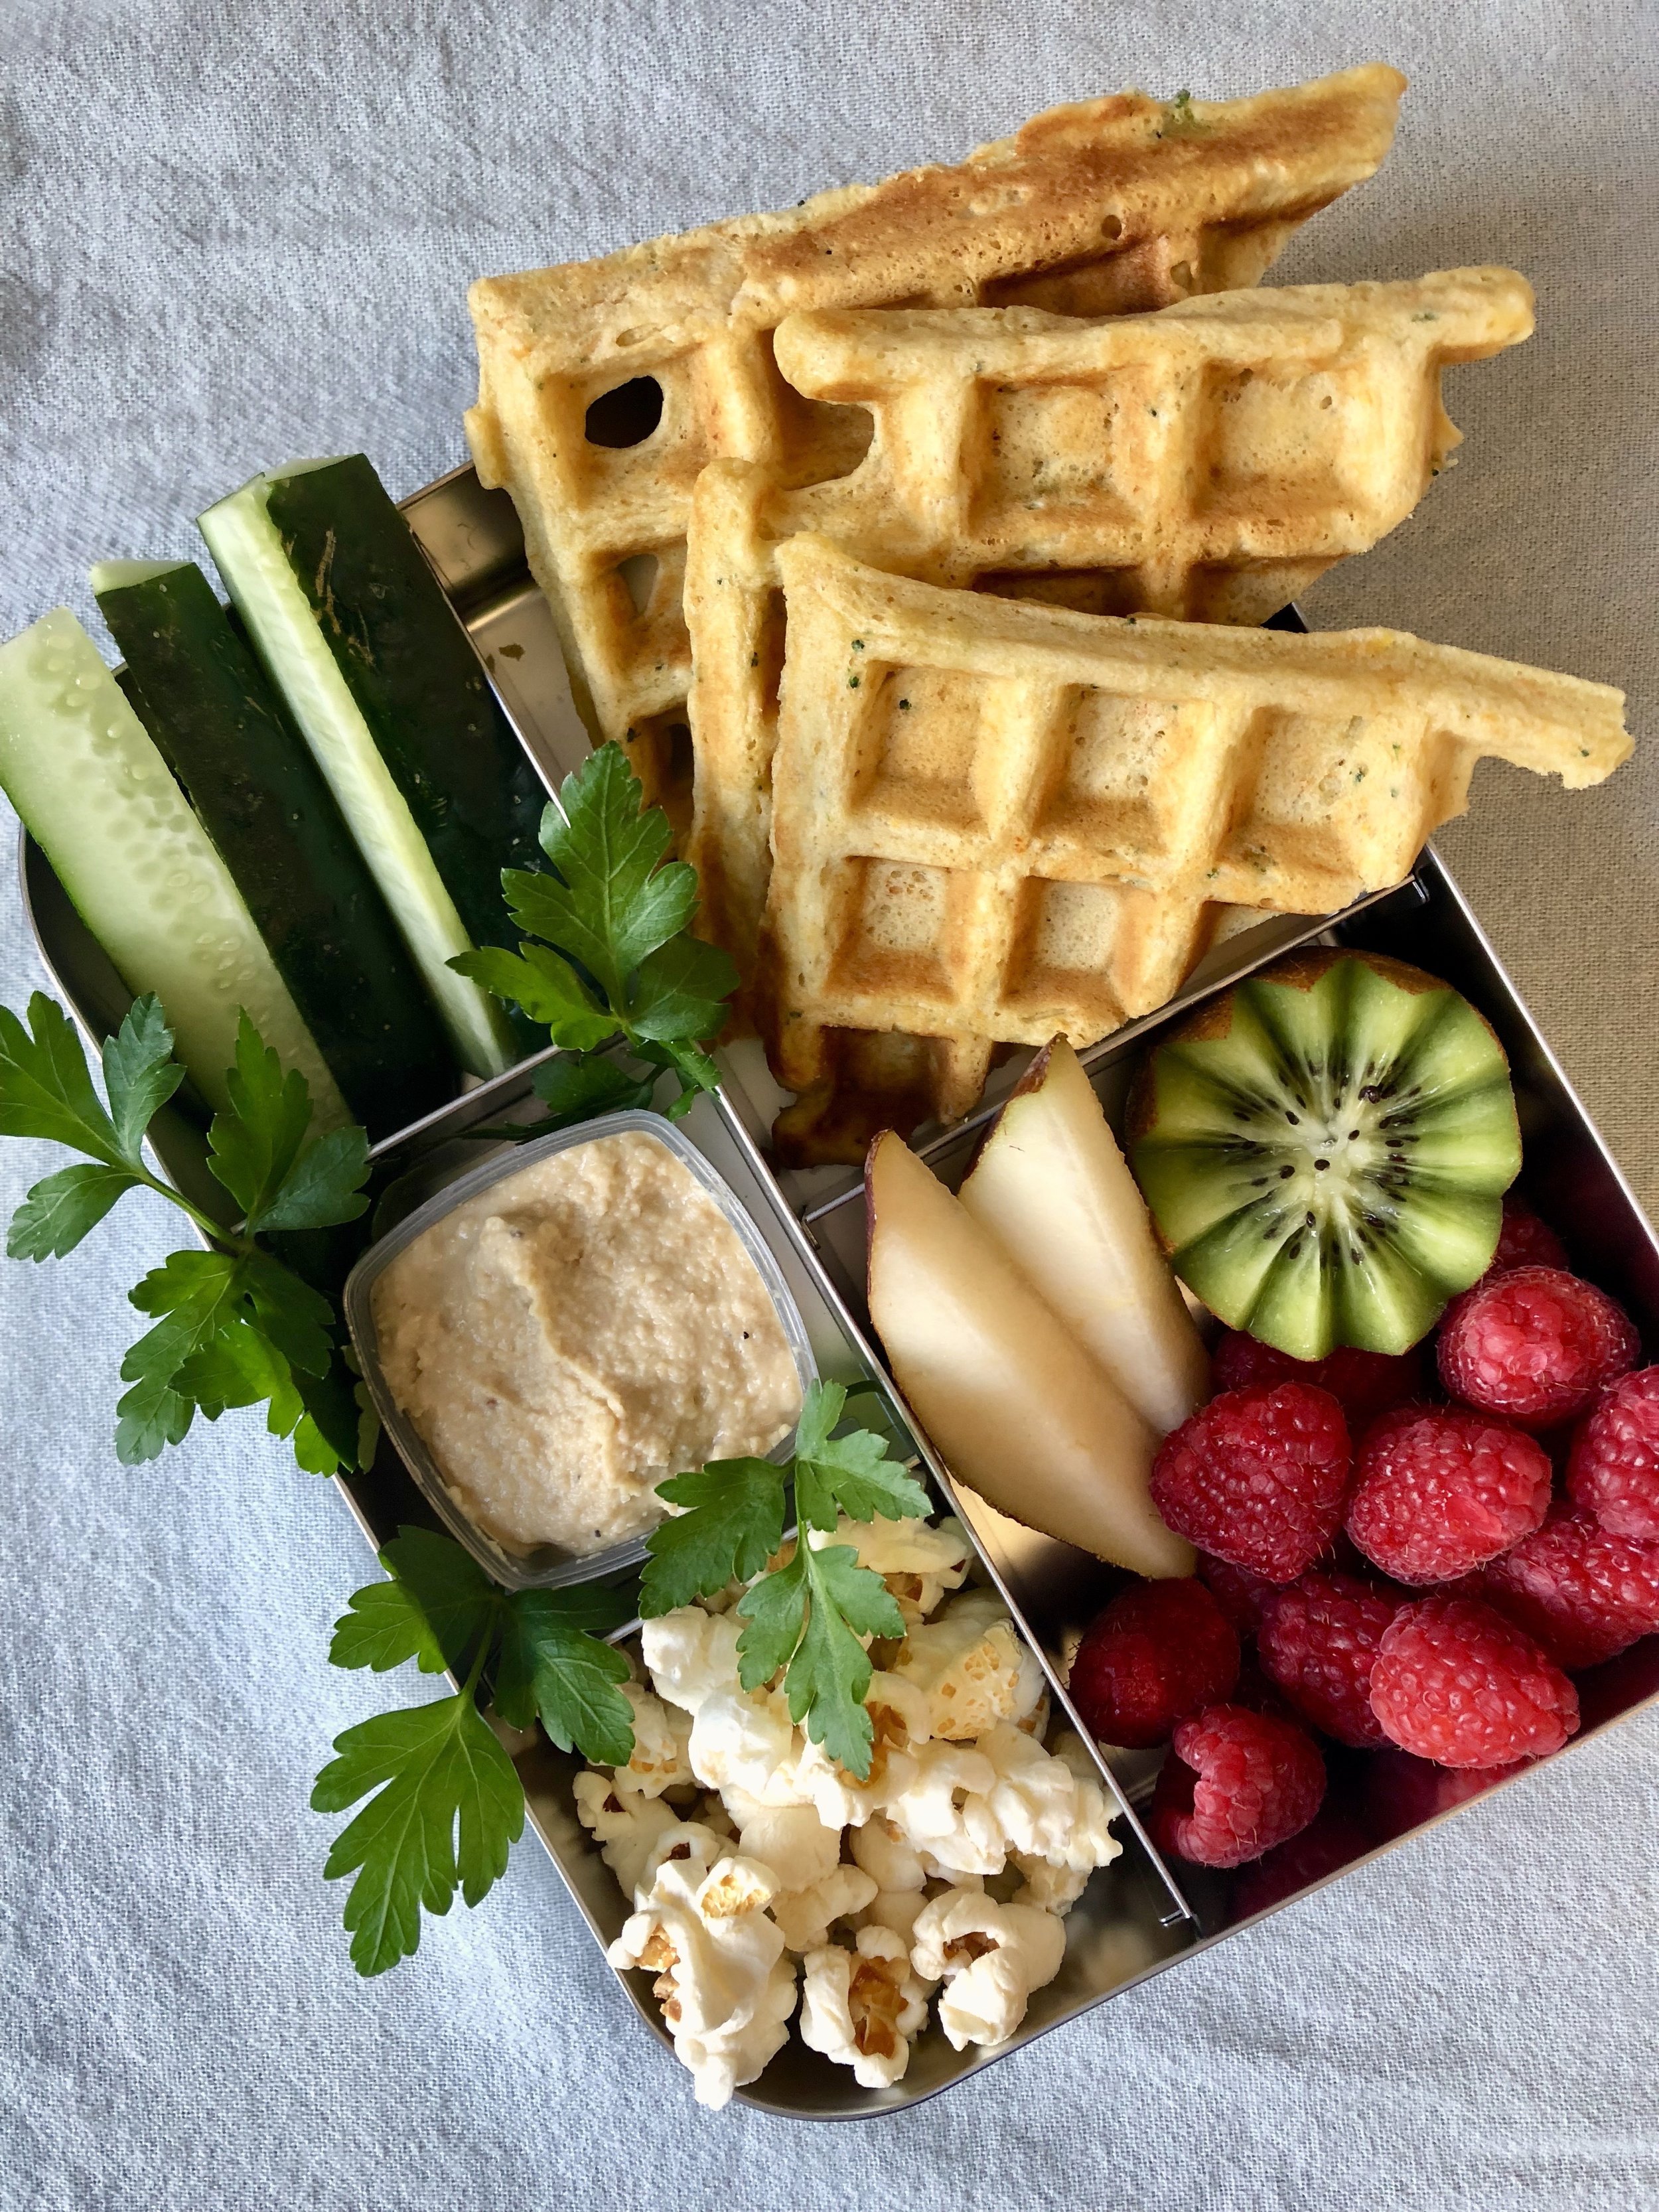
Use these Veggie Waffles as a sandwich base or just by themselves, and your kids will celebrate. My kids eat these cold. Happily. And they love to pack them in their lunchboxes using the LaLa Lunchbox app. Of course you can warm them and place them in foil in that lunchbox, if your kids like things warm. You can pack my Grilled Cheese Wafflewiches or these Veggie Waffles and either way, you’re good.

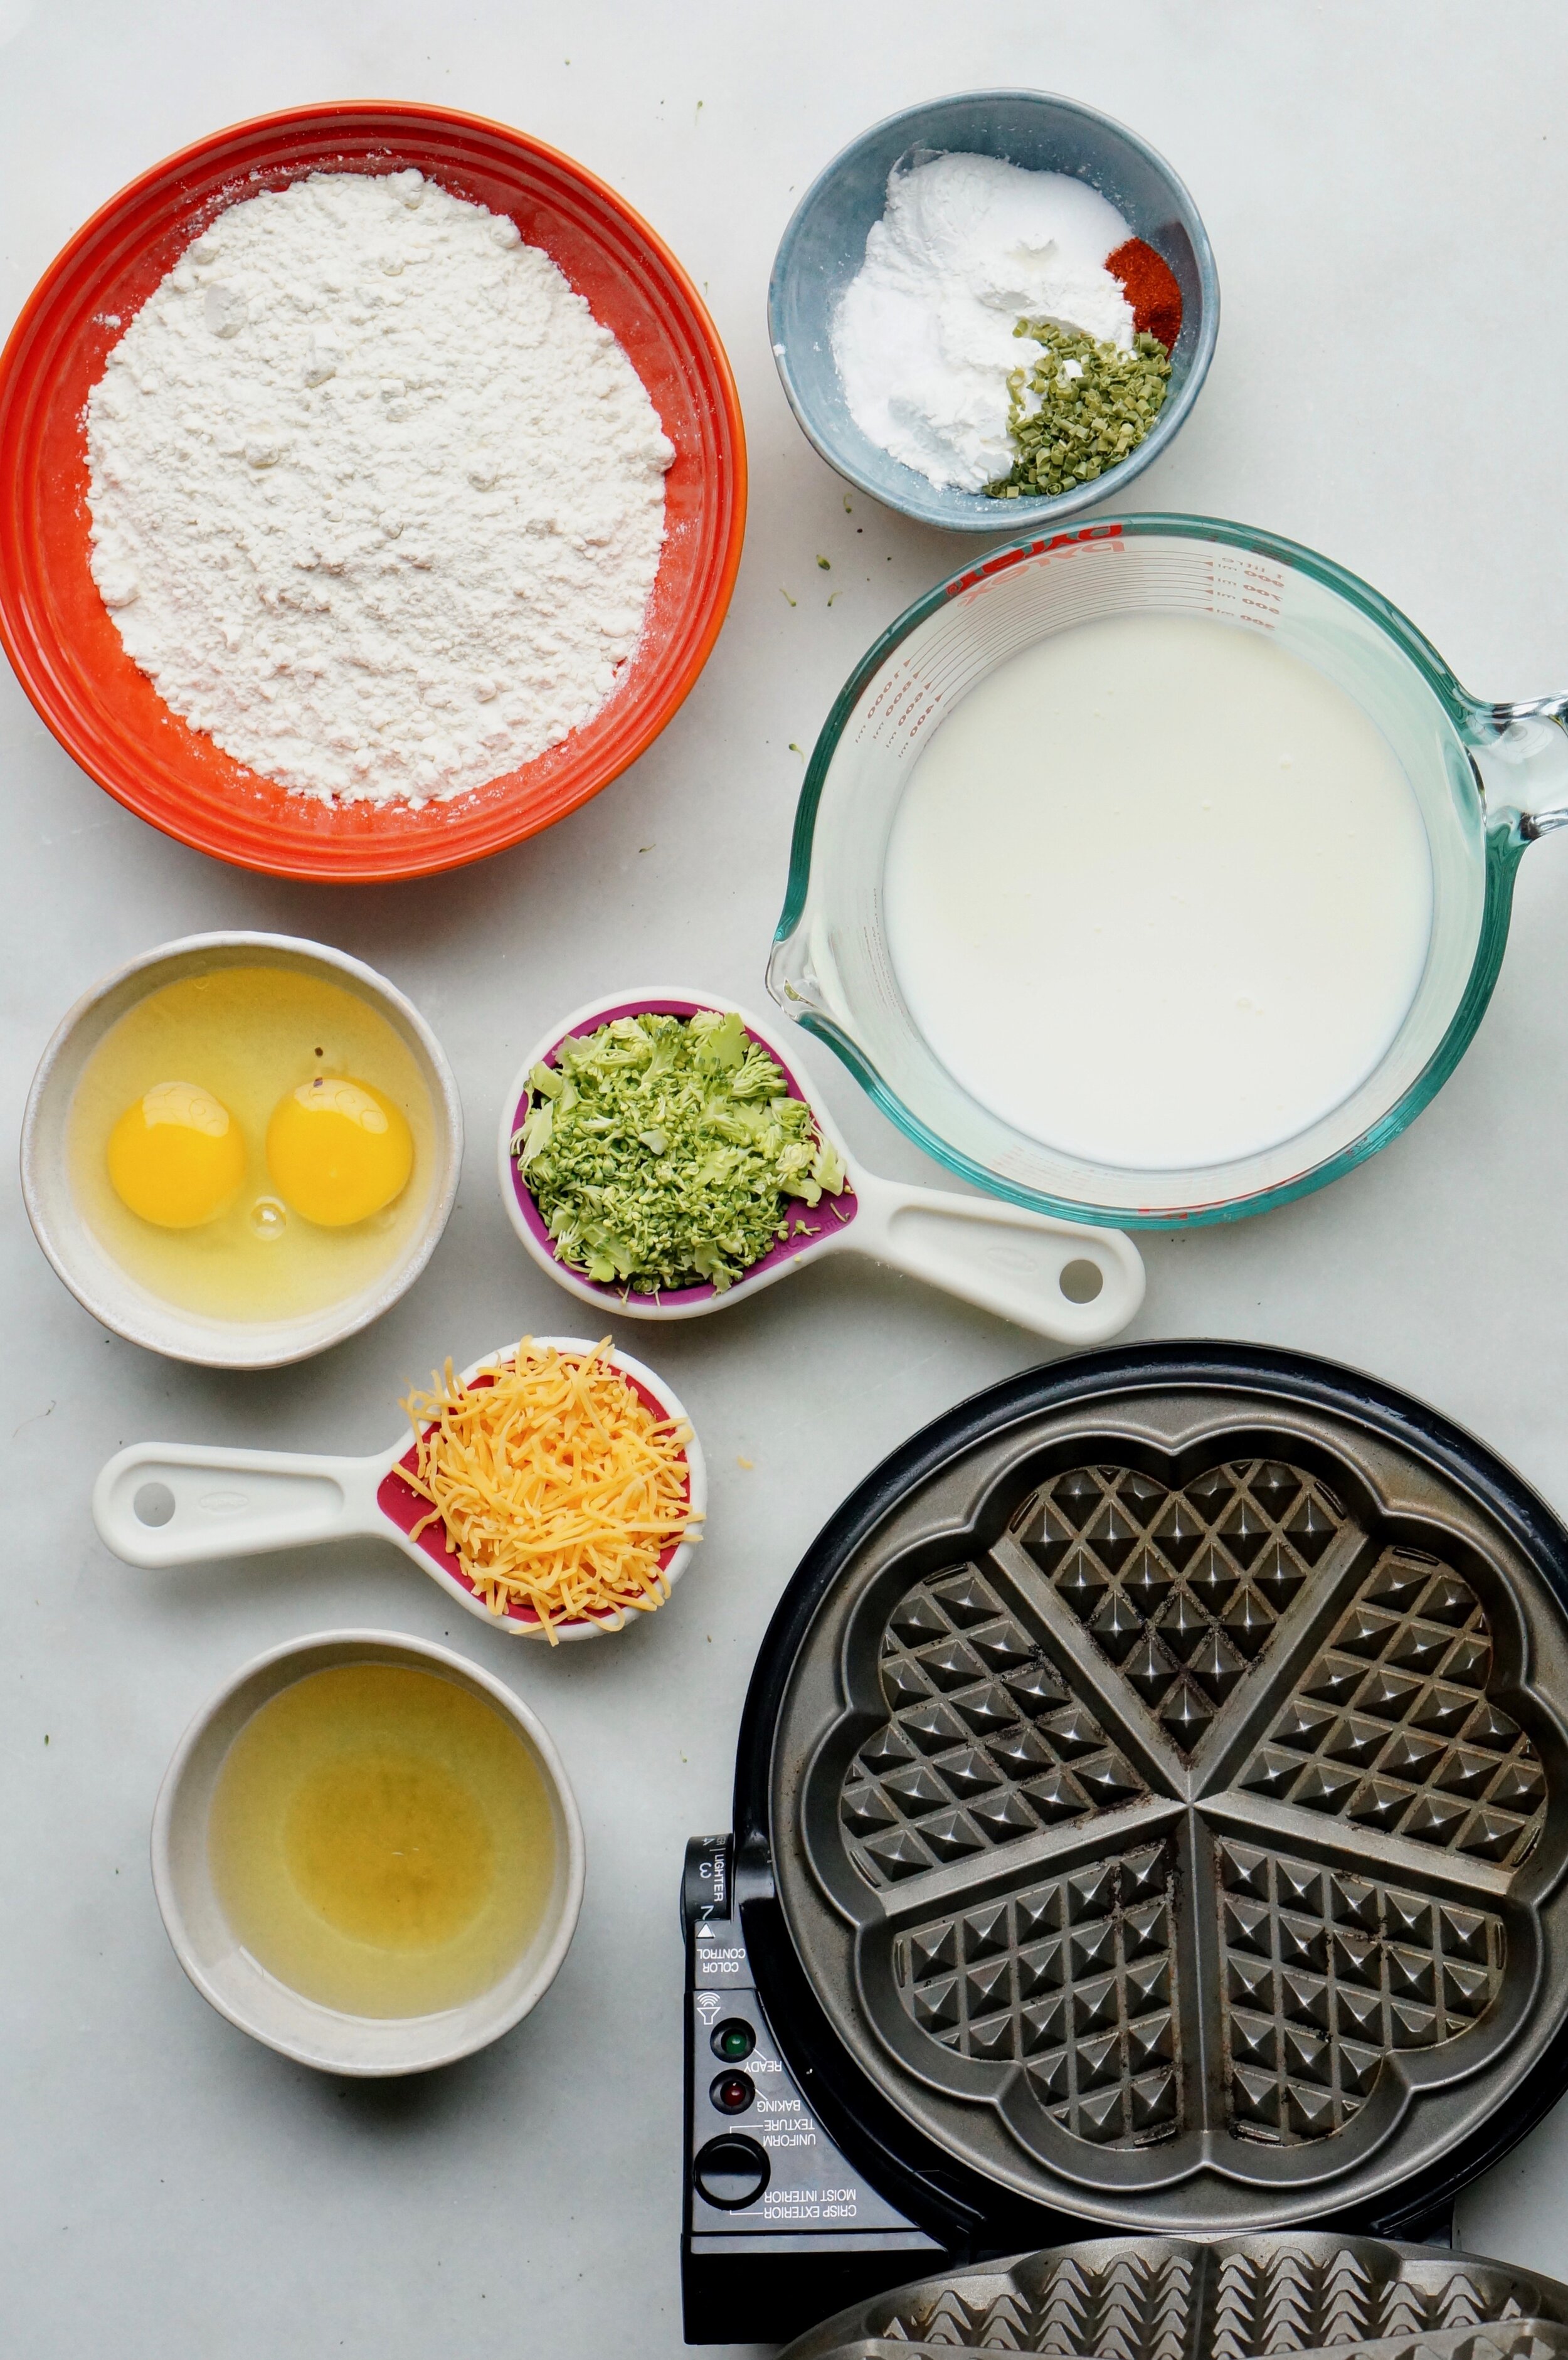
Veggie Waffle ingredients

Veggie Waffle ingredients

VEGGIE WAFFLES

veggie waffles for a nut free lunchbox. Prep once eat twice, easy recipe.

INGREDIENTS
1 cup + 3 tablespoons flour
3 tablespoons cornstarch
1 teaspoon baking powder
1/2 teaspoon baking soda
1/4 teaspoon paprika
1/2 teaspoon salt
1/8 teaspoon nutmeg
1/3 cup finely chopped veggies (such as broccoli, carrots, spinach)
1 teaspoon apple cider vinegar
2 large eggs
1 cup buttermilk*
4 tablespoons of neutral oil
1/4 cup grated parmesan (or any) cheese (optional)

*If you don’t have buttermilk, use 1 cup minus 2 tablespoons of milk + 2 tablespoons lemon juice. Let that sit at least 5 minutes until it curdles.

DIRECTIONS

  1. Preheat the waffle iron and the oven to 200 degrees F. In a medium sized bowl, mix all of the dry ingredients.

  2. In a large bowl, add the wet ingredients: apple cider vinegar, oil, eggs and buttermilk and whisk together until just combined.

  3. In a separate bowl, mix together the dry ingredients, making sure that everything is fully incorporated.

  4. Whisk together the dry ingredients with wet ingredients and mix thoroughly to make sure there are no flour clumps. Add chopped veggies and cheese.

  5. When the waffle iron is hot, pour about 1/4 cup of batter to create each waffle (may change depending on your waffle iron). Close the waffle iron and cook for approximately 3 minutes, or until the steam stops spraying out of the sides.

  6. Use a spatula or your fingers to remove the waffle and repeat until the batter is finished.

  7. Place the waffles on a rack and place that rack in the oven to stay warm and crispy.


If you make these, tag me on Instagram @lalalunchbox #lalalunchbox

Easy, Homemade Falafel

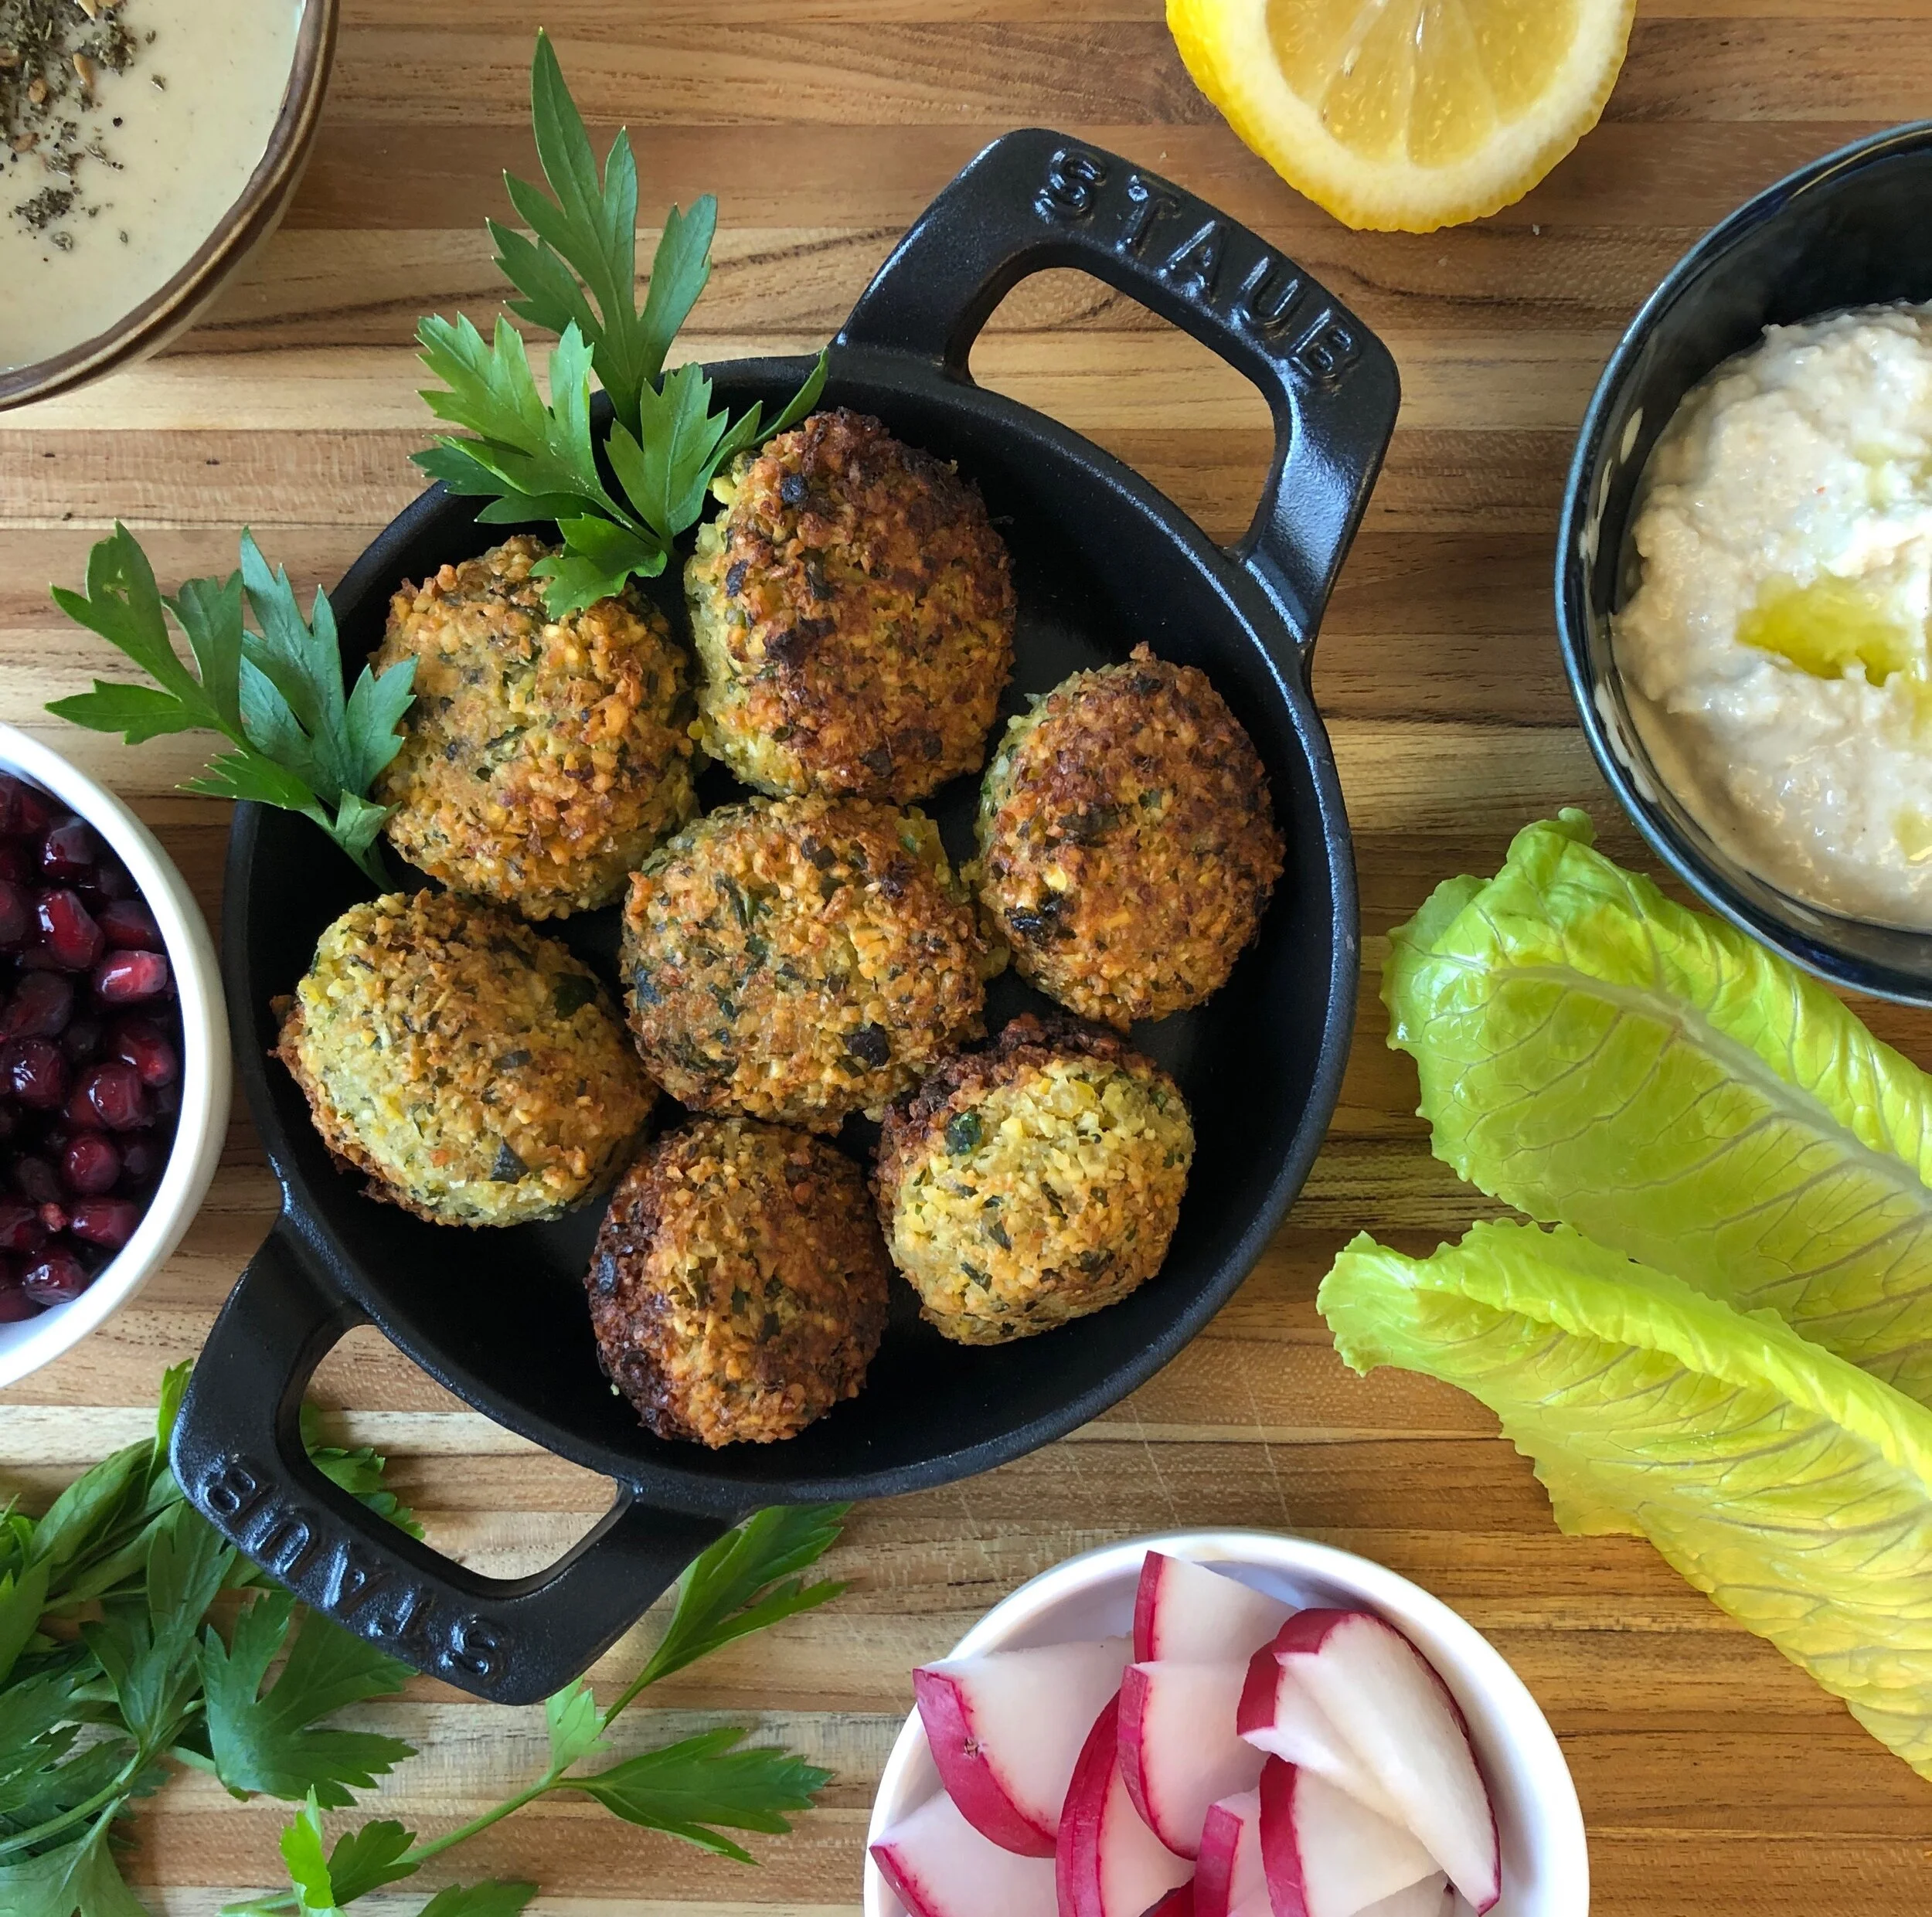
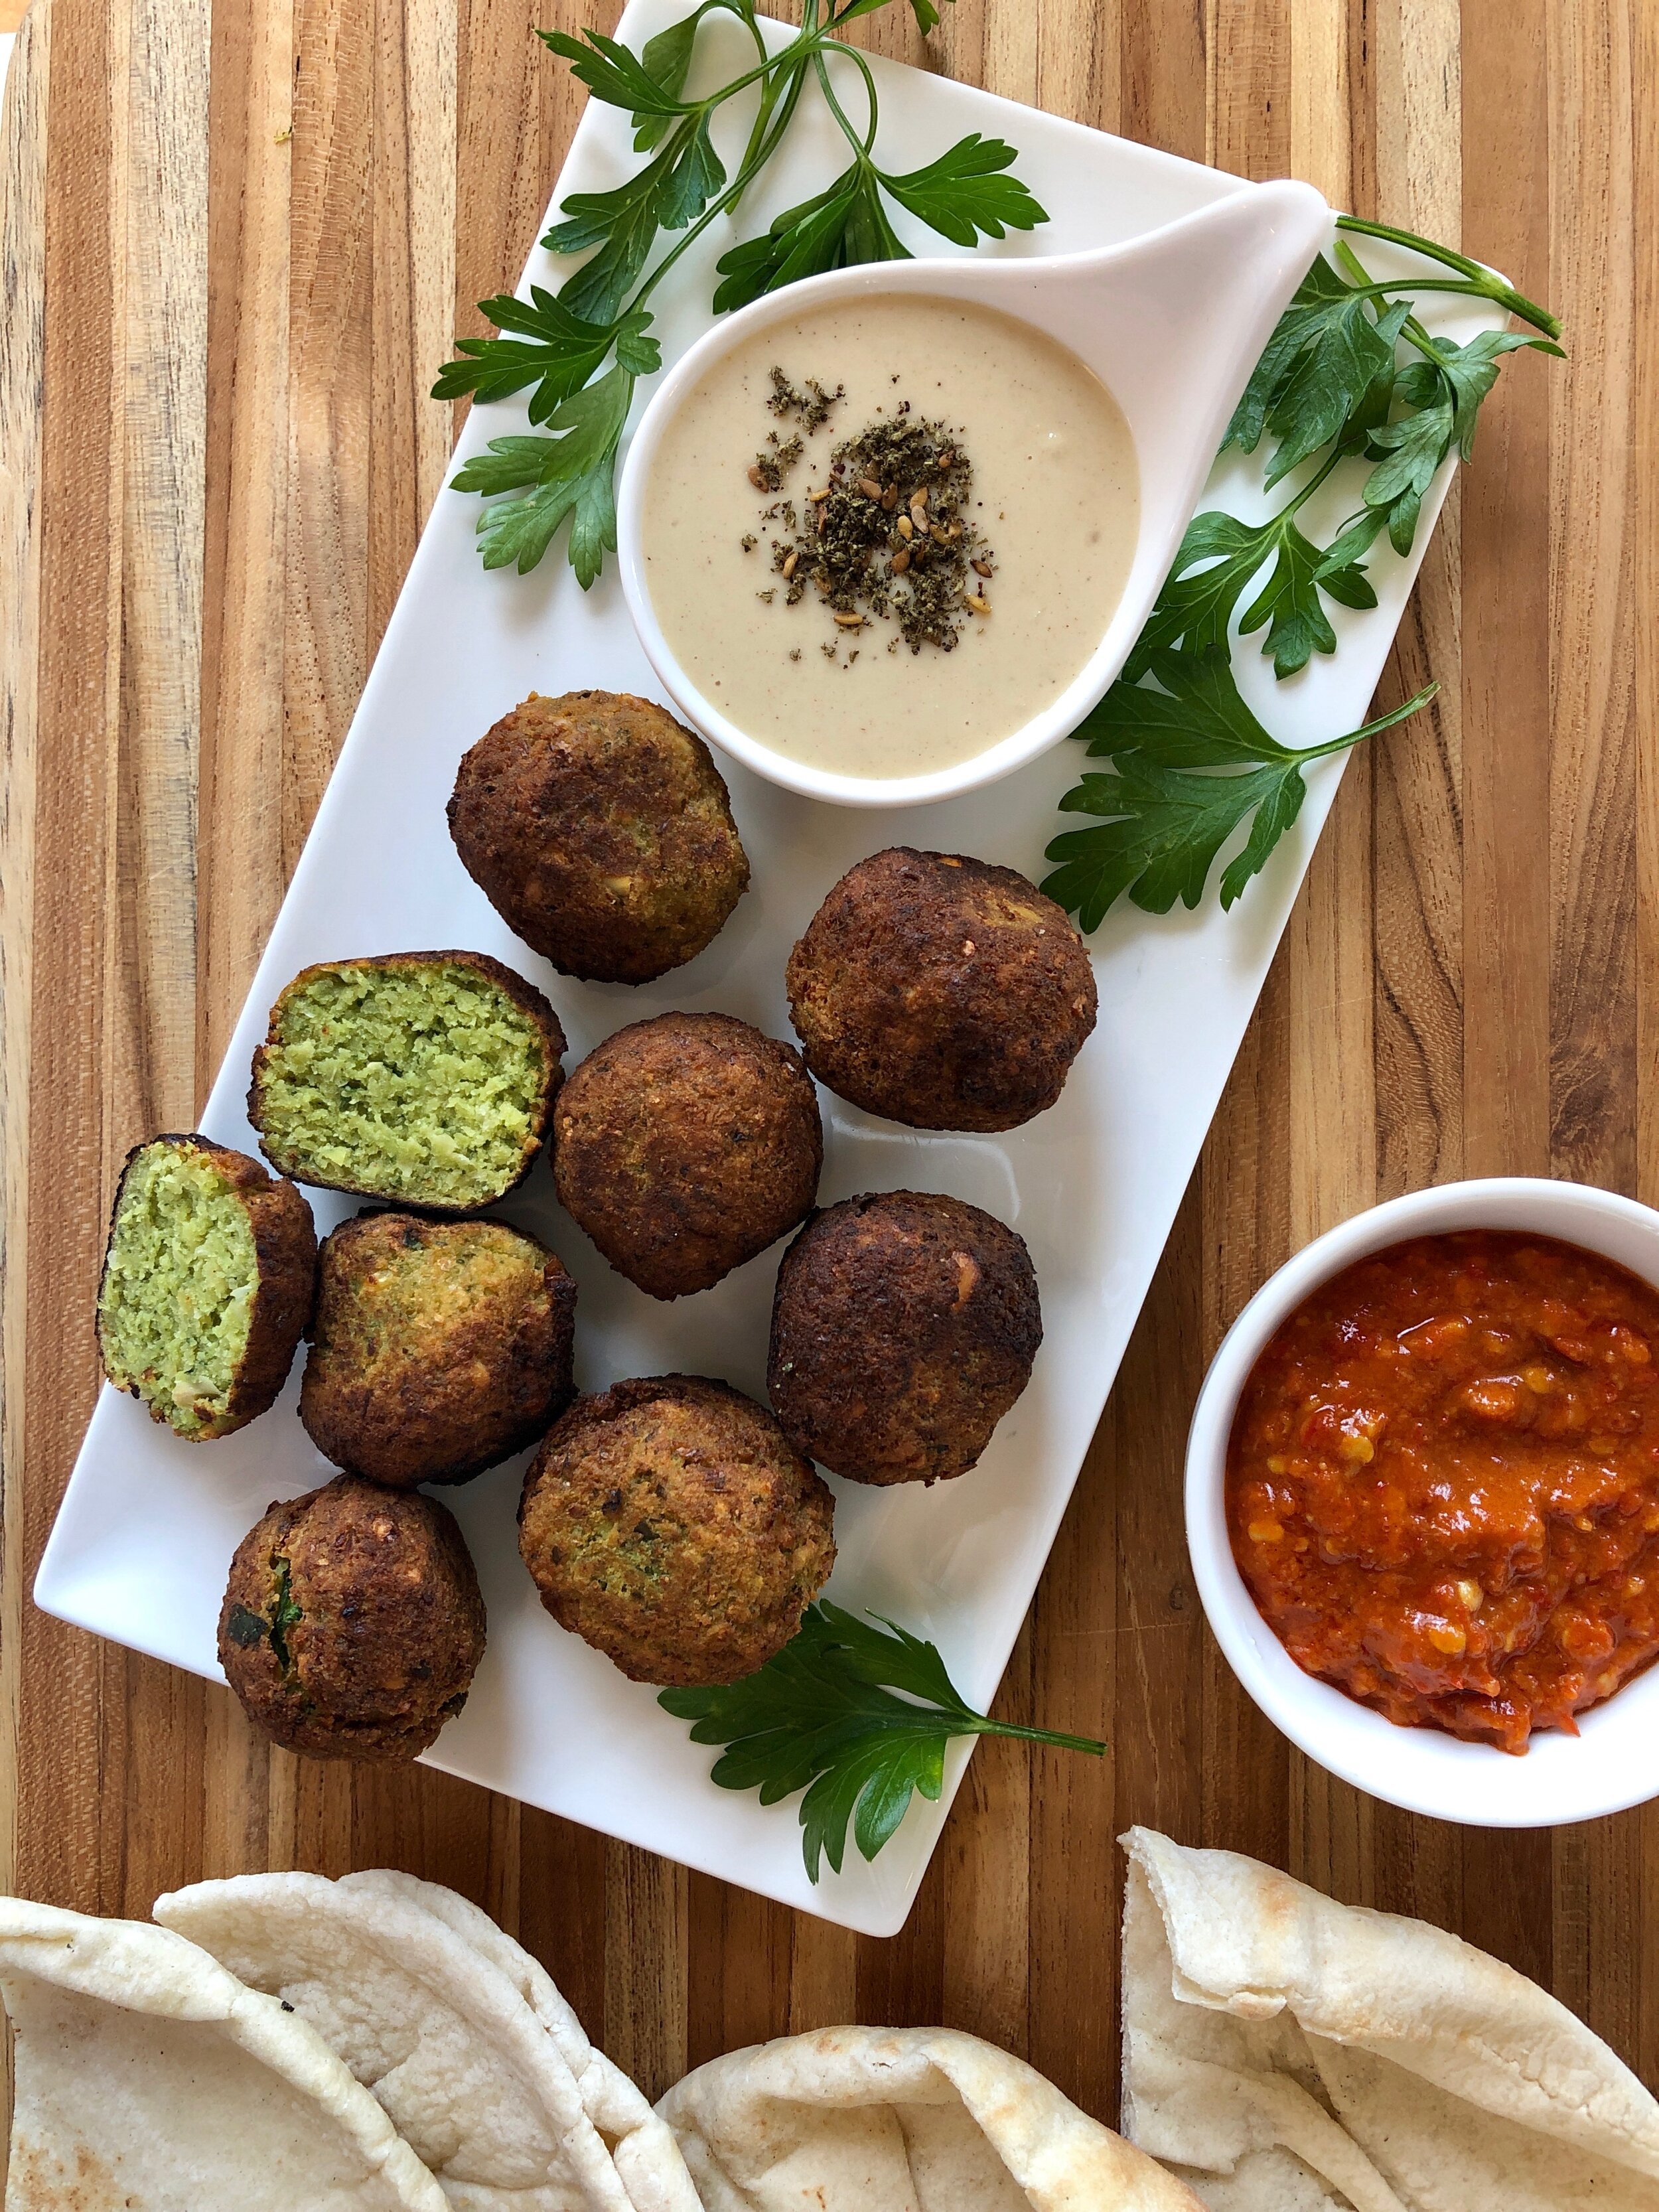
falafel

All hail the mighty falafel!

Crispy on the outside, tender on the inside and bursting with zingy flavors, falafel is something that I can eat on repeat. Chickpeas, parsley and cilantro are a stellar combination, and when you add spices and garlic, it’s heavenly. Seriously, what’s not to love about this Middle Eastern staple? Budget-friendly, delicious, filling — falafel hits all the notes!

While in Israel this summer, I had falafel every single day. Pretty sure that eating deep fried anything is not sustainable in the long term, but wow did it make me happy! You can use my recipe below to pan fry or air fry falafel; no deep frying necessary. I’ve tried these baked, but I find them too dry, so there are no baking instructions included.

falafel platter

The key to great falafel - as I discovered in my recipe testing extravaganza - is to use raw chickpeas from dried beans that have soaked at least 12 hours. I’ve soaked them for fewer hours, and the recipe works, but I find them tastier when they’re soaked longer. This recipe is perfect for family dinner, lunchbox packing, entertaining, and for feeding folks who are vegan, dairy free and nut free.

I tried making falafel from canned beans and while I really wanted it to work, the texture was off. To me, falafel should have a slightly grainy texture, and that wasn’t coming through with canned beans. Dried, uncooked beans have the starchy quality that helps to hold the shape of the balls.

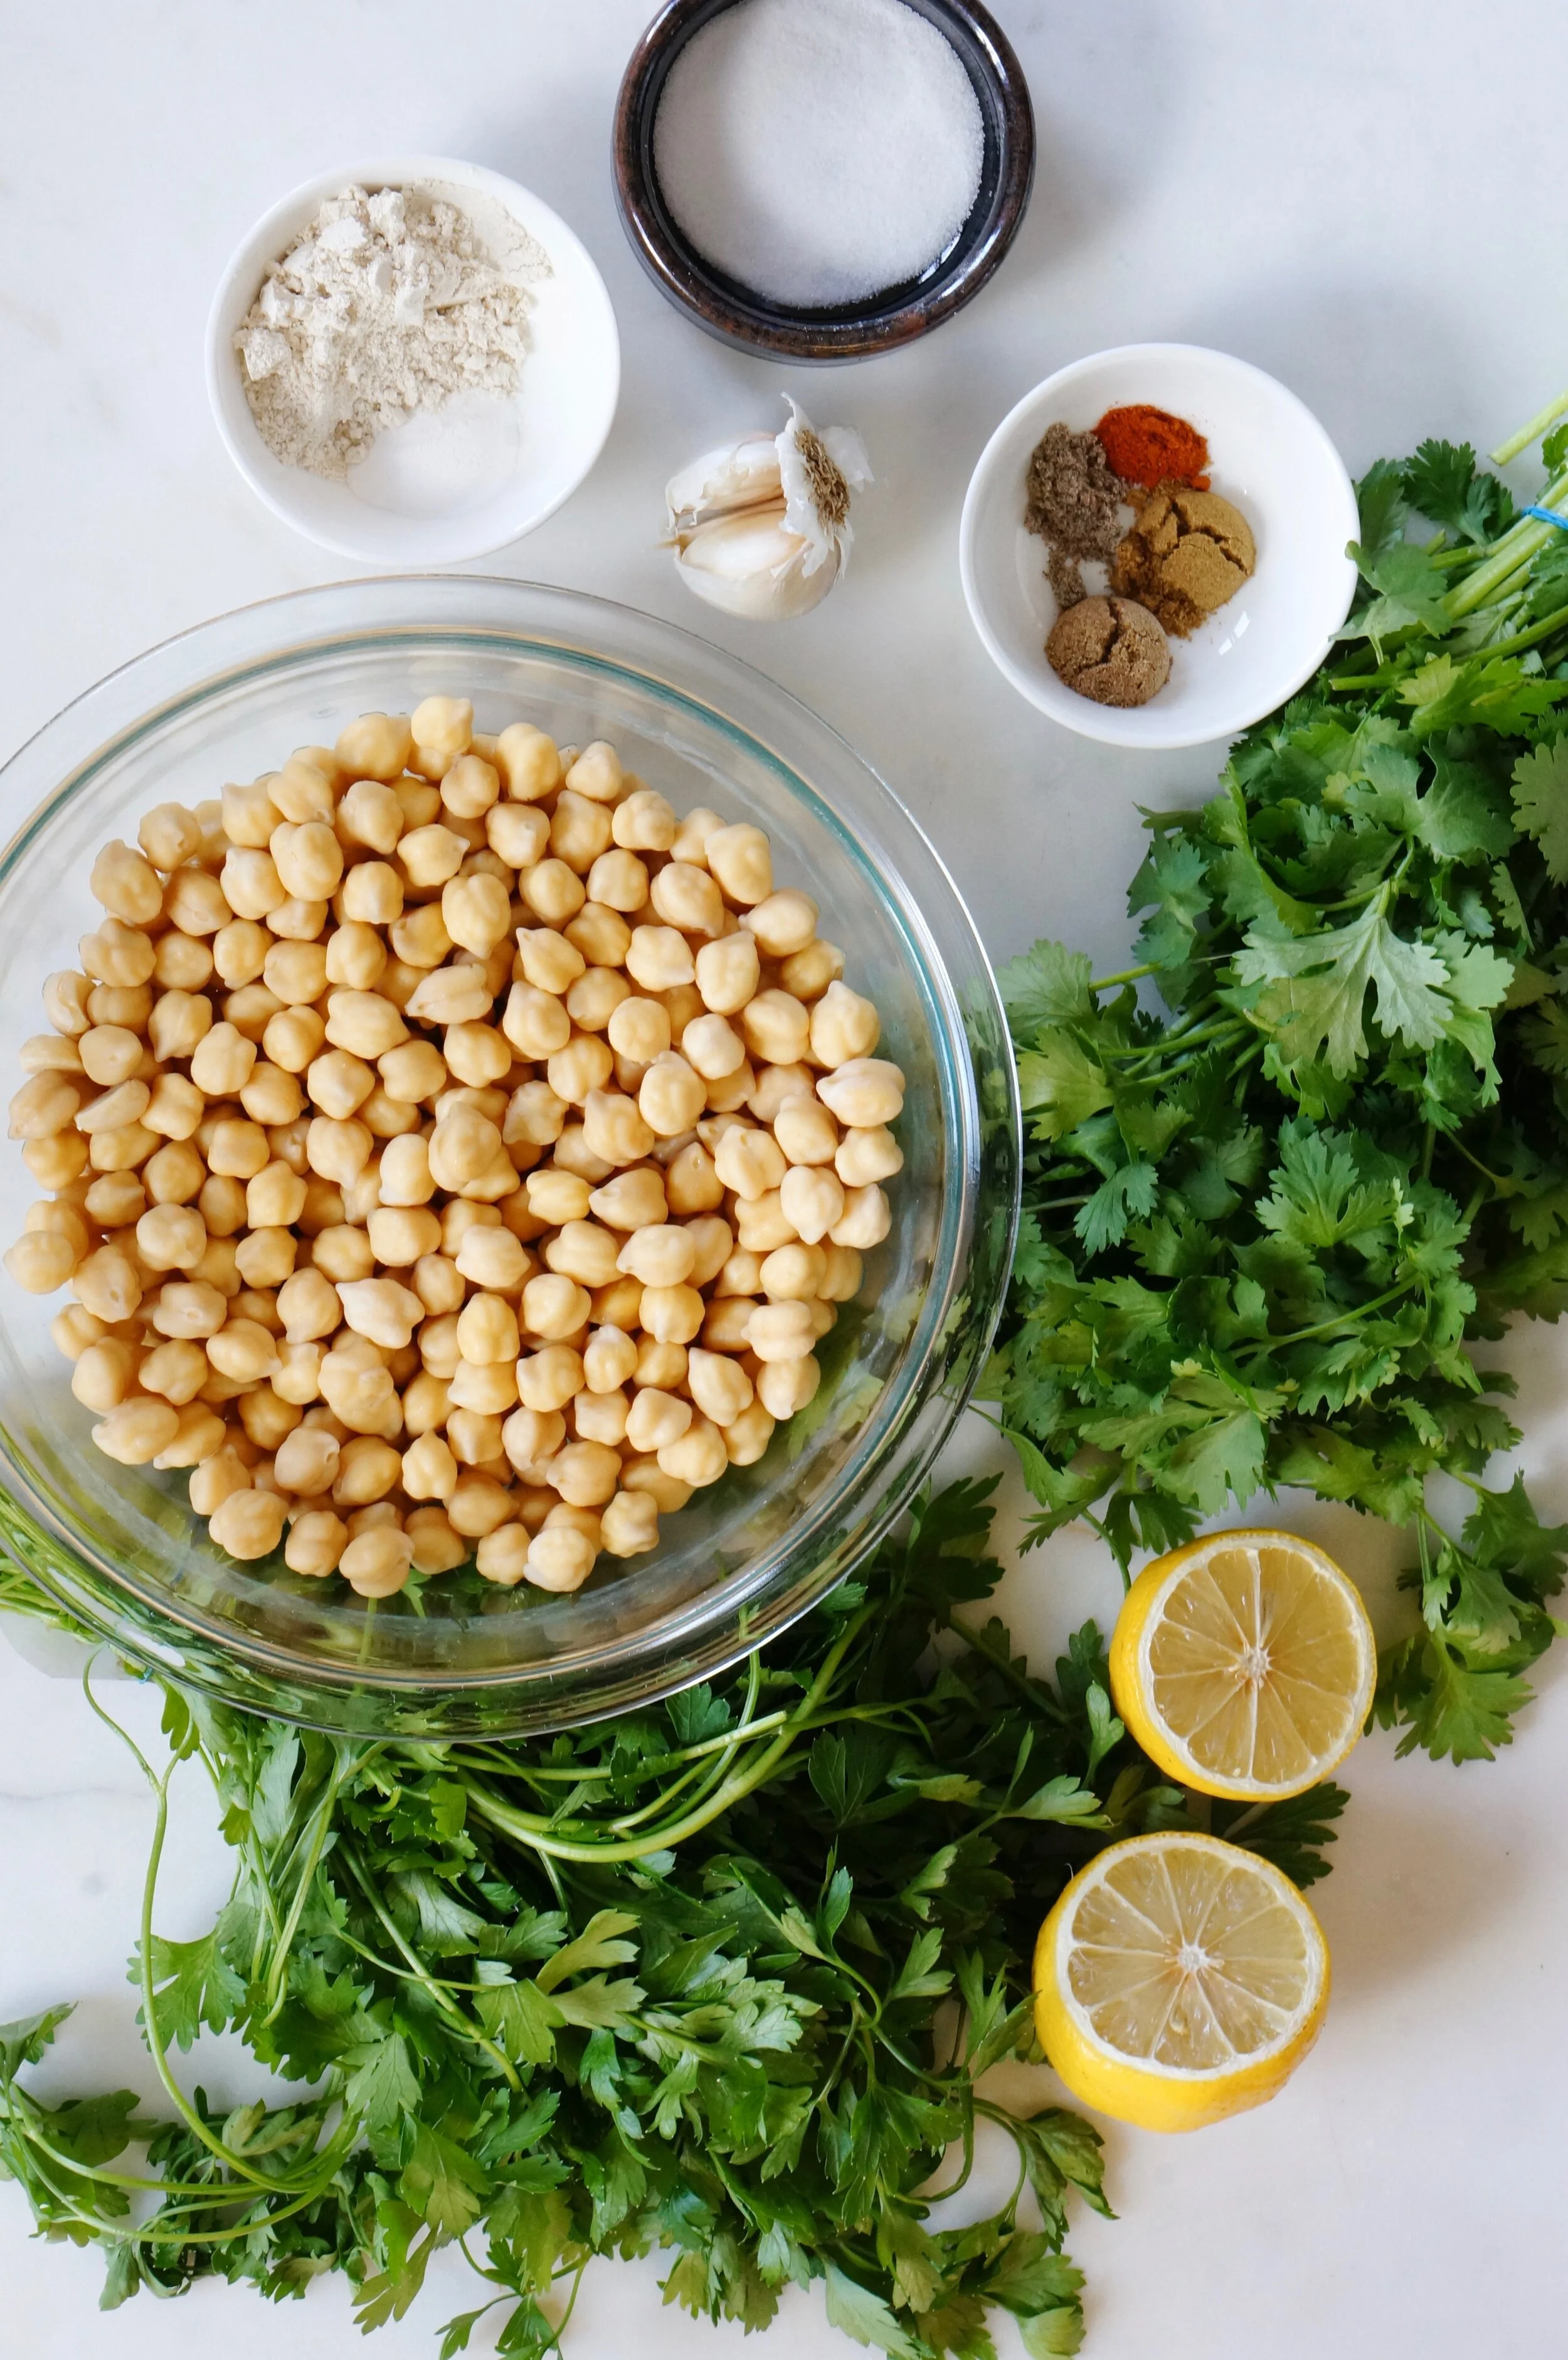
Falafel ingredients

While falafel are tastiest when hot and freshly cooked, I pack these in lunchboxes for my kids and eat them cold myself. My preference is to eat them with tahini mixed with water, lemon juice, garlic and salt, tucked inside of a pita with pickled red onion, hot sauce, lettuce and tomato. That said, I’ve been known to eat them happily with just tahini sauce and pita or lettuce. Anything goes! If you make this recipe, let me know by tagging me on Instagram!

Falafel

1 cup dried chickpeas (soaked at least 12 hours)
2 cloves garlic, roughly chopped
1 teaspoon cumin
1 teaspoon salt
1/2 teaspoon dried coriander
1/4 teaspoon cardamom
3/4 cup chopped cilantro
3/4 cup chopped parsley
1/2 teaspoon lemon zest
2 tablespoons lemon juice
1 tablespoon water
1/2 teaspoon baking powder
1 1/2 tablespoons flour
Neutral oil for pan frying or for brushing on top in the airfryer

Method

falafel ingredients

Place the dried chickpeas in a bowl and cover with water. Let soak for at least 12 hours. If you soak for longer than 12 hours, replace the water. The chickpeas will have grown substantially.
Place chickpeas into a food processor and pulse until roughly chopped, taking care not to over process.

Add the garlic and spices and pulse again.

falafel recipe

Next, add the cilantro and parsley. The mixture will have a lovely green color when pulsed.

Scrape down the sides and add the lemon zest, lemon juice, water and baking powder and pulse again.

Finally, add the flour and combine using a spatula.

Let this mixture rest in the refrigerator for at least 30 minutes.

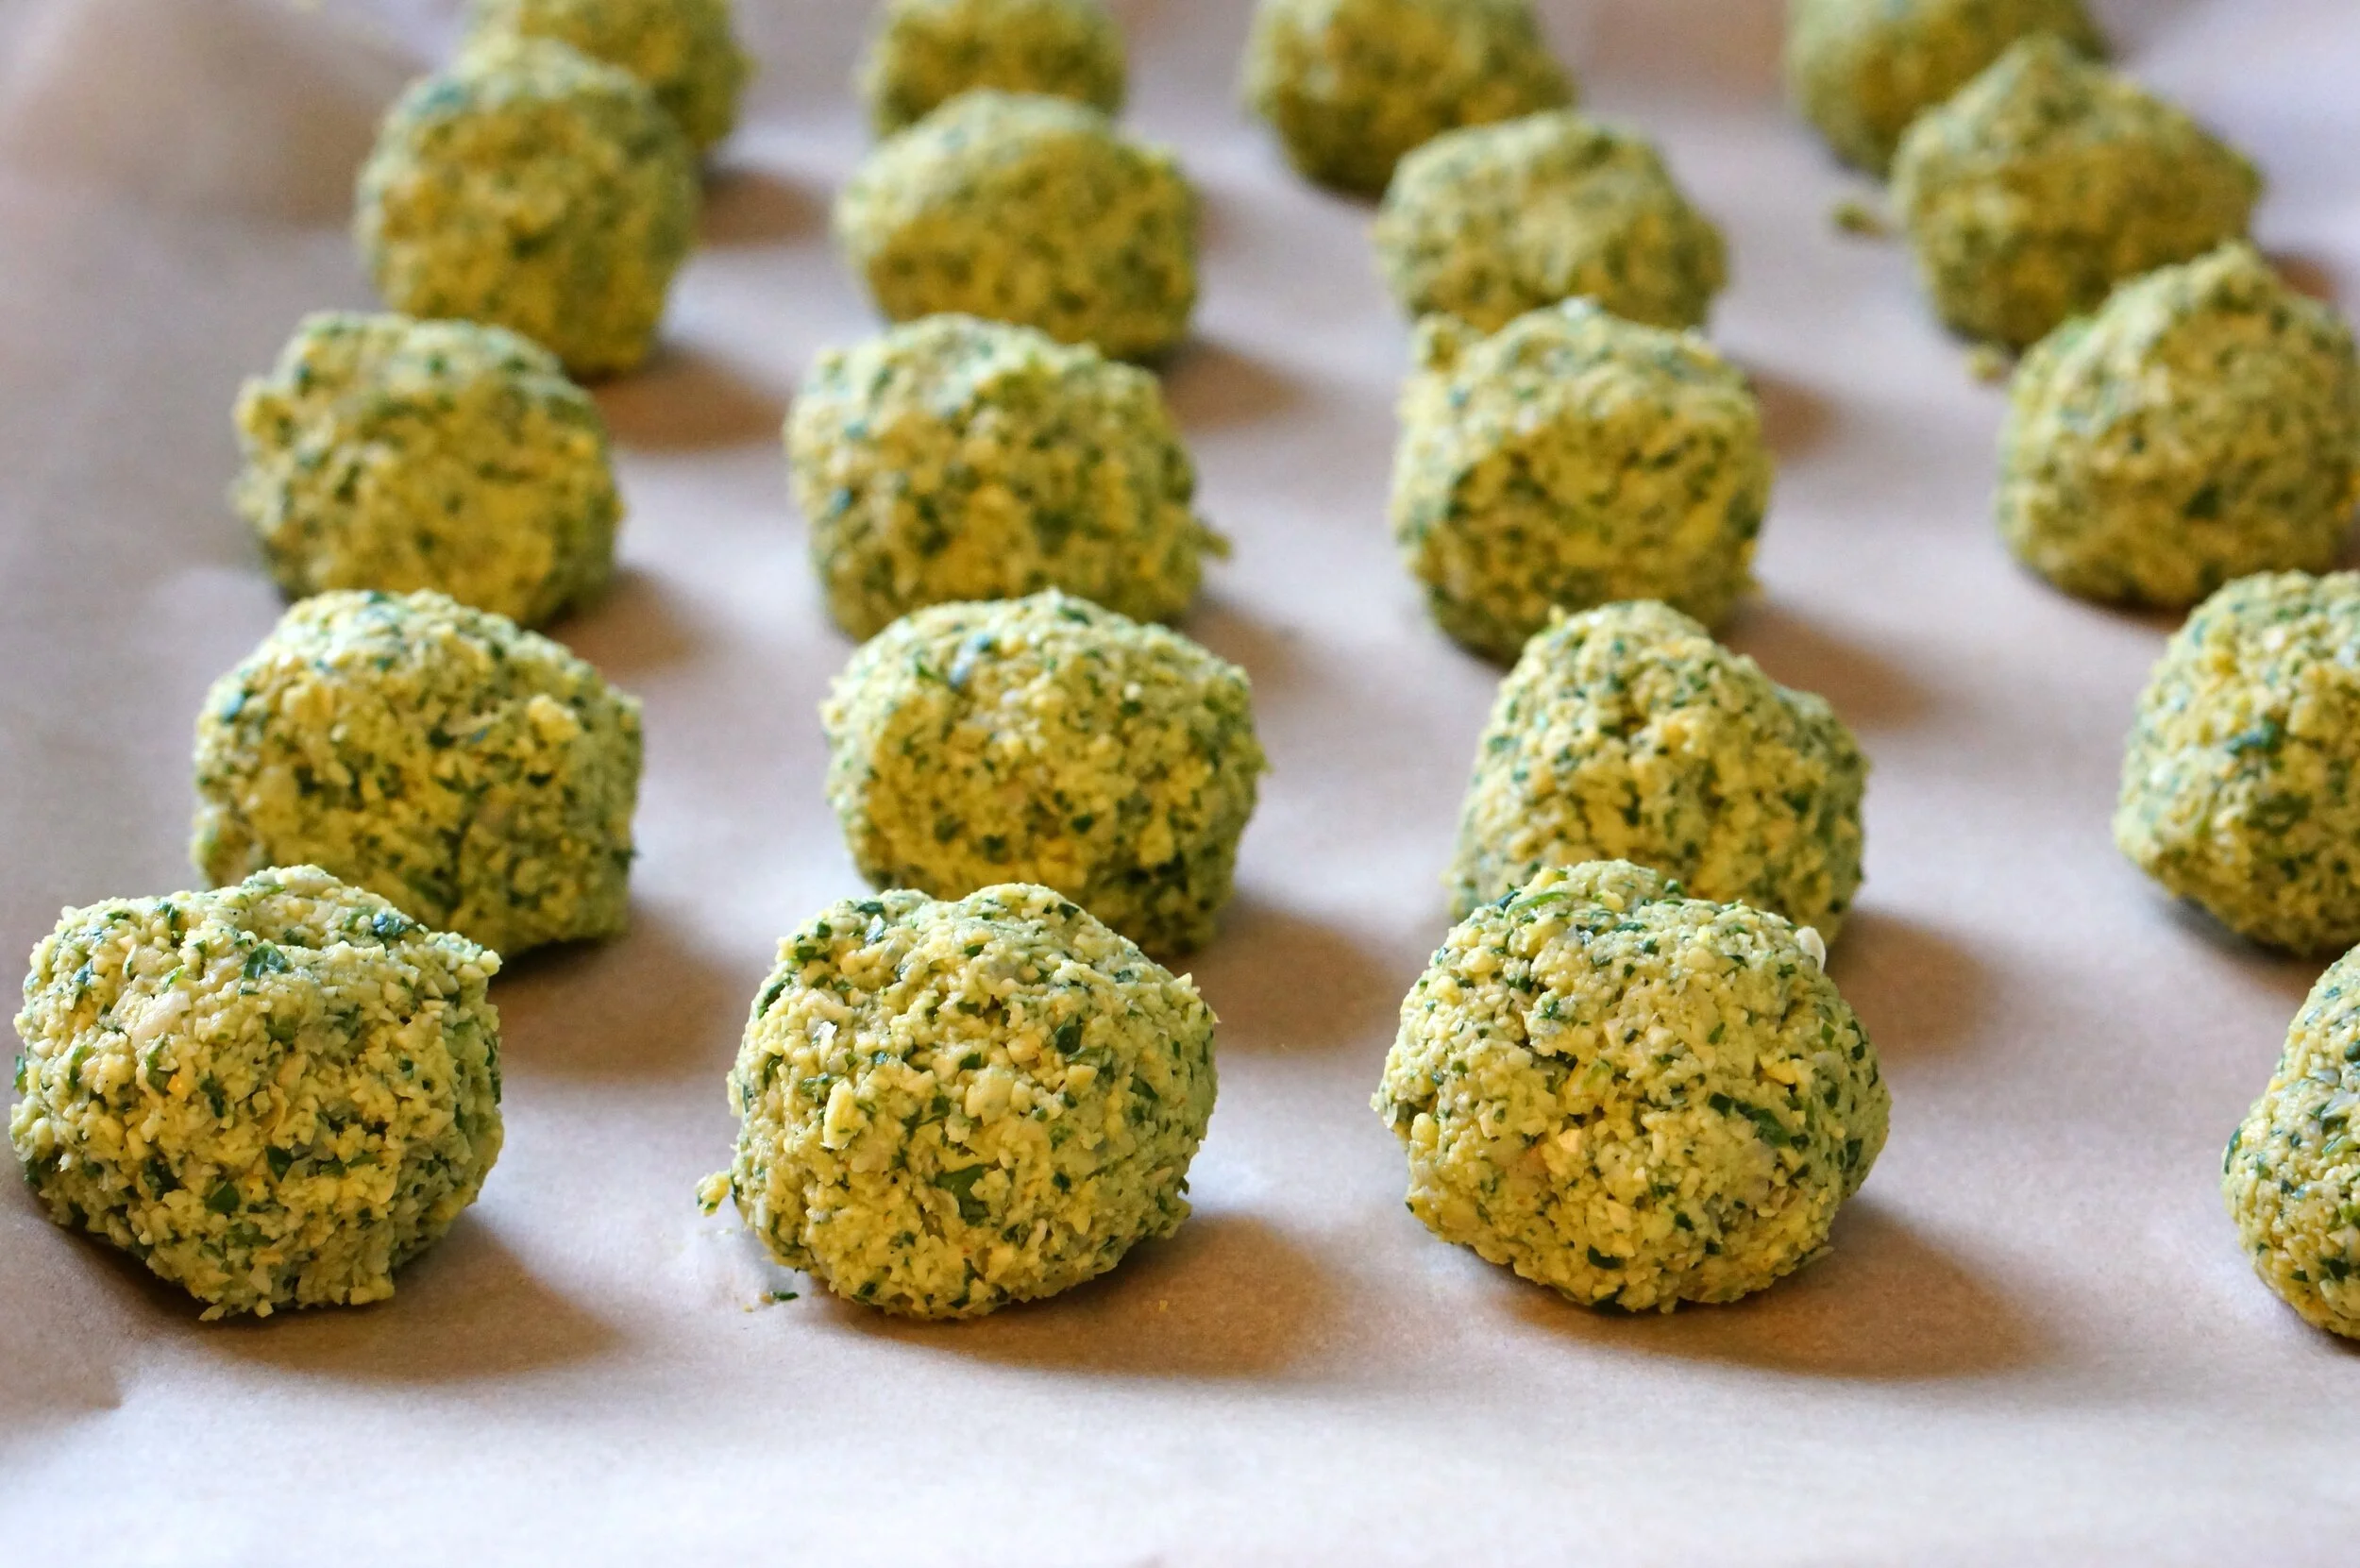
Form into 2 inch balls and place on a parchment lined baking sheet.

To air fry: place in the air fryer at 360 F for 15 minutes.
To pan fry: heat neutral oil (I used avocado oil) in a dutch oven on medium high heat. When the oil is hot, place falafel in and pan fry (turning occasionally) until golden brown all around. Cooking time is approximately 6-8 minutes per batch, but time may vary according to the size of the balls. If the falafel are burning, turn the heat down.

Makes approximately 20 balls.

Ready to make falafel

Ready to make falafel

Frankly, I prefer these pan fried to air fried, but I realize that air fried makes them healthier. Still, these are simply chickpeas, herbs and spices, so either way I feel good about what I’m eating.

falafel lunchbox

falafel lunchbox

Easy Pesto Pasta

Nut Free Pesto Pasta

Nut Free Pesto Pasta

Pesto has got to be one of the easiest, most delicious pasta ideas out there. Unfortunately for a nut-allergic person like me, pesto can be off limits much of the time. In an effort to enjoy pesto safely, I’ve developed a recipe that my whole family can safely enjoy!

There are no nuts or seeds, and it calls for both lemon juice and lemon zest to boost the brightness. The end result is a zesty, satisfying sauce that works deliciously on pasta (and chicken!) and packs beautifully in a lunchbox. With just 7 ingredients, this recipe comes together in the blink of an eye. I love it not only because it’s nut free but also because I can make a giant batch and freeze leftovers.

If you give this a try, drop a comment or tag me and let me know how it goes!

If you’re looking for more lunchbox ideas using pasta, I’ve got you covered.

Pesto ingredients

Pesto ingredients

Just 7 ingredients for this Pesto: fresh basil, garlic, olive oil, Parmesan, lemon juice, lemon zest, nutmeg and salt (with an 8th optional ingredient: fresh cracked pepper). My family loves this with pepper, but they actually prefer to put the pepper on themselves, so I usually leave it out of the recipe.

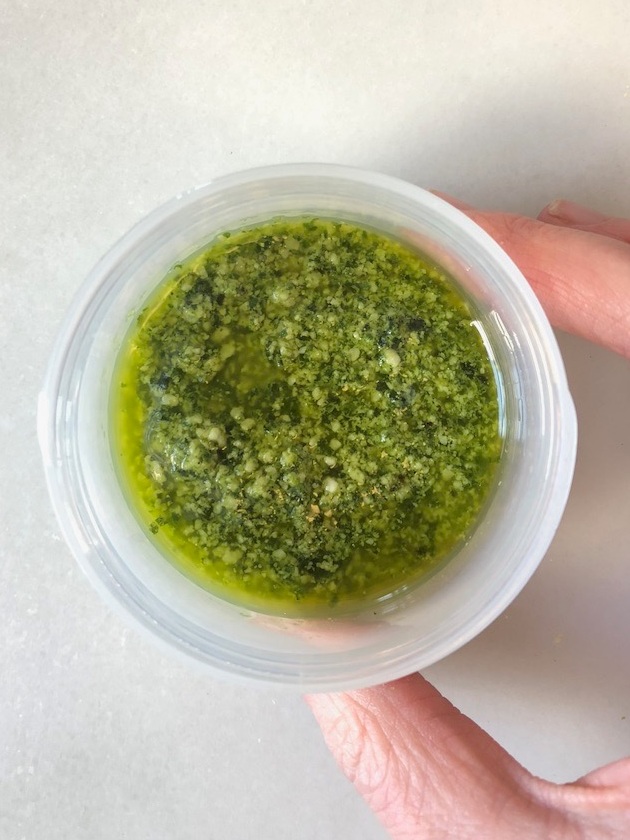
Pesto made in the food processor

Pesto made in the food processor

Place all ingredients into a food processor and this comes together in minutes!

Nut free pesto

Nut free pesto

Ready in minutes, bursting with flavor - this recipe is a winner! Just add this to already cooked pasta and you’re done!

Pesto

Pesto

Pesto Pasta

1 packed cup fresh basil 
1 small garlic clove
1/3 - 1/2 cup olive oil 
1/4 cup Parmesan 
2 tablespoons lemon juice
1/4 teaspoon lemon zest 
Pinch of nutmeg
Salt and pepper to taste. 

Place the basil, garlic, 1/3 cup of olive oil and Parmesan into the food processor and process until the basil leaves have begun to break down. Add the lemon juice, zest, nutmeg, salt (start with a 1/4 teaspoon) and pepper. Process to desired consistency, and add oil as needed. 

You can freeze leftovers for up to 2 months.

Golden Milk Waffles (Dairy Free and Nut Free)

Golden Milk Waffles for a dairy free nut free lunchbox

I’m all about my waffle maker these days.
I love making waffles because they’re a fun weekend breakfast treat that can carry over to the week ahead in the school lunchbox. It’s meal planning at it’s finest. Whip up a bath of waffles - these Golden Milk beauties, Veggie Waffles or Cheesy Waffles to make into a Grilled Cheese Wafflewich, and you’ve got some fun options for your child to choose from for the week ahead. You can add photos of these to the LaLa Lunchbox app library for your child to choose any time you’ve got extras on hand.

This sweet, spiced version is perfect with sliced fruit, or you can make a wafflewich with your favorite nut butter. These will stay fresh in your refrigerator for 2-3 days and you can freeze them for a month.

GOLDEN MILK WAFFLES

Ingredients for Golden Milk Waffles

INGREDIENTS
1 cup + 2 tablespoons flour
3 tablespoons cornstarch
1 teaspoon baking powder
1/2 teaspoon baking soda
1/2 teaspoon salt
1/2 teaspoon cinnamon
1/4 teaspoon ground cardamom
1/4 teaspoon turmeric
1/8 teaspoon nutmeg
1 tablespoon apple cider vinegar
2 large eggs
1 cup coconut milk (I use full fat)
4 tablespoons of coconut or neutral oil, melted
1 tablespoon date syrup or maple syrup
1 teaspoon vanilla extract

DIRECTIONS

Golden Milk Waffles in the making. Dairy free and nut free.
  1. Preheat the waffle iron and the oven to 200 degrees F. In a medium sized bowl, mix all of the dry ingredients.

  2. In a separate bowl, add the wet ingredients: apple cider vinegar, eggs, coconut milk, coconut oil, date syrup and vanilla extract and whisk together until just combined.

  3. Add the wet ingredients to the dry ingredients, making sure that everything is fully incorporated.

  4. When the waffle iron is hot, pour about 1/4 cup of batter to create each waffle (may change depending on your waffle iron). Close the waffle iron and cook for approximately 3 minutes, or until the steam stops spraying out of the sides.

  5. Use a spatula or your fingers to remove the waffle and repeat until the batter is finished.

  6. Place the waffles on a rack and place that rack in the oven to stay warm and crispy.

Golden Milk Waffles, Dairy Free and Nut Free