dairy free

Olive Oil Apricot Cake (Dairy Free)

I've been in an olive oil groove lately with my baking. It started with this cake, and then I went back and remade this cookie recipe, and well, I'm having so much fun with all of it, why stop now? 

olive oil apricot cake

Apricots have started appearing in the markets and I couldn't be happier about it. Sure, apricots are a perfect snack all by themselves, but their slight tang is a perfect balance for sweet baked goods. I set to work on a dairy free cake recipe that incorporated apricots and cherries and all I can tell you is that this cake tastes like summer in every bite! 

apricots

It's got tangy apricots, rich, fruity olive oil, sweet cherries and bright lemon zest. Loads of fruit flavor in every bite. I made this cake so many times that I found myself eating it for breakfast! I've made the recipe dairy free by using coconut yogurt, but you can easily swap in plain yogurt if you'd prefer. I've also tested it with oat flour instead of all purpose flour and while it was still delicious, it was noticeably more dense and needed more baking time. I prefer the AP flour recipe, but feel free to test it out with oat flour if you're looking for something gluten free. 

Give this one a go. You won't be sorry! 

Ingredients:
3/4 cup plain coconut yogurt (I used a brand that is cultured coconut cream, without fillers)
1/3 cup fruity olive oil (the taste really comes through here)
2 large eggs + 1 large egg yolk
2/3 cup sugar
zest of 2 whole lemons
1 teaspoon vanilla extract
1 1/2 cups flour
1 3/4 teaspoons baking powder
1/2 teaspoon baking soda
1/4 heaping teaspoon salt
pinch of nutmeg
4 apricots
25-30 cherries
confectioner's sugar for dusting

Method: 
Preheat the oven to 350.
Line a 9x13 pan with parchment paper and grease the sides.
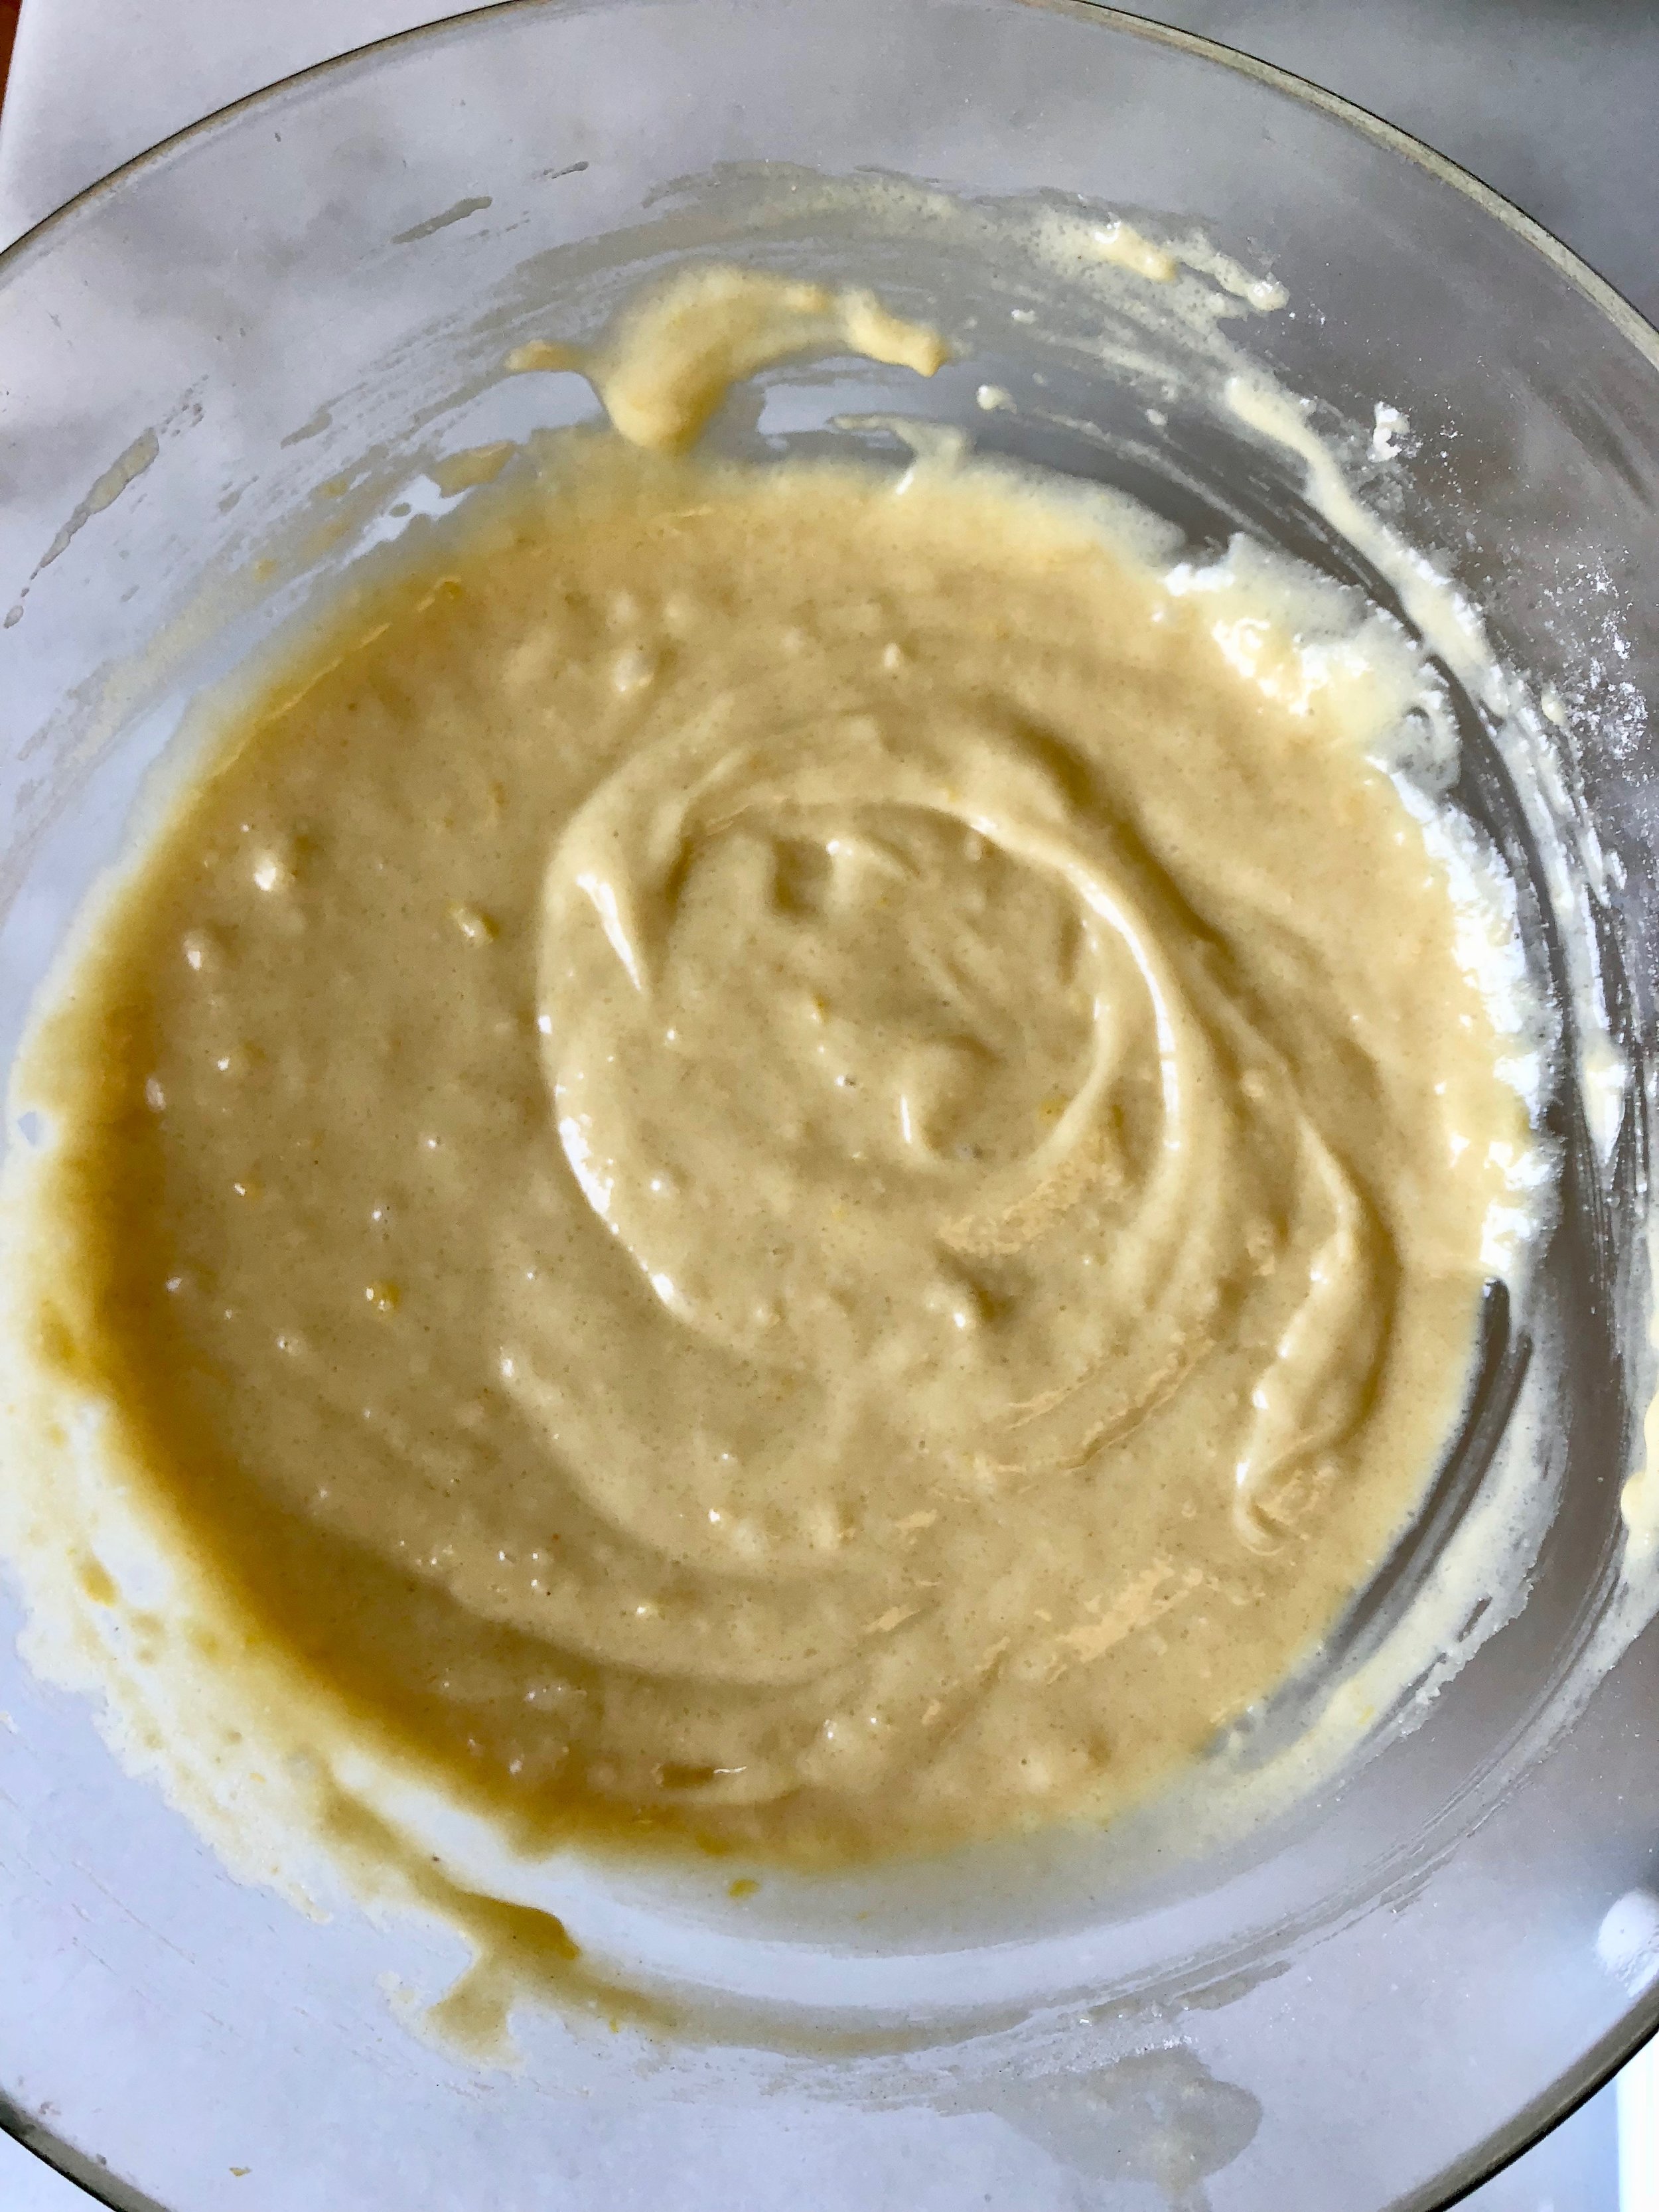
In a large bowl, whisk together the wet ingredients: yogurt, olive oil, eggs and the yolk (one at a time), zest and vanilla. Add the sugar and combine. 

apricot olive oil cake wet ingredients

In a separate bowl, mix together the dry ingredients: flour, baking powder, baking soda, salt and nutmeg. Slowly add the dry ingredients to the wet ones and combine thoroughly to form a batter. 

olive oil apricot cake batter

Take 2 apricots and chop into a small dice. Do the same with 20 cherries. Set aside. 
Slice the remaining apricots and cherries into thin slices. Set aside separately. 
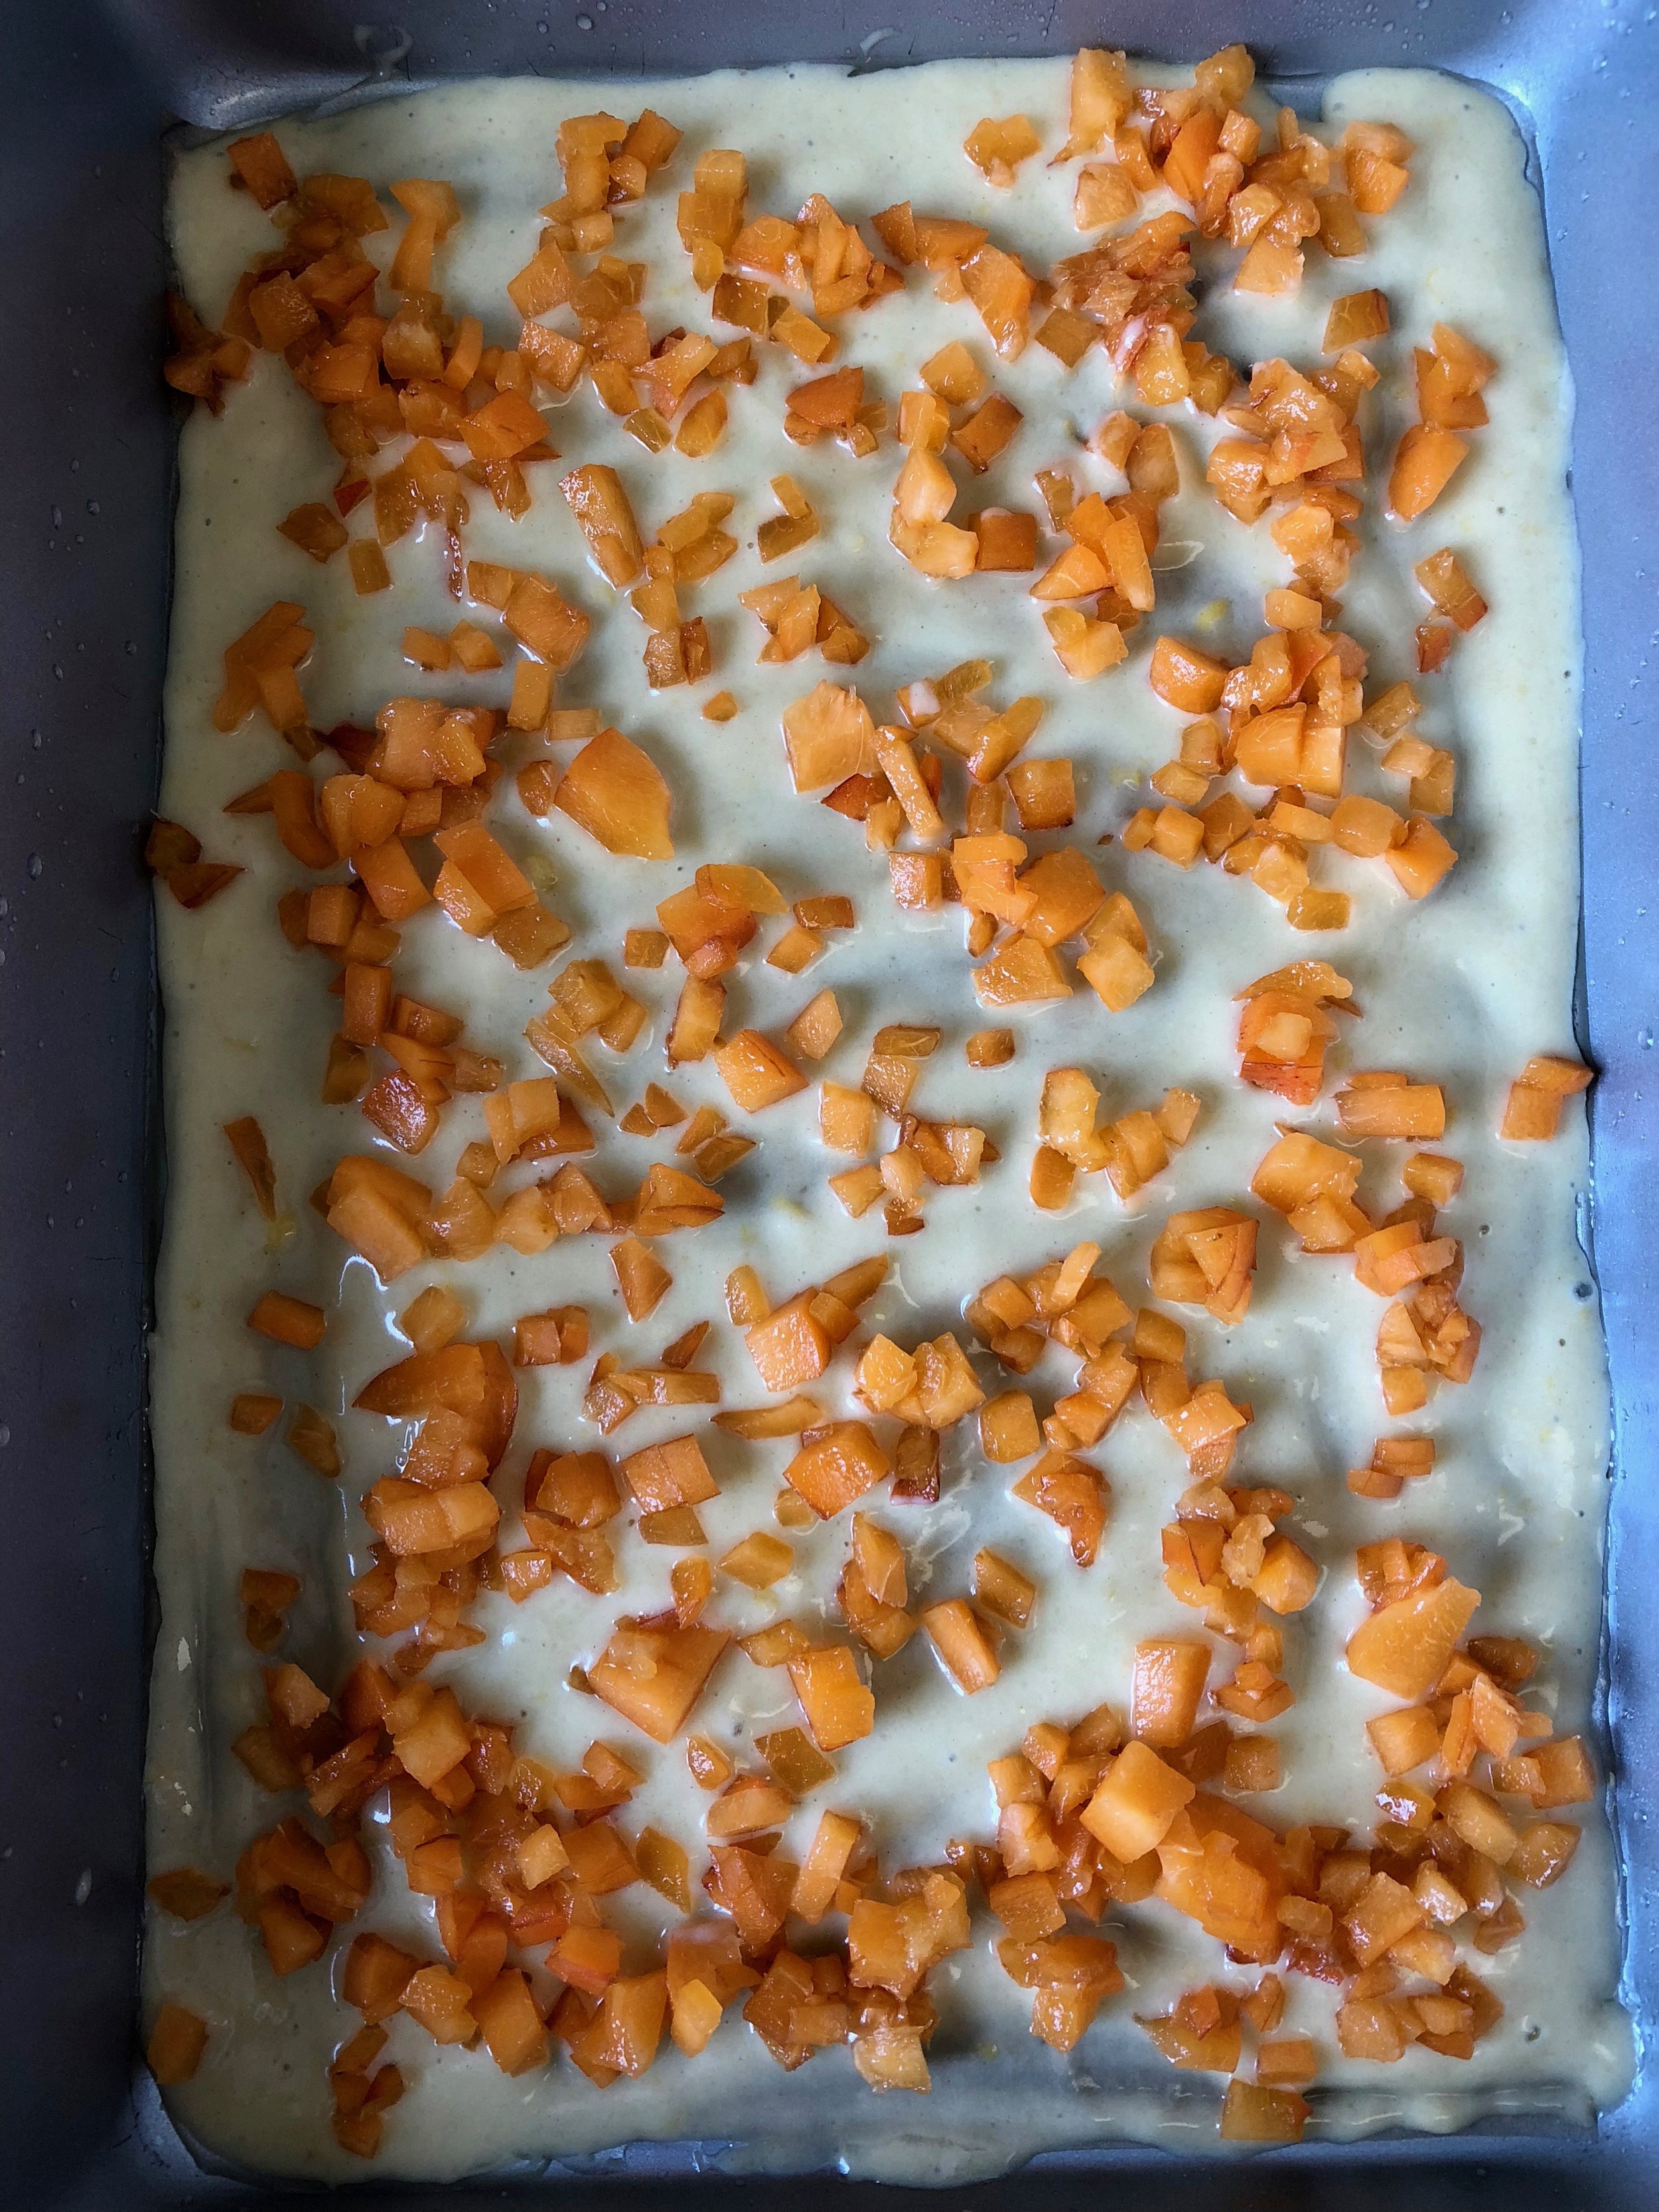
Spread a thin layer of batter on the bottom of the pan.

olive oil apricot cake batter layer 1

Top with diced apricots.

add diced apricots

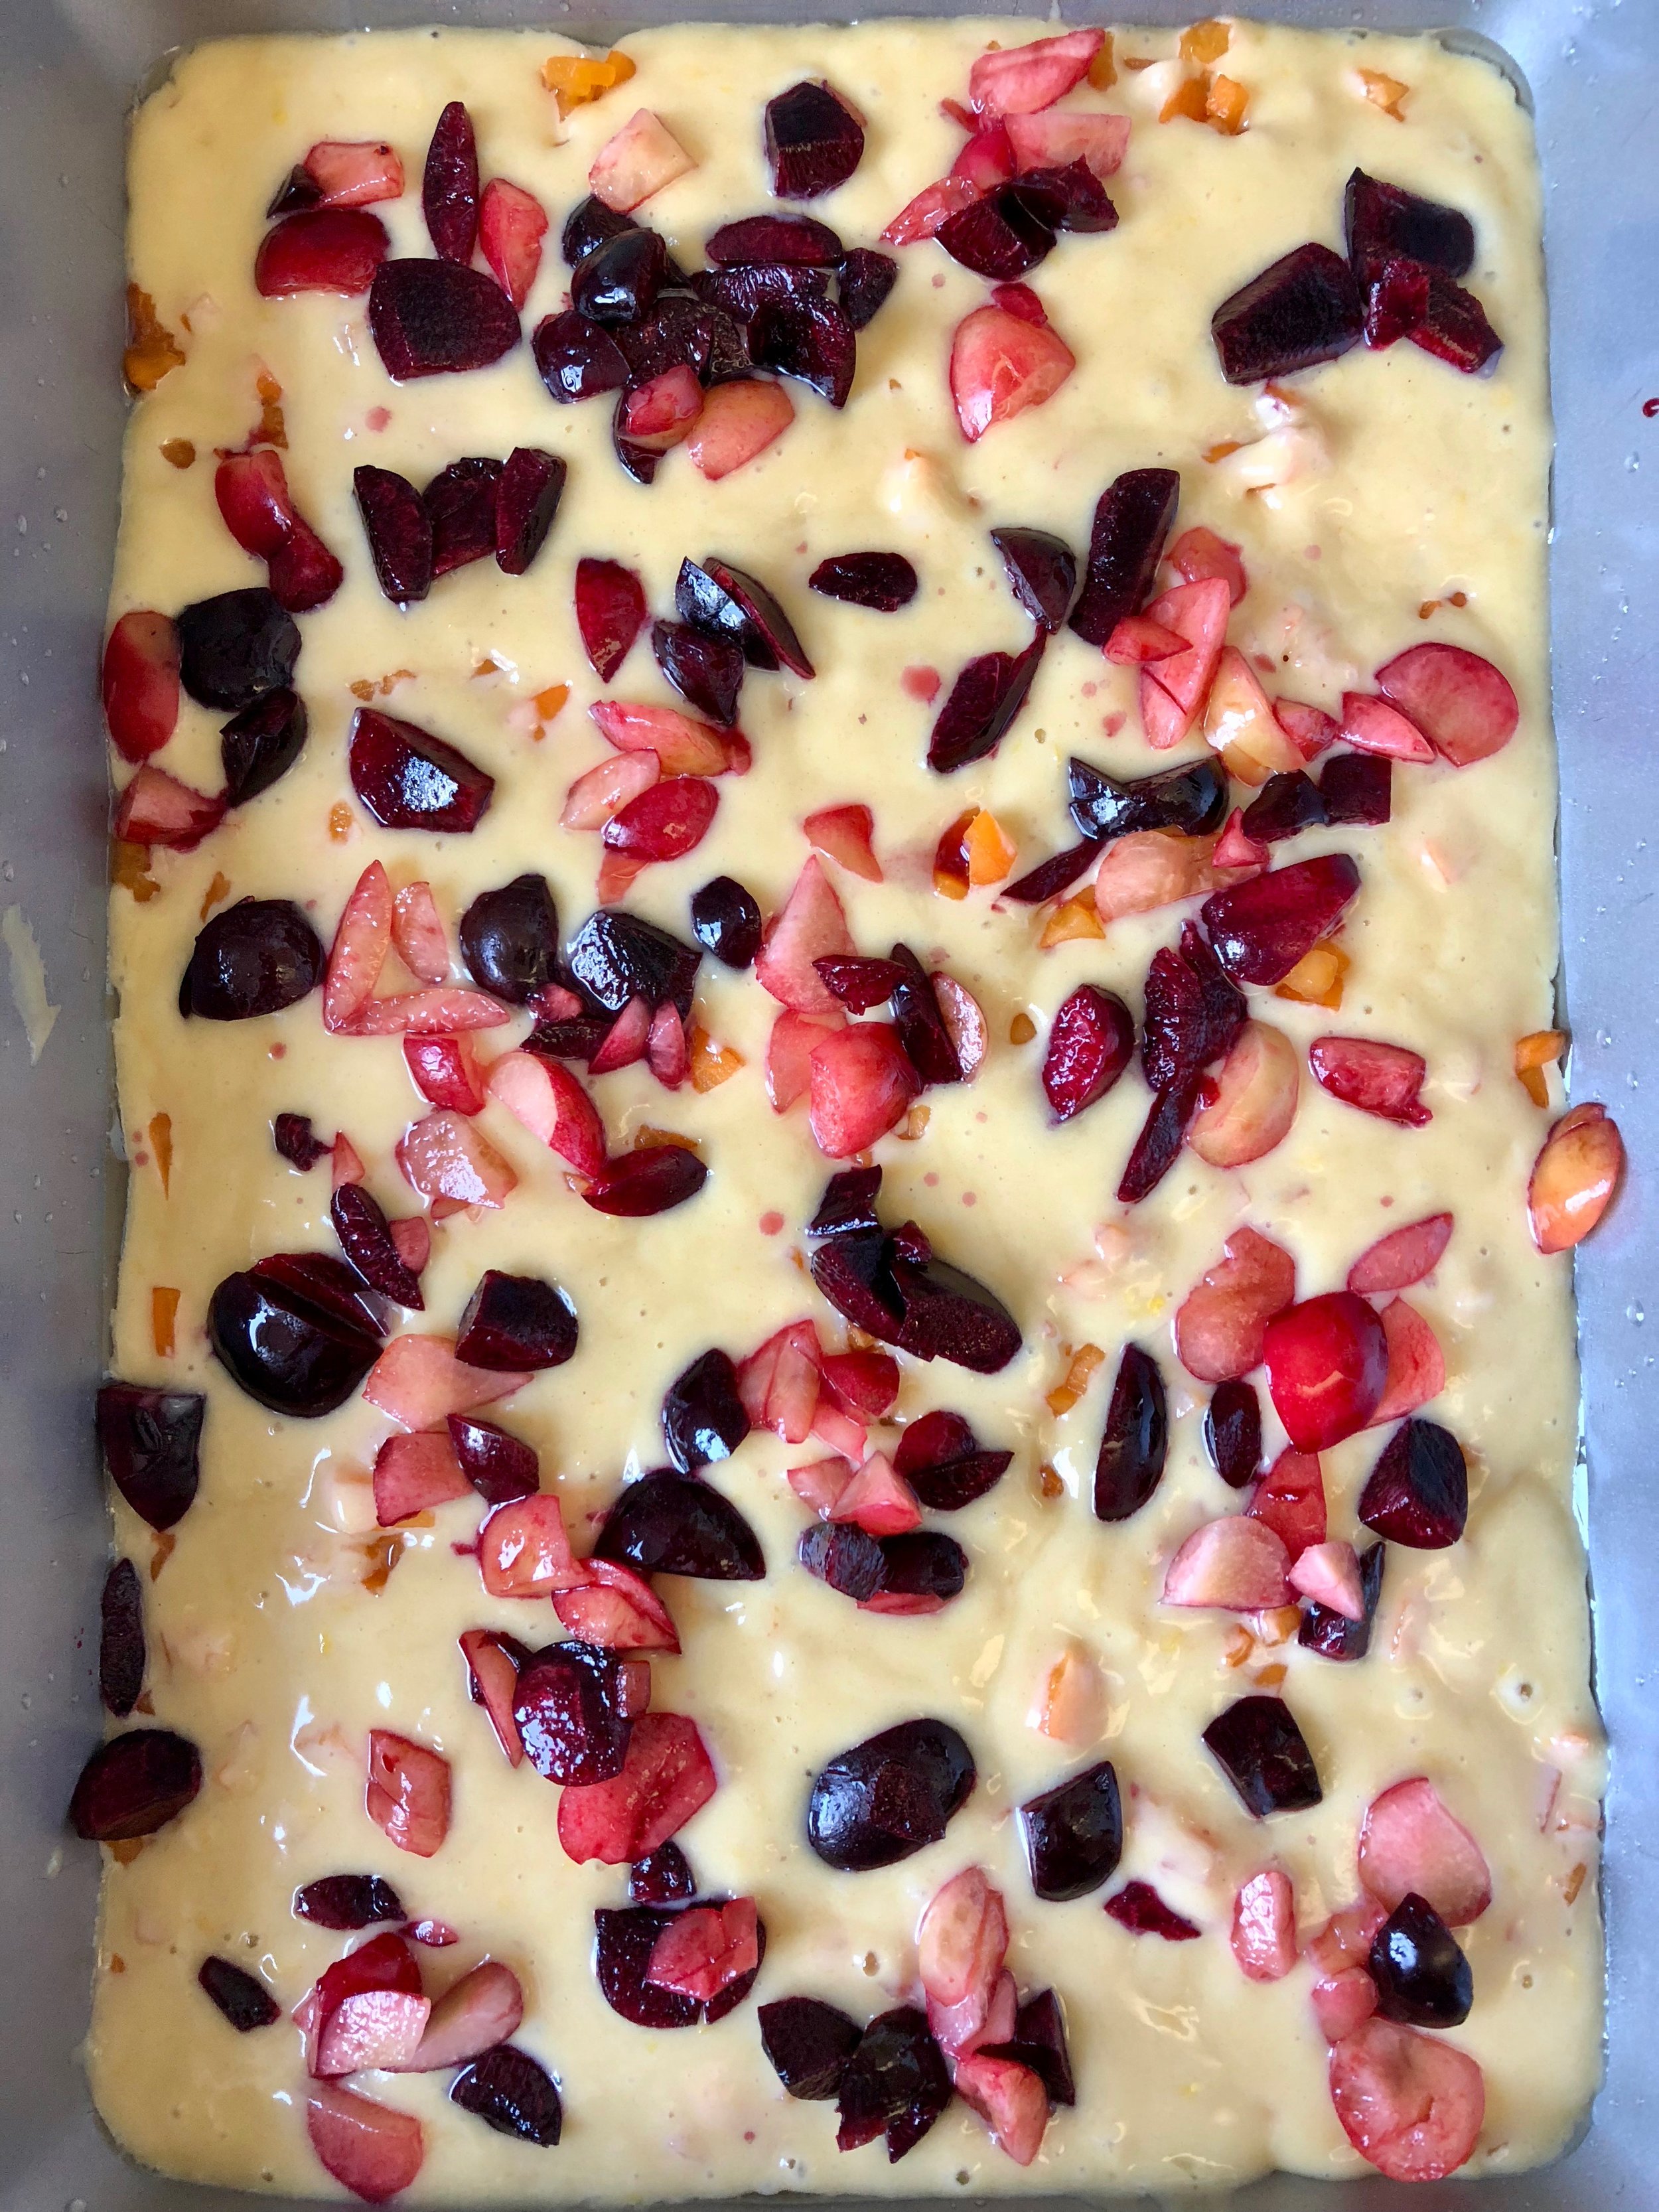
Add another layer of batter (don't worry if it's not all perfectly covered). Spread a thin layer of diced cherries on top.

olive oil apricot cake cherry layer

Add the remaining batter on top and place your sliced cherries and apricots on top.

add sliced fruit on top of olive oil cake


Bake for approximately 35-40 minutes, or until a cake tester comes out clean. Once completely cooled, dust with confectioners sugar. Makes about 15 squares (or more/less depending on how you slice it). 

olive oil apricot cake


The Lunchbox Homestretch

Packing lunchboxes at the end of the school year sometimes feels like the worst. chore. ever. Am I right? Unfortunately those lunchboxes can't pack themselves, so here are some recent lunchboxes that I hope will give you some inspiration to help you through the lunchbox homestretch. If you're looking for more frequent ideas, be sure to follow along on Instagram. And of course, if you want to take the guesswork out of packing lunch, download the LaLa Lunchbox app (free on iOS), hand the phone over to your kids and empower them to make choices -- all within a list of available options that you control. 

Anyway, below are 5 lunchboxes, all with a slightly different approach, but with a common theme: they all have an abundance of fresh fruits and vegetables, they're all nut free and they all took less than 10 minutes to put together. 

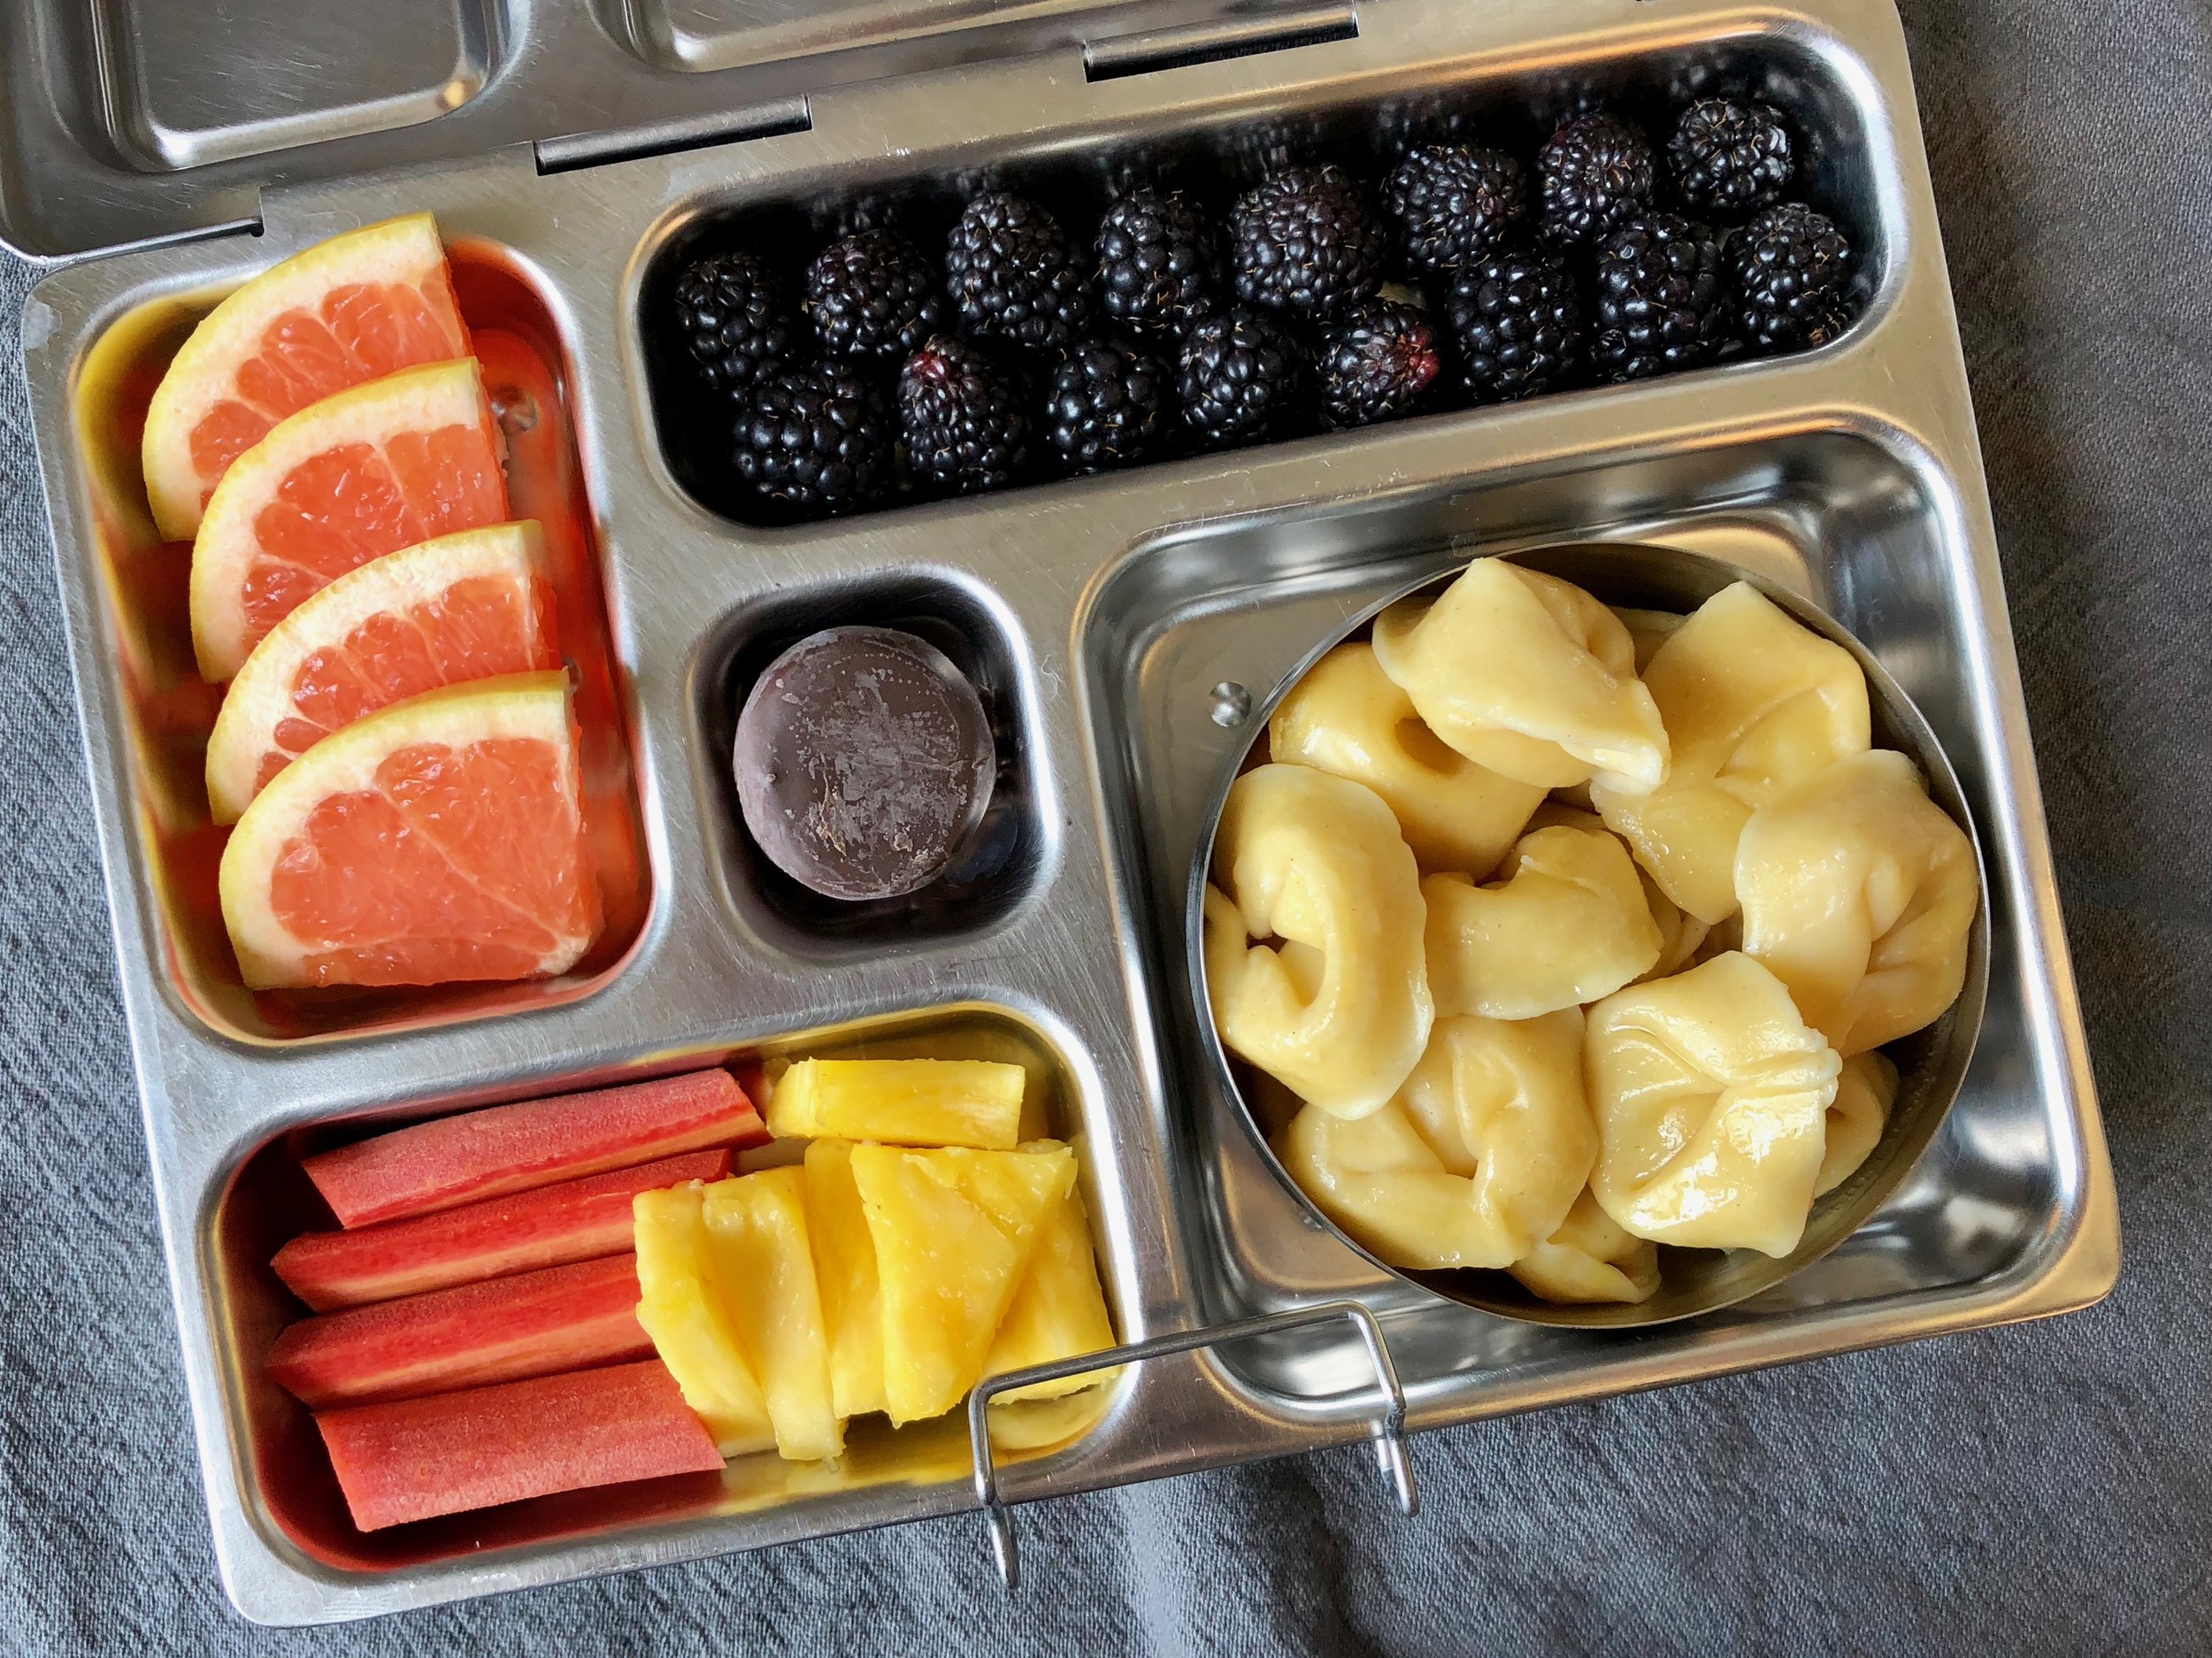
1. Leftovers! My kids had tortellini one night recently for dinner and I made much more than I needed for dinner so that I could pack it in the lunchboxes. Easy peasy. Toss that in the bento with some fruit and a veggie and you're good to go. This lunch is nut free and vegetarian. 

leftovers

2. The Big Dipper. This lunchbox has two dipping options: sunflower seed butter and hummus. There are veggies, corn chips and apple slices for dipping and a fun little polka dotted banana with the sweet treat of mini chocolate chips. It's a finger-friendly lunchbox. This lunch is dairy free, nut free, gluten free and vegetarian. 

Big Dipper

3. The New Outfit. I don't know about you, but I've packed pretty much this same lunch a thousand times. Look closely and let's break it down: it's a cheese sandwich, with fruit, carrots, lettuce and a brownie. But here I've used a different bread (these are bistro buns) and I popped the raspberries on top of the baby carrots. It's old familiar foods, dressed up in a new outfit, and sometimes that's all the jazzing up that's needed. This lunch is nut free, gluten free, dairy free and vegan. 
 

The New Outfit

4. The Crunchy Bruncher. This lunch is half brunch, half crunch. There are wafflewiches with sunflower seed butter (aka: frozen mini waffles made into sandwiches with sunflower seed butter - and any nut butter will do here), and dates for that creamy sweet appeal, plus pretzels, crunchy veggies and guacamole for dipping. There's a sunflower seed butter and chocolate cup for a treat. A fun lunch to eat! This lunch is nut free and vegetarian. 

The Crunchy Bruncher

5. The DIY. Do you have Taco Tuesday at your house? We frequently do, and my kids love to make their own tacos for lunch the next day with leftovers. Here we've got corn tortillas with chicken (seasoned with my homemade taco seasoning) with lettuce and peppers. Kids can put their fixins on at lunch and gobble it up. On the sweet side, we've got watermelon with mint and some dye free gummy bears. This lunch is nut free, dairy free, gluten free and vegan. 

The DIY

What's your lunchbox homestretch strategy? Email me, I'd love to hear it! 

Green Powerhouse Muffins

green powerhouse muffins

Dark winter mornings have the power to shift our whole weekday morning routine. Those extra minutes that the kids linger in bed  underneath their cozy comforters make it necessary for us to have fast, easy breakfasts on the ready. Freezer stash muffins have become winter essentials.

These Green Powerhouse Muffins are what we are digging lately (recipe below). They’re nut free, gluten free, dairy free and refined sugar free. You can make them vegan by substituting flax or chia eggs for the eggs, and by using maple syrup instead of honey. 🌱 Beyond being an excellent breakfast choice, these are great for the lunchbox or as an after school snack.  

Sure, I’d love to enjoy a leisurely breakfast with my family of five on a school day. It just doesn't seem to happen these days. If it’s a similar situation in your house, give these a go!

(p.s.: here’s what else I’ve got in the freezer stash these days: banana muffins, breakfast cookies)

Here’s what you’ll need:

green powerhouse muffins setup

1 banana
4 dates
10 oz. frozen chopped kale (or spinach)
1/4 cup coconut milk
1/4 cup sunflower seed butter (unsweetened)
2 cups rolled oats (gluten free)
2 eggs
1/4 cup avocado oil
1/4 cup honey or maple
3 teaspoons vanilla extract
1 teaspoon baking powder
1 teaspoon baking soda
1/4 teaspoon salt
2 teaspoons cinnamon

Method: 

Preheat oven to 350. In a blender, first add the banana, dates and coconut milk. Blend until smooth. Next add the sunflower seed butter and half the oats. Blend again. Add the remaining ingredients and blend until all the ingredients are fully incorporated. Pour into a lined muffin tin and bake for approximately 25 minutes or until a cake tester comes out dry. Freeze extras for up to 3 months. 

* This recipe was inspired by The Natural Nurturer, whose Green Oatmeal Smoothie muffins we have enjoyed immensely. 

green powerhouse muffins

Olive Oil Lemon Thyme Cookies!

Cookie season is here and I couldn't be happier! I've said this before, but this kind of important thing bears repeating. Cookies make the world go round, as far as I'm concerned. Sayonara candy, cake and pie. 

olive oil lemon thyme.JPG
olive oil lemon thyme 2.JPG

My youngest is dairy free, so over the years I've found some terrific recipes for dairy free cookies that satisfy my cookie craving and are also safe for all 5 of us to enjoy. These Lemon & Thyme Olive Oil Cookies have become some of our favorites! Beyond the flavor, which I can assure you as a cookie snob, is out of this world, the texture is fantastic. I'm making a triple batch of these to bring to a Christmas party.

Here's the recipe, courtesy of Une Gamine Dans La Cuisine. The original recipe calls for almond extract, but my family is nut free, so I've eliminated that. 

Lemon & Thyme Olive Oil Cookies
makes about 28-32 cookies

ingredients
1 cup granulated sugar
2 tablespoons lemon zest (about 2 regular-size lemons) {note: save the lemon}
2 1/4 cups all-purpose flour
1 teaspoon baking powder
1/2 teaspoon baking soda
1/4 teaspoon salt
1 teaspoon finely minced thyme
2/3 cup extra virgin olive oil
1 egg
2 tablespoons fresh lemon juice

topping
1/2 cup granulated sugar for rolling

method
In the bowl of a stand mixer, combine the sugar (1 cup) and lemon zest. Rub the zest into the sugar until it's evenly moistened and aromatic; Set aside to marinate for a few minutes.

In a separate large mixing bowl, whisk together the flour, baking powder, baking soda, salt, and thyme; Set aside. 

Add the olive oil, egg and lemon juice, to the lemon-sugar mixture. Mix either by hand or with a mixer until smooth. (About 3-5 minutes.) Add the dry ingredients and mix until just combined. Cover the bowl and refrigerate for at least 3 hours - this part is key. 

Preheat the oven to 375 F. Line cookie sheets with parchment paper. 

Place the 1/2 cup of granulated sugar (for rolling) into a large, shallow bowl. 

For each cookie, measure out about 2 well-rounded teaspoonfuls. Roll into balls and roll the balls through the bowl of sugar until evenly coated. {Note: Don't worry if the dough is a bit crumbly. If you work the balls of dough long enough with your palms, it will come together.} Place the sugar-coated cookies onto prepared sheets and use your hand or the bottom of a cup to flatten slightly. 

Bake for 8-10 minutes. The cookies will have puffed up slightly but will still look pale. (Mine were just right after 8 minutes.) Remove the cookies sheets from the oven and let the cookies rest for about 3 minutes before transferring them to a cooling rack.

Recipe adapted from Mama's Gotta Bake


Allergy Friendly Meals

I had the honor of doing a takeover for @theallergychef on Instagram recently. I marvel at Kathlena; she runs an allergy friendly bakery and hosts weekly livestreaming cooking demos, but she's allergic to most of the food that she creates and has to wear a mask to handle the fumes. In fact, she's allergic to about 200 things but has dedicated her life to helping others in the allergy community who struggle with what to eat. Incredibly admirable. Beyond all of this though, Kathlena is one of the nicest people I have met. 

For my takeover, I shared ideas for breakfast, lunch, after school snacks and dinner.  If you're looking for more allergy friendly ideas, be sure to follow Kathlena on Instagram and check out more from her here, here and here. I recently did a series about Top 8 Allergy Safe Lunches - with a dozen different lunchbox ideas - and you can find that right here

Without further ado, here's a recap of that takeover with some additional information that might be handy: 

Breakfast.

Banana Oatmeal Bars with Dried Blueberries

Banana Oatmeal Bars with Dried Blueberries

Two things about this breakfast: 
1. It's super easy to make. My kids can make this without an adult and call me in to put it in and take it out of the oven. That's how easy it is. Seriously. 
2. It's ridiculously delicious, as well as filling and healthful. Find the recipe here

Two more things I want you to know about this breakfast: 
1. I've added açaí powder to the recipe (as well as dried blueberries). I'm allergic to fish and walnuts, both of which are rich in omega 3s. I do try and put flax into things when I remember but I definitely don't have a reliably steady source of omega 3s. Açaí is an antioxidant that also contains omega 3s, so I like to to add it where I can.
2. Did you know that non organic strawberries may contain fish DNA? I'm not going to get into the topic of GMOs here but for the sake of allergies, I think it's important to pass this information on. Some strawberry crops are genetically engineered with fish DNA to prevent the fruit from frost damage. I was unable to find any information as to whether this genetic modification had any implications for fish allergies. I'm guessing that it doesn't, but honestly, I don't know. I would guess that the anti-freezing trait is passed on with no other part of the fish DNA but I'm not a scientist and I'm not sure. Read more here


Lunch. 

Below are two lunches that are Top 8 Free. They're simple, easy and fun to eat, loaded with colorful, healthful foods and most importantly, safe for allergic kids. 

Top 8 Free pancakes on a stick

Breakfast for lunch + food on a stick = a super fun, delicious lunch! Here we've got some oatmeal pancakes, free of egg, dairy, soy, gluten and nuts (as well as the other top 8 foods) and you can find the easy recipe right here

top 8 free leftovers

This Top 8 Free lunch has leftover roasted chicken wings, hummus and veggies for dipping (I like Ithaka brand because it's free of soy), plus fruit and a carrot cake cookie, made with this recipe. Substitute flax eggs for the eggs and you're set for a delicious top 8 yummy treat! 


Dinner. 

top 8 free meatballs

I make meatballs fairly often. It's one of those dishes that all five of us enjoy, and leftovers are great for lunchboxes so they're kind of perfect. I love that I can switch up meatballs just by varying the meat and the size. But recently I went on a hunt to find a meatless meatball -- and not just any meatless meatball, I wanted a top 8 free meatless meatball. Tall order! 

Confession: I tried 6 different recipes and some of them were such flops that my kids took one bite and almost staged a coup! Then I came upon this recipe and it was a success. Actually, it wasn't a success the first time, and that's because I used regular green lentils, not french green lentils. I can tell you with 100% certainty - it makes a HUGE difference. Serve these beauties with your fave gluten free pasta (my family likes the ones made from corn and quinoa) and some veggies and you're in business. 

Do you have favorite top 8 free recipes that you love? I'd love to hear about them so please share!

Be sure to follow us on Instagram for more meal inspiration and follow along with The Allergy Chef for some amazing allergy friendly recipes, ideas and products. Plus - a huge bonus: she hosts a livestream cooking demo every Monday. You won't want to miss that.