chocolate

Blueberry Chocolate Cups

Move over nut butters and raspberry, there’s a new Queen in town!

Blueberry Chocolate Cups

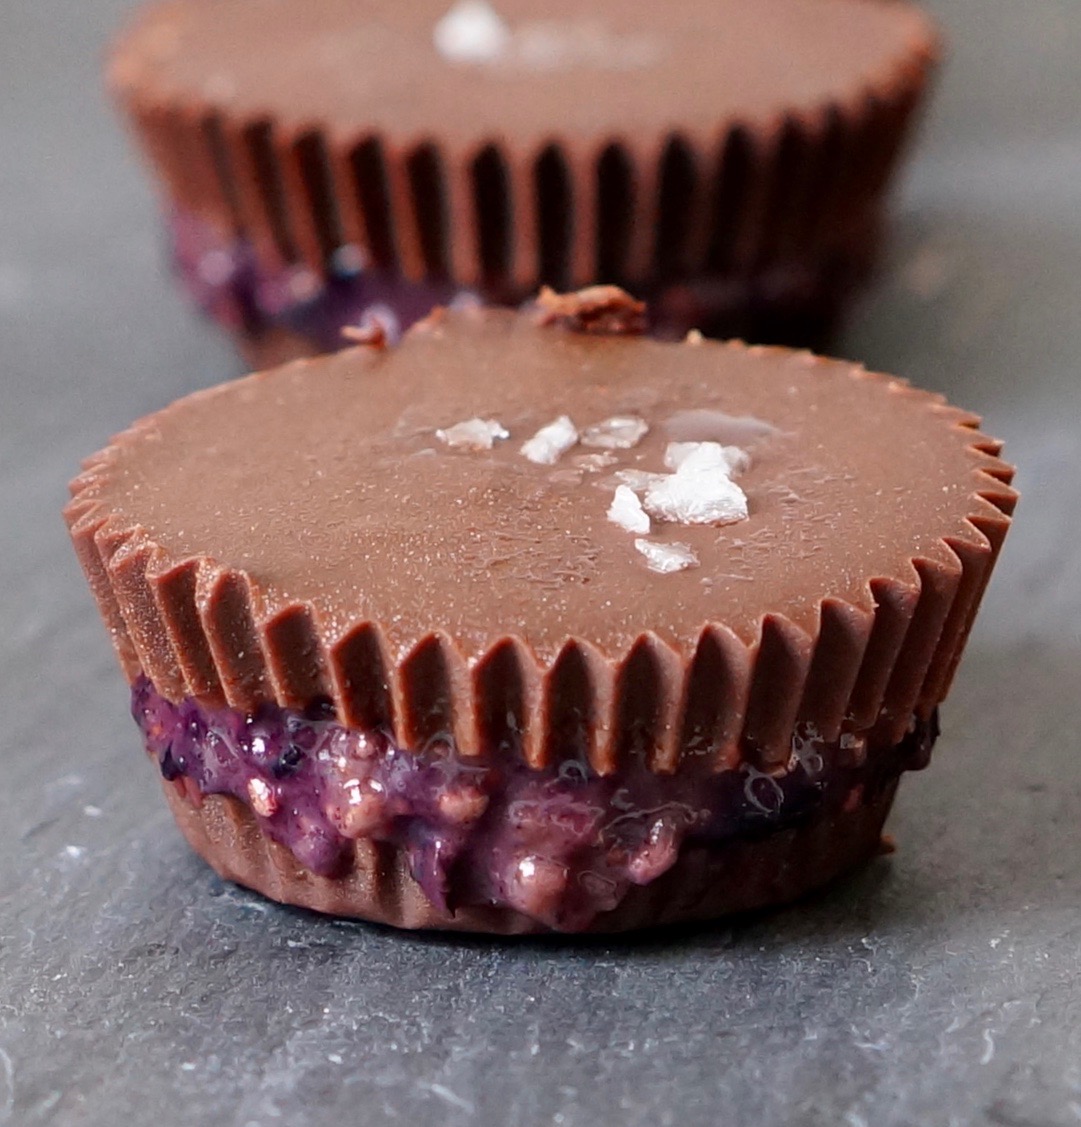
Blueberries and chocolate go together beautifully, and it’s time the two share the spotlight with these delicious mini Blueberry Chocolate Cups! With just 7 ingredients and under 30 minutes to make, gather the kids into the kitchen and watch how quickly the magic of this easy recipe comes together!

Blueberry Chocolate Cup

Blueberry Chocolate Cup

I love these because they’re naturally sweet, quick to make and perfect for little hands. I designed them to be a frozen treat, but you can keep them in the fridge if you prefer. The chia seeds make the inside a bit jammy, and because dates don’t harden when they freeze, you’ll always have a soft middle on these cups. Did I mention that there’s no added sugar? Score!

I’ve made this recipe with dark chocolate, milk chocolate and white chocolate. My personal preference is dark chocolate, but you’ll have to try them all to see what works best for you!

If you make these and post them, don’t forget to tag me on Instagram and use hashtag #lalalunchbox!

Blueberry Chocolate Cup

Blueberry Chocolate Cup

Blueberry Chocolate Cups

Ingredients

2 cups chocolate chips

1 tablespoon + 1/2 teaspoon neutral oil, divided

1 6 ounce container of blueberries

4 medjool dates

1/2 teaspoon vanilla extract

Pinch of salt

1 tablespoon chia

Flake salt for the top (optional)


Method

Melt the chocolate chips over a double boiler with 1 tablespoon neutral oil and let it cool for 5 minutes.

Line a mini muffin tin with liners and place a small amount of chocolate in the bottom of each. This will be the bottom of the chocolate cups. Place in the freezer while you complete the next step.  

Soak the dates in warm water for 5 minutes. Remove them from the water, cut them into chunks and add to a food processor.

Add blueberries to the food processor and blend together until the large chunks have become small. Add 1/2 teaspoon neutral oil, vanilla and salt and process again. 

Place contents into a bowl and add chia seeds. Stir and let that rest for at least 5 minutes. 

Take the muffin tin out of the freezer. The chocolate should be relatively hard. Spoon some of the blueberry date mixture into each cup and top with remaining melted chocolate. Sprinkle with flake salt (optional). Place in the freezer again to set. 

Store in an airtight container in the freezer for up to 2 months. Because dates don’t freeze, the inside texture will remain soft. Makes 15 mini cups. If you’d like to keep it at 12, use the leftover blueberry date sauce on sandwiches. 

Blueberry Chocolate Cups

Blueberry Chocolate Cups

Clementine Cupcakes

Clementines are a thing of beauty. They're juicy, flavorful, high in vitamin C, perfectly transportable, easy to peel, easy to eat. The list goes on and on. Am I right? Plus, they've got to be one of the best accoutrements for a Halloween lunch. Just draw a pumpkin face on the peel and call it a day! 

Clementine Pumpkin

After buying two bags of clementines, I wanted to get creative with them. How about Clementine Cupcakes? My son was on board immediately. My older daughter and her friend bake together every Monday, so as it turned out, I didn't have any white sugar in the house. I used maple syrup instead and am happy to report that it worked out beautifully for these cupcakes! These cupcakes have a bold citrus flavor, so if you're looking for more of a "hint" of citrus, reduce the amount of zest that you use. I’ve also added cardamom to add brightness to these cupcakes, and I’ve made them dairy free by using olive oil. The flavor of the olive oil really comes through here, so choose something fruit and flavorful. I paired it with a chocolate sour cream frosting, (because chocolate) and that recipe is also below. 

Clementine Cupcakes

Clementine Cupcakes

Ingredients

1/4 cup + 2 tablespoons olive oil
1/2 cup of maple syrup
2 large eggs
zest of 3 clementines (or one tightly packed tablespoon)
1/2 cup of orange juice (or a combination of freshly squeezed orange, lemon and clementine)
1 teaspoon vanilla extract
1 1/2 cups flour
1/2 teaspoon salt
1 teaspoon baking powder
1/2 teaspoon baking soda
1/2 teaspoon cardamom
clementine segments for garnish

* Preheat the oven to 350. 
* In a large mixing bowl, combine the olive oil and maple syrup.  Slowly add in the eggs. Once thoroughly combined, add the zest, orange juice and vanilla extract. 
* In a separate bowl, mix the dry ingredients together. 
* Add dry ingredients to wet ingredients and use a whisk to make sure there are no clumps. 
* Pour into a muffin tin lined with paper cups and bake for 20-24 minutes or until a knife comes out clean. This recipe makes 12 small cupcakes, or 10 large ones.

Chocolate Sour Cream Frosting

What you'll need: 
1/2 cup sour cream
1 cup semi sweet chocolate chips, melted
1 teaspoon vanilla extract
1/4 teaspoon salt

Once the chocolate chips are melted and slightly cooled, add the sour cream, vanilla and salt. Mix thoroughly. This recipe will make more than enough for your cupcakes, which is a good thing because it's kiiiiiiiiiind of irresistible! Garnish the cupcakes with clementine segments and enjoy! 

Birthday Brownies

IMG_0289.jpg

The year that I sent my daughter to school with strawberry shortcakes on her birthday will probably go down as the worst.

She's always been a strawberry girl, drawn to both the fresh-picked, tiny sweet ones and the large, often less flavorful ones we find at the market. Ages ago, she came across a fun fact that strawberries were the only fruit that had seeds on the outside, and it became one of her favorite stories to tell for a while. She's also huge fan of all things bready, and biscuits fit beautifully in that category. And fresh whipped cream? It's got her name all over it. My mother made strawberry shortcakes for her one day and she was smitten. 

IMG_4134.jpg

So that year for her 5th birthday, I made strawberry shortcakes - at her request - for her in-school celebration. The kids hated them! Okay, hate is definitely too strong, but I learned that kids have expectations for classroom birthdays and strawberry shortcakes didn't make the cut. That's a whole other topic, and I'd love to discuss it but I'm all about the birthday dessert today. Anyway, we had a lot left over that year, which no one here complained about. 

Brownies are universally beloved. 

Brownies are universally beloved. 

From then on, my kids have requested more traditional things for school, like cupcakes or cookies. Works for me. At some point, they'll stop asking for homemade desserts for school birthdays, so I'm happy to comply annually until then. This year, my newly minted 12 year old asked if I could please make brownies for school. Brownies were definitely not going to be panned. Who doesn't love brownies? I *love* them. An extra batch of brownies doesn't stay around for long, and making them is easy and fun. 

The recipe that I've been loving lately is adapted from Smitten Kitchen. The brownies are dark, rich, chocolatey and not too sweet, and definitely not cakey. I made four batches in two days, sending off three to school and saving one for us. I've replaced the AP flour with oat flour, making these gluten free, and I've reduced both the sugar and the cocoa powder. I also found that they needed a bit more time to cook, so I've reflected that in this recipe (scroll down). 

Here's how easy they are to make (as opposed to strawberry shortcakes, which took me way longer, and were much more labor intensive). It's just 7 ingredients and 6 steps --- take a look:  

Brownie ingredients: 7

Brownie ingredients: 7

1. First mix the butter and sugar.

butter + sugar

butter + sugar

2. Add cocoa powder and stir to combine. 

added cocoa powder

3. Add salt. 

Add salt

4. Add eggs and vanilla. 

add eggs

5. Add oat flour and give it one final stir. 

Add oat flour

6. Ready to bake! Place in a parchment lined pan in a preheated 325 degree oven for 25-28 minutes.

ready to bake


Birthday Brownies

  • 10 tablespoons unsalted butter (room temperature)
  • 1 cup granulated sugar
  • 3/4 cup unsweetened cocoa powder (natural or Dutch-process)
  • heaping 1/4 teaspoon flaked salt
  • 1 teaspoon pure vanilla extract
  • 2 large eggs, cold
  • 1/2 cup oat flour

Preheat the oven to 325°F. Line the bottom and sides of an 8×8-inch square baking pan with parchment paper or grease with avocado oil or butter.

Combine the butter and sugar in a large bowl. Add cocoa powder and salt and stir until all lumps are gone. Stir in vanilla, eggs and oat flour and mix with a wooden spoon until the batter is smooth and thick. Spread evenly into the pan. 

Bake for approximately 25-28 minutes or until the brownies have set and a cake tester comes out clean. Let cool completely on a rack. Cut into 16 or 25 squares and watch them disappear. 

ultimate brownies

Avocado Chocolate Cookies

Okay, I know. It sounds weird. But when I came across the photo of these Avocado Chocolate Cookies on Pinterest, they looked so good, I just had to see for myself. Plus, I had all of the ingredients in my house, so it was an easy experiment. And when I showed the photo to my sweet-toothed son, he was game to make these with me. I mean, look at these things! 

avocado chocolate cookies

I made one substitution in the original recipe (granulated sugar for coconut sugar) and added three ingredients (baking powder, salt and cinnamon). Our recipe noted below. 

ingredients for avocado chocolate cookies

First we cracked an egg and added it to our mixing bowl. Next we used about 3/4 of a large avocado and mashed it. 

avocado and egg for cookies

Next, we added sugar and cocoa. This batter is looking good! 

cocoa and sugar added

Finally, we added baking soda, baking powder, cinnamon, and salt, and then the chocolate chips.  

"Mama, can I taste it?" 

"Mama, can I taste it?" 

We spooned the batter onto parchment paper on a cookie sheet and baked at 350 for 9 minutes. 

avocado chocolate cookie batter

Wow. These things! Gooey. Rich. Satisfying! A keeper, for sure. 

avocado chocolate cookies

Here's the recipe: 

Avocado Chocolate Cookies (adapted from the Fit Ninja)

1 extra large egg
3/4 very ripe avocado, mashed
1/2 cup sugar (I used raw sugar. The original recipe called for coconut sugar)
1/2 cup unsweetened cocoa powder
1/2 teaspoon of baking soda
1/4 teaspoon of baking powder
1/4 teaspoon of salt
1/2 teaspoon of cinnamon
1/2 cup dark chocolate chips

Preheat the oven to 350. Combine the egg and mashed avocado and mix until the lumps are mostly gone (be careful not to overbeat). Add sugar and cocoa powder and mix well. Add baking soda, baking powder, salt and cinnamon and stir until you have a nice batter. Add the chocolate chips and mix one final time. Line a baking sheet with parchment paper. Spoon the batter onto the baking sheet and bake for 8-10 minutes. This recipe makes about 24-30 cookies. Keep in the refrigerator. Enjoy! 

Wacky Cake

My son turned four on our vacation in Rio and we celebrated with a family favorite, Wacky Cake. It's a classic version of a dairy-free, egg free chocolate cake but because of the differences in available ingredients here,  I had to make a few changes. 

Delicious nonetheless! We took the tram up the Sugar Loaf and celebrated with cake and the phenomenal views of Rio.

DSC06535.jpg

Here's my usual go-to recipe for wacky cake and below is the recipe with substitutions. 

1 1/2 cups flour 
1/4 cup of sugar
1/2 cup cocoa (with added sugar)
1 teaspoon baking soda

1/2 teaspoon salt
1 tablespoon of white vinegar
1 cup of water
5 tablespoons vegetable oil
1/2 vanilla bean (scraped from the inside of the pod)
1/2 cup chocolate chips (optional)
Sliced dried apricots (optional)

Preheat the oven to 350. Mix all of the dry ingredients together and sift them to prevent the cocoa from getting clumpy. Add vinegar, water, oil and vanilla paste and stir until thoroughly combined.  Add chocolate chips. Lightly grease a baking pan (9x9 can work nicely). Bake at 350 for approximately 25 minutes. We cut this into 16 small slices and topped with sliced dried apricots.