vegetarian

Easy Spinach Pie (Dairy Free)

My husband declared that he was going to be meat-free for the month of May. Why? I don't know, maybe just to shake things up a bit. We don't eat a ton of meat around here but I'll admit, it's been both challenging and fun to design completely vegetarian dinners for us a month. Here's the rub: dinners also have to be nut-free (my allergies), dairy free (my preference) and pasta free (my husband's preference).

This spinach pie recipe is based on a classic recipe that I got from my mom. It's a family favorite. My adaptation of her recipe has no crust and no cheese and just five ingredients. It's the kind of thing you're going to want to make in bulk not only because it's delicious and you'll plow through it but also because it freezes beautifully. Having one of these tucked away in your freezer is like a goldmine on those days when you're too pooped to make anything. 

Popeye would be delighted! 

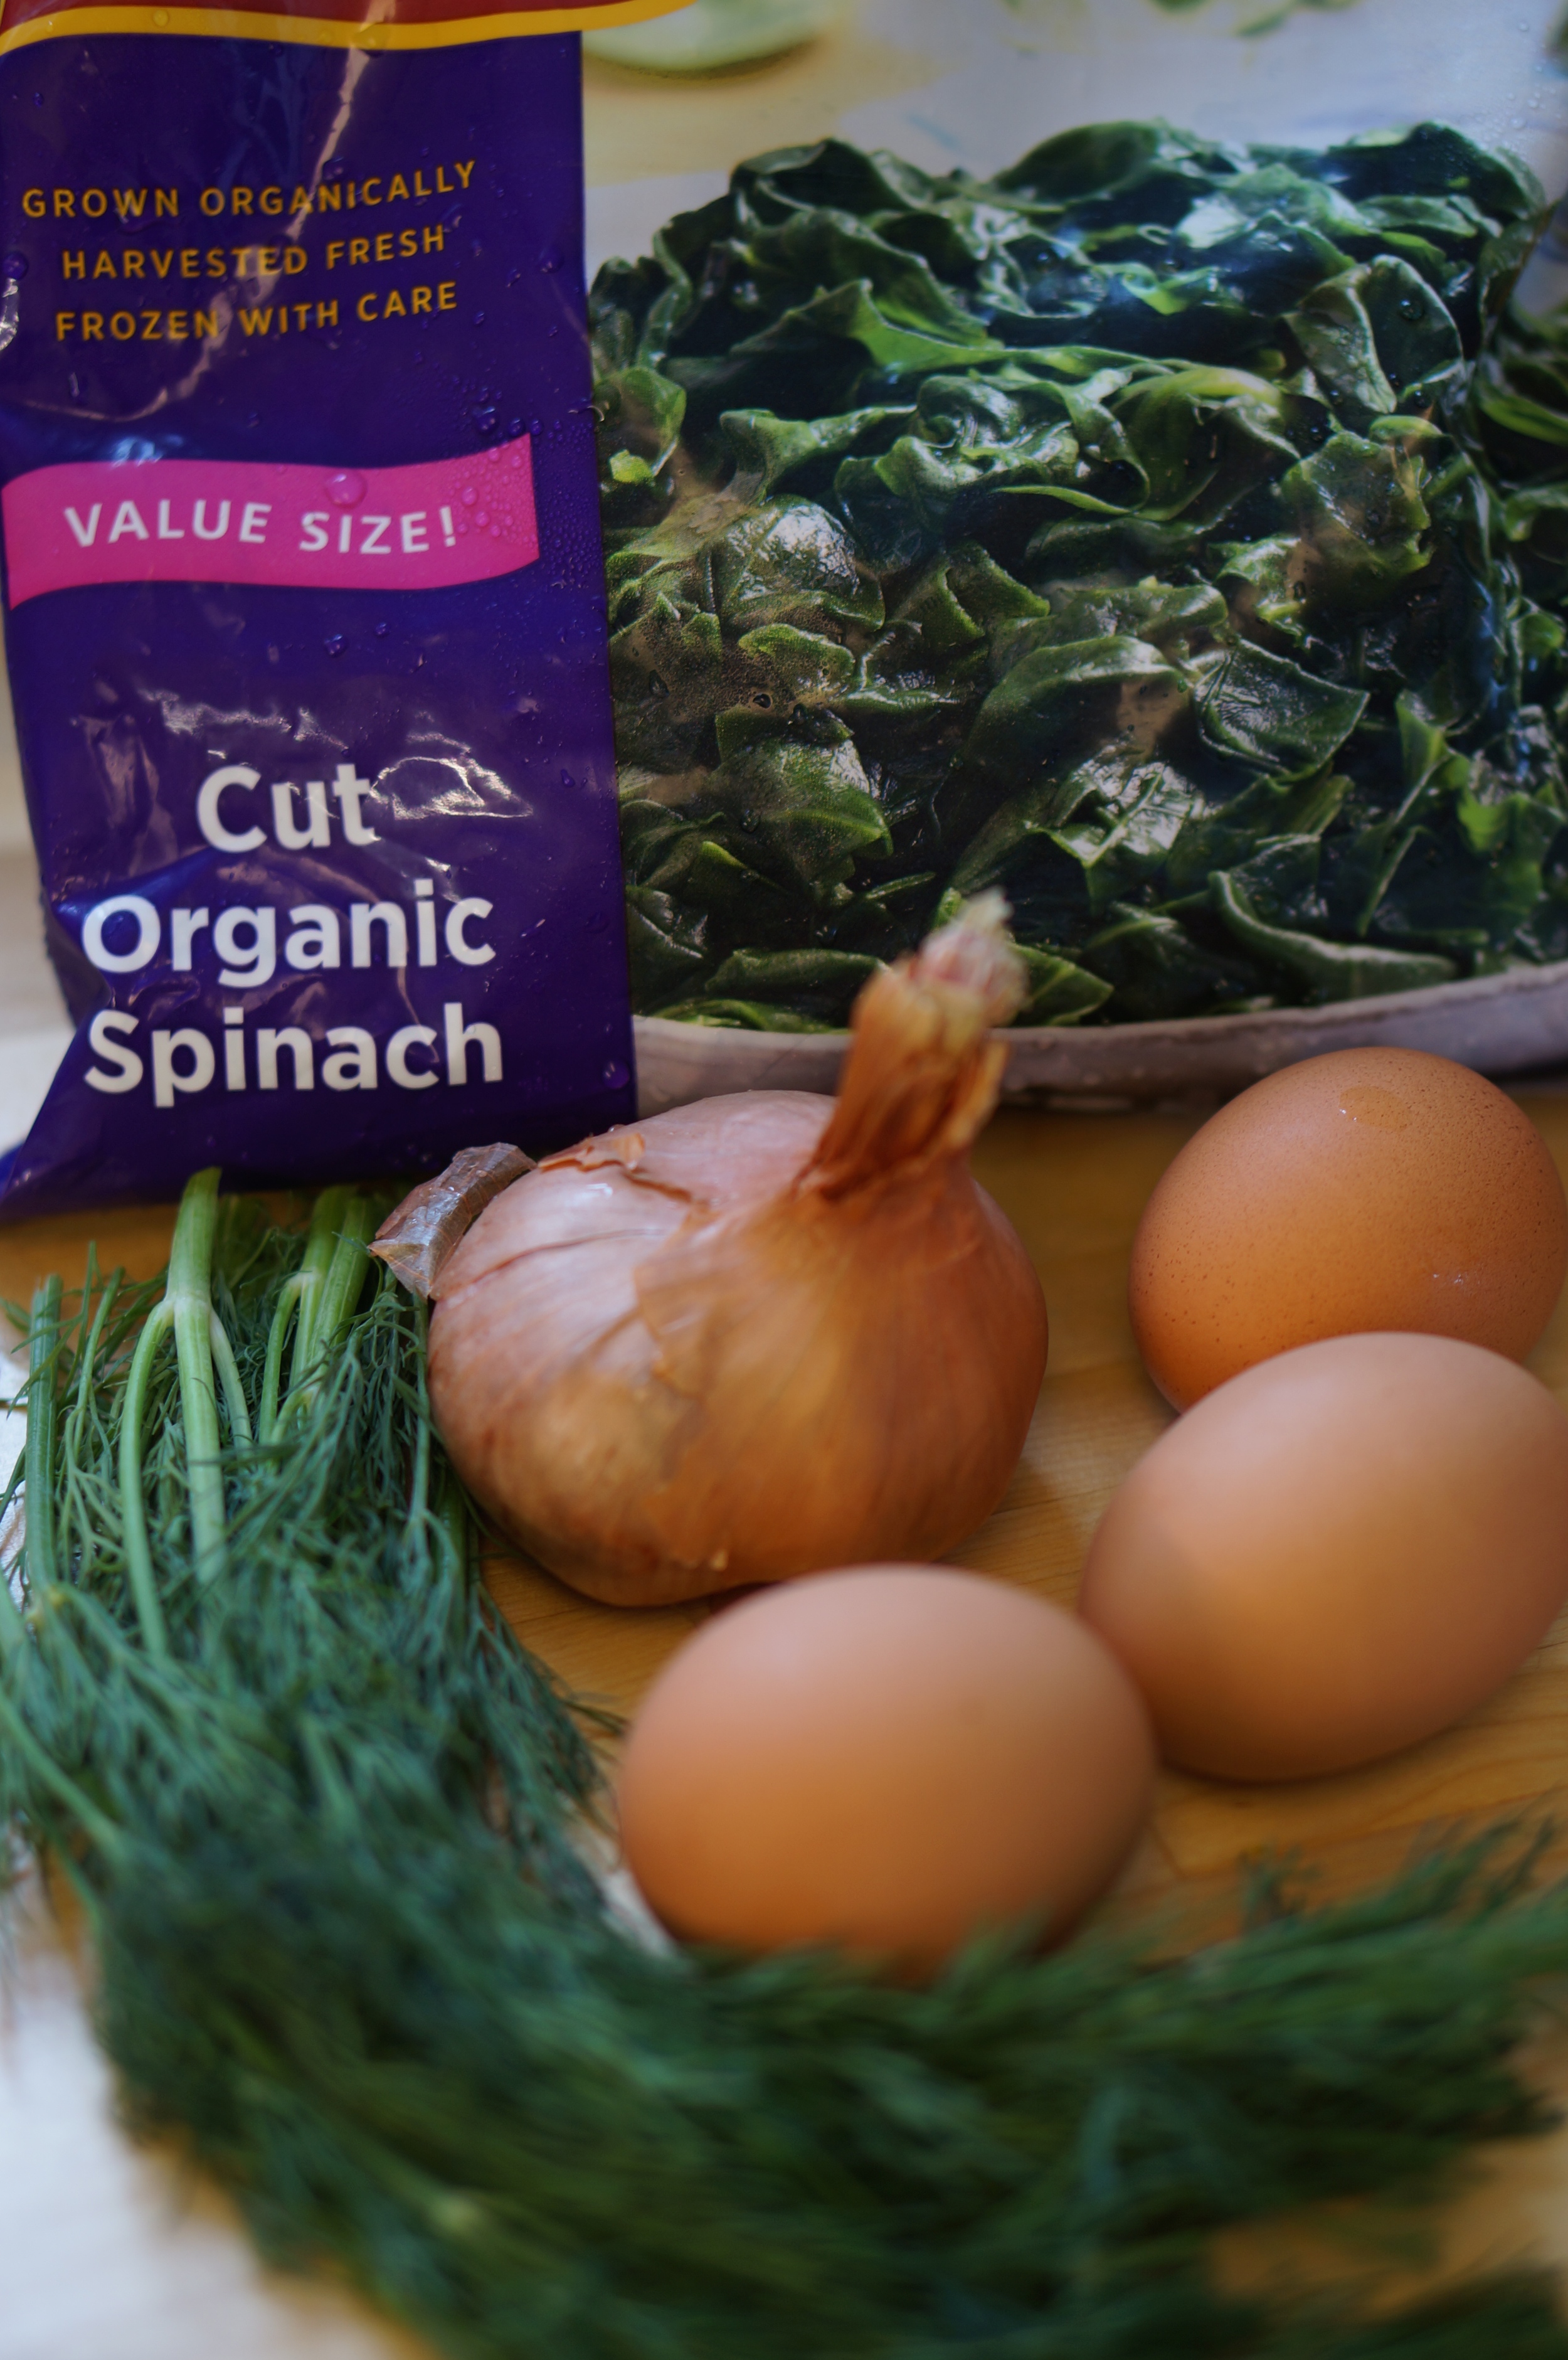
I use frozen spinach for this recipe. Most of the produce that I buy is fresh but I've read numerous articles like this one from the Washington Post suggesting that green leafy vegetables like spinach are "so nutrition-dense that it's good for you either way you eat it" (i.e. fresh or frozen). Spinach is like the superhero of greens. It has vitamin A, vitamin C, calcium, iron and fiber. The eggs in this dish hold it together and give it added protein and the sautéed shallot and dill round out the flavor. This recipe can serve 4 people as a main course but my husband and I ate 2/3 of a recipe for dinner. I had the rest for lunch the next day. 

Leftover Spinach Pie for lunch.

Leftover Spinach Pie for lunch.

Spinach Pie (Dairy Free) 

Ingredients
20 oz chopped frozen spinach (two 10 oz packages) 
2 whole shallots, chopped
1 tablespoon of olive oil
3 large eggs
2 tablespoons of fresh chopped dill
Salt and pepper to taste

Method
Preheat the oven to 375. Cook the spinach as directed on the package and drain as thoroughly as possible. Place in a bowl. Sauté the chopped shallots in olive oil until translucent. Let cool for a few minutes and then add to spinach. Mix well. Add the eggs and dill and make sure everything is well combined. Add salt and pepper as desired. Place in a baking dish (I use an 8x8). Bake for approximately 30 minutes. 

Lunchbox-Friendly Sushi

LaLaLunchboxSushi.PNG

Let me put this right out there: DIY sushi rolls with the kiddos is a lunch that packs itself.

I've always been fascinated by sushi: the art of it, the buzz around it, the quest for the freshest fish, the accoutrements. I'm not able to indulge in any of it thanks to my fish allergy and I rarely take chances in a sushi restaurant with the non-fish items because even the slightest bit of cross contamination leads me to Benadryl. 

A couple of years ago, when we discovered that my eldest daughter didn't have the allergies that I have (phew!), she and my husband began a sweet tradition of going out for sushi as a twosome. At some point, a second tradition emerged and we began making vegetarian rolls of our own at home. My daughter (then in kindergarten) was completely enthralled by the DIY rolls and all things with seaweed. Her love affair waned for a long while but now it seems to be back. She and I went to the market together the other day and she specifically requested sushi rice and nori. I wasn't at all surprised to see it on her LaLa Lunchbox meal plan this week and was kind of excited for this lunch-making activity.

Making sushi rolls is one of those things that sounds involved. And messy. And hard. But I swear, it isn't. I was really feeling victorious about the whole thing until I realized that my littlest one was systematically removing all of the folded clothes from her dresser drawer as we were DIYing with nori. That was big fun. But I digress.

These sushi rolls really are an easy project to do with kids and you can basically put anything you want in them. We chose to fill them with egg and avocado. I explained it to my 3.5 year old sushi newbie like this: "First, we're making rice. Second, we're frying two eggs. Third, we're slicing an avocado. Then it's all about the rolling." 

Bam! It really is that straightforward. My kids overstuffed the rolls in their excitement, of course, and my son was a little taken aback by just how sticky the rice was on his fingers. But they were both proud as peacocks about these rolls, and completely excited to pack them in their lunchboxes. Two rolls, sliced into pieces, fit perfectly into an Easy Lunchboxes container – woot! 

DSC02866.JPG
DSC02886.jpg

Never made sushi rice before? Never fear. Here's how: 

Bring 1 cup of sushi rice and 1.5 cups of water to a boil. Cover and simmer for about 20 minutes or until the water has evaporated completely. Add 2 tablespoons of rice vinegar (unsweetened) and stir. 

To assemble the rolls, here's what you'll need:

  • 1 package of nori (toasted seaweed)
  • 2 TB rice vinegar
  • 1 cup sushi rice, prepared
  • 1 avocado, sliced
  • 2 eggs, scrambled

Prepare the sushi rice and set aside. Lay a piece of nori on a mat and sprinkle lightly with water. My son likened it to rain drops. Spread the rice evenly on the nori, making sure to leave room on the edges (about 1/2 inch, plus more at the top for sealing). Place the avocado slices and egg pieces along the bottom edge of the rice and roll up the nori like a burrito. Seal the edges with wet fingertips. Slice with a sharp knife and enjoy! Makes about 6 rolls. 

See that cute little pink bunny thing below? It's a teeny container for soy sauce! 

DSC02929.jpg