vegetarian

Sweet Potato Breakfast Tacos

Sweet Potato Breakfast Tacos

When I was a kid, my mom didn’t make tacos often. On the rare occasion that she did, we’d have hard shell tacos, with ground meat and a packaged seasoning (you know the one). My mom served it with shredded cheese, lettuce and tomato and called it a day. For the record, I never ate any of the tomato, but I’m pretty sure that I dug taco night. My mom is a fabulous cook, and I learned to be an adventurous eater thanks to her, but tacos were never really her thing. They’re something I learned to really appreciate after I left home.

Fast forward… today I serve tacos to my crew fairly regularly. We usually have soft shell tacos (typically with corn tortillas, but sometimes with flour tortillas), and I serve them with turkey, chicken, pork, black beans, chickpeas, you name it! My kids love tacos any way I serve them, and they especially love DIY Taco Night, when they can fashion their own creations with a variety of fixings.

The folks at Siete Foods (whose chips we’re practically obsessed with) sent me a care package that included their new hard shell tacos and a variety of hot sauces (love love love), and the crunch factor added a whole new dimension of fun to Taco Night! I made Sweet Potato Breakfast Tacos, with scrambled eggs, sautéed spinach and a variety of fixings and the combo was a huge win! In a nutshell, it was like eating a spinach omelet with sweet potato hash browns and crispy chips with guacamole, hot sauce and salsa. All good there! It was hilarious watching my kids tilt their necks to make sure they got every last crispy bit into their mouths.

This one will be on repeat at my house, for sure! See below for the recipe.

Sweet Potato Breakfast Tacos

Sweet Potato Breakfast Tacos

Sweet Potato Breakfast Tacos

Ingredients:
2 medium/large sweet potatoes, cut into 1 inch chunks (skin on)
1/2 teaspoon salt
1 teaspoon garlic powder
1 teaspoon ground cumin
1 teaspoon sweet paprika
1/2 teaspoon dried oregano
4 tablespoons olive oil, divided
8 eggs, lightly scrambled
10 ounces spinach

Suggested fixings:
salsa
guacamole
sour cream
shredded cheese
lettuce
tomatoes

Method:
Preheat the oven to 400 F. Add 2 tablespoons of olive oil to a large frying pan and add the sweet potato. Sauté on medium heat and toss to make sure the olive oil is evenly distributed. Add the seasonings and combine using a wooden spoon. Let that cook for 10-15 minutes until cooked through with slightly browned edges. Place in a bowl and set aside. In the same pan, add another tablespoon of olive oil and lightly scramble the eggs. We prefer them soft, but cook them to your liking. Place them in a bowl when done. In the very same pan (one pan to clean up: victory❣️) quickly sauté the spinach with the final tablespoon of olive oil. Tip: you can add fresh garlic to this if you’d like. While that cooks, heat the taco shells open side down in the oven for 2 minutes. Boom! Dinner is done. ❤️

The only argument we had about this one was whether the sweet potato hash browns should go on the bottom or whether the egg should go on the bottom. What’s your vote? 🤔

This meal is gluten free, dairy free, nut free and vegetarian.

Sweet Potato Breakfast Tacos
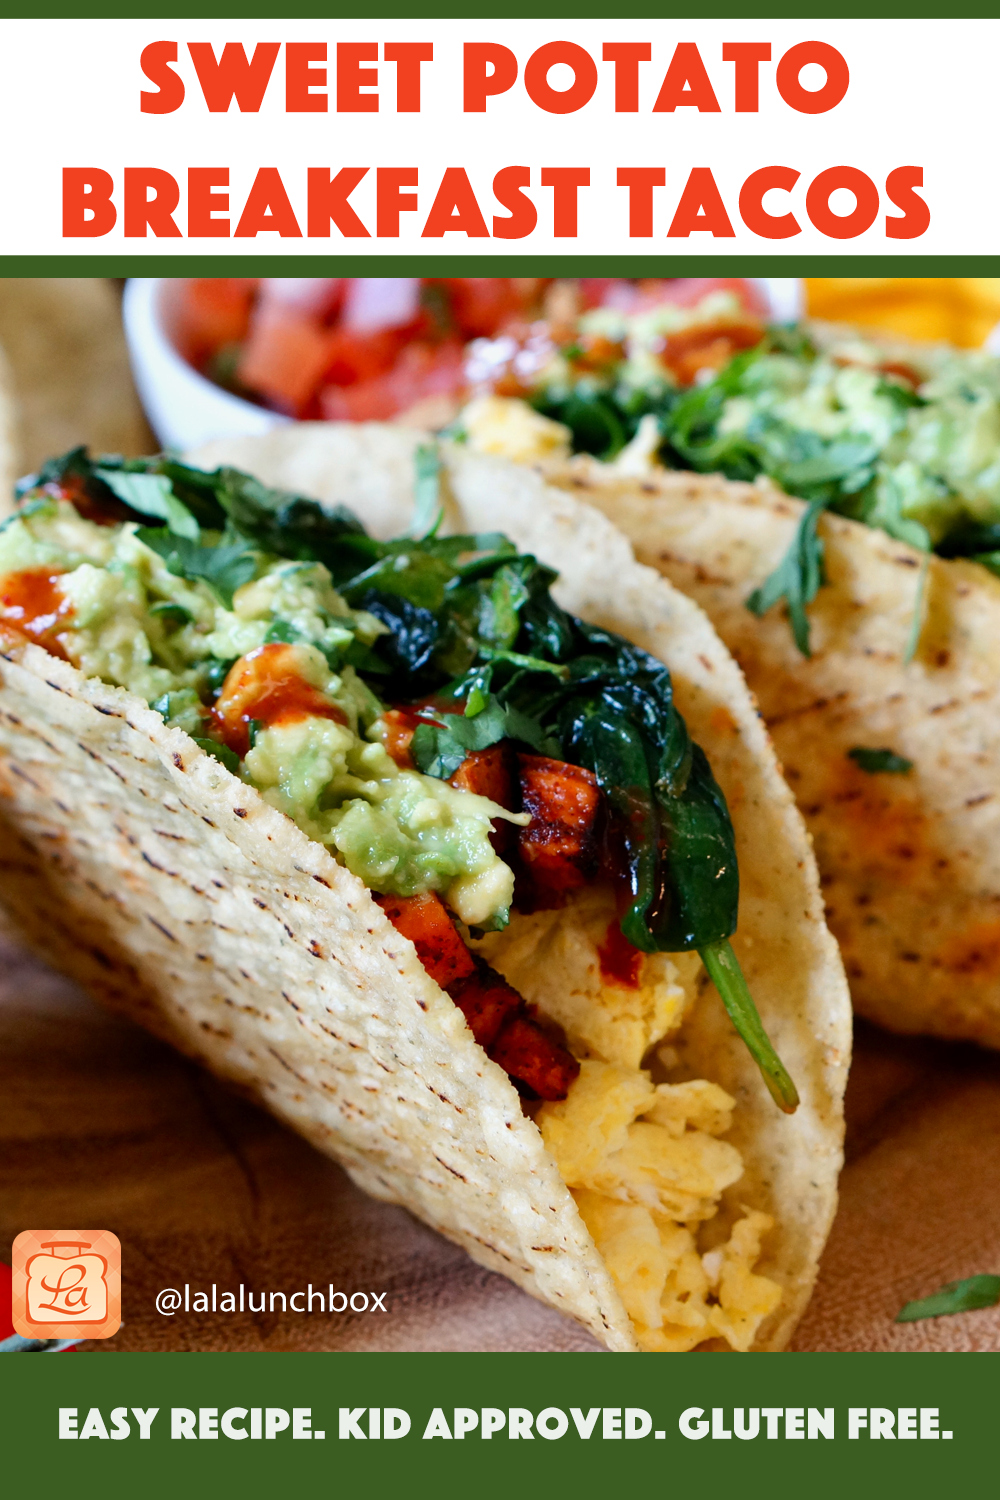
Sweet Potato Breakfast Tacos

Taco Pasta

Is there anything better than the simple comfort of pasta with the simple deliciousness of taco seasonings? I think not. I’m not sure why the idea to combine the two took me so long to figure out, but I’m glad I finally did!

Taco Pasta

Taco Pasta

This simple recipe combines my taco seasoning with fridge-forage veggies and cooked pasta. It’s a riff on pasta salad, which means you can serve it cold or hot and everyone will celebrate. The possibilities are endless: serve this with chicken, or meat free; with shredded cheese or dairy free; and always load on the veggies to make it a one bowl wonder. This works perfectly for dinner and for lunchbox leftovers.

If you’re looking for more pasta ideas, I’ve got you covered!

If you make this, I’d love to hear what you add! Tag me so that I can see!

Taco Pasta Lunchbox
taco sauce ingredients

taco sauce ingredients

Taco Pasta

Sauce
1/4 teaspoon ground cumin
1/4 teaspoon garlic powder
1/4 teaspoon onion powder
1/4 teaspoon paprika
1/2 teaspoon dried oregano 
2 tablespoons olive oil 
2 tablespoons lime juice
Fresh cracked pepper to taste
*optional: pinch of cayenne pepper 

Pasta
8 oz dry pasta, cooked as directed
1-2 cups of chopped veggies (I used cherry tomatoes and bell peppers)
1/4 cup chopped fresh cilantro

Method

  1. Combine all of the sauce ingredients in a small bowl and whisk together. Set aside.

  2. In a large bowl, add cooked pasta with chopped veggies and toss to combine.

  3. Add sauce and toss again to thoroughly combine.

Argentine Tortilla (Tortilla de Papas)

individual tortilla de papas

Potatoes + onions + eggs + spices = divine combination. Right?

My family traveled to Brazil and Argentina this summer to visit family and celebrate my brother in law’s wedding. Visually and culturally, the trip was magnificent! It was a culinary eye opener for my kids, and somewhat difficult at times for one of my kids and for me to handle the amount of meat consumed. We don’t eat so much red meat at home, but in Brazil and Argentina, it’s ubiquitous.

One bright light: in Buenos Aires, my aunt wowed us with her Tortilla de Papas, an Argentine riff on the classic Spanish dish, Tortilla Española.
In the classic preparation, chunks of potato are fried in olive oil with onions and spices until they have beautifully browned edges, and then eggs are added. Once flipped, this omelet seals the deal as a simple, yet filling and comforting rustic dish. My aunt can make this with her eyes closed, and it’s absolutely delicious time and time again. But wow, it’s a messy affair! Oil splatters everywhere, and the need to pour out some of the excess oil is potentially a hazard. In general, not the kind of dish that I would personally want to make over and over.

Once home, I tried my hand at her recipe many times, and tinkered with it until I reached a dish that I would be happy making on repeat. Instead of frying in a cast iron pan, I’ve roasted and seasoned the potatoes and onions, then baked the whole thing with eggs. The roasted flavor carries over beautifully here, and you won’t need to wipe up all of the oil spatter from frying. This dish can be made in multiple sizes, with the only adjustment made in the cooking time.

tortilla de papas

It’s homey and comforting, and easy enough to make on a busy weeknight. I love this dish because it’s also hearty enough to have as a main dish. If you make this dish, post it and tag @lalalunchbox and #lalalunchbox on Instagram.

Tortilla de Papas

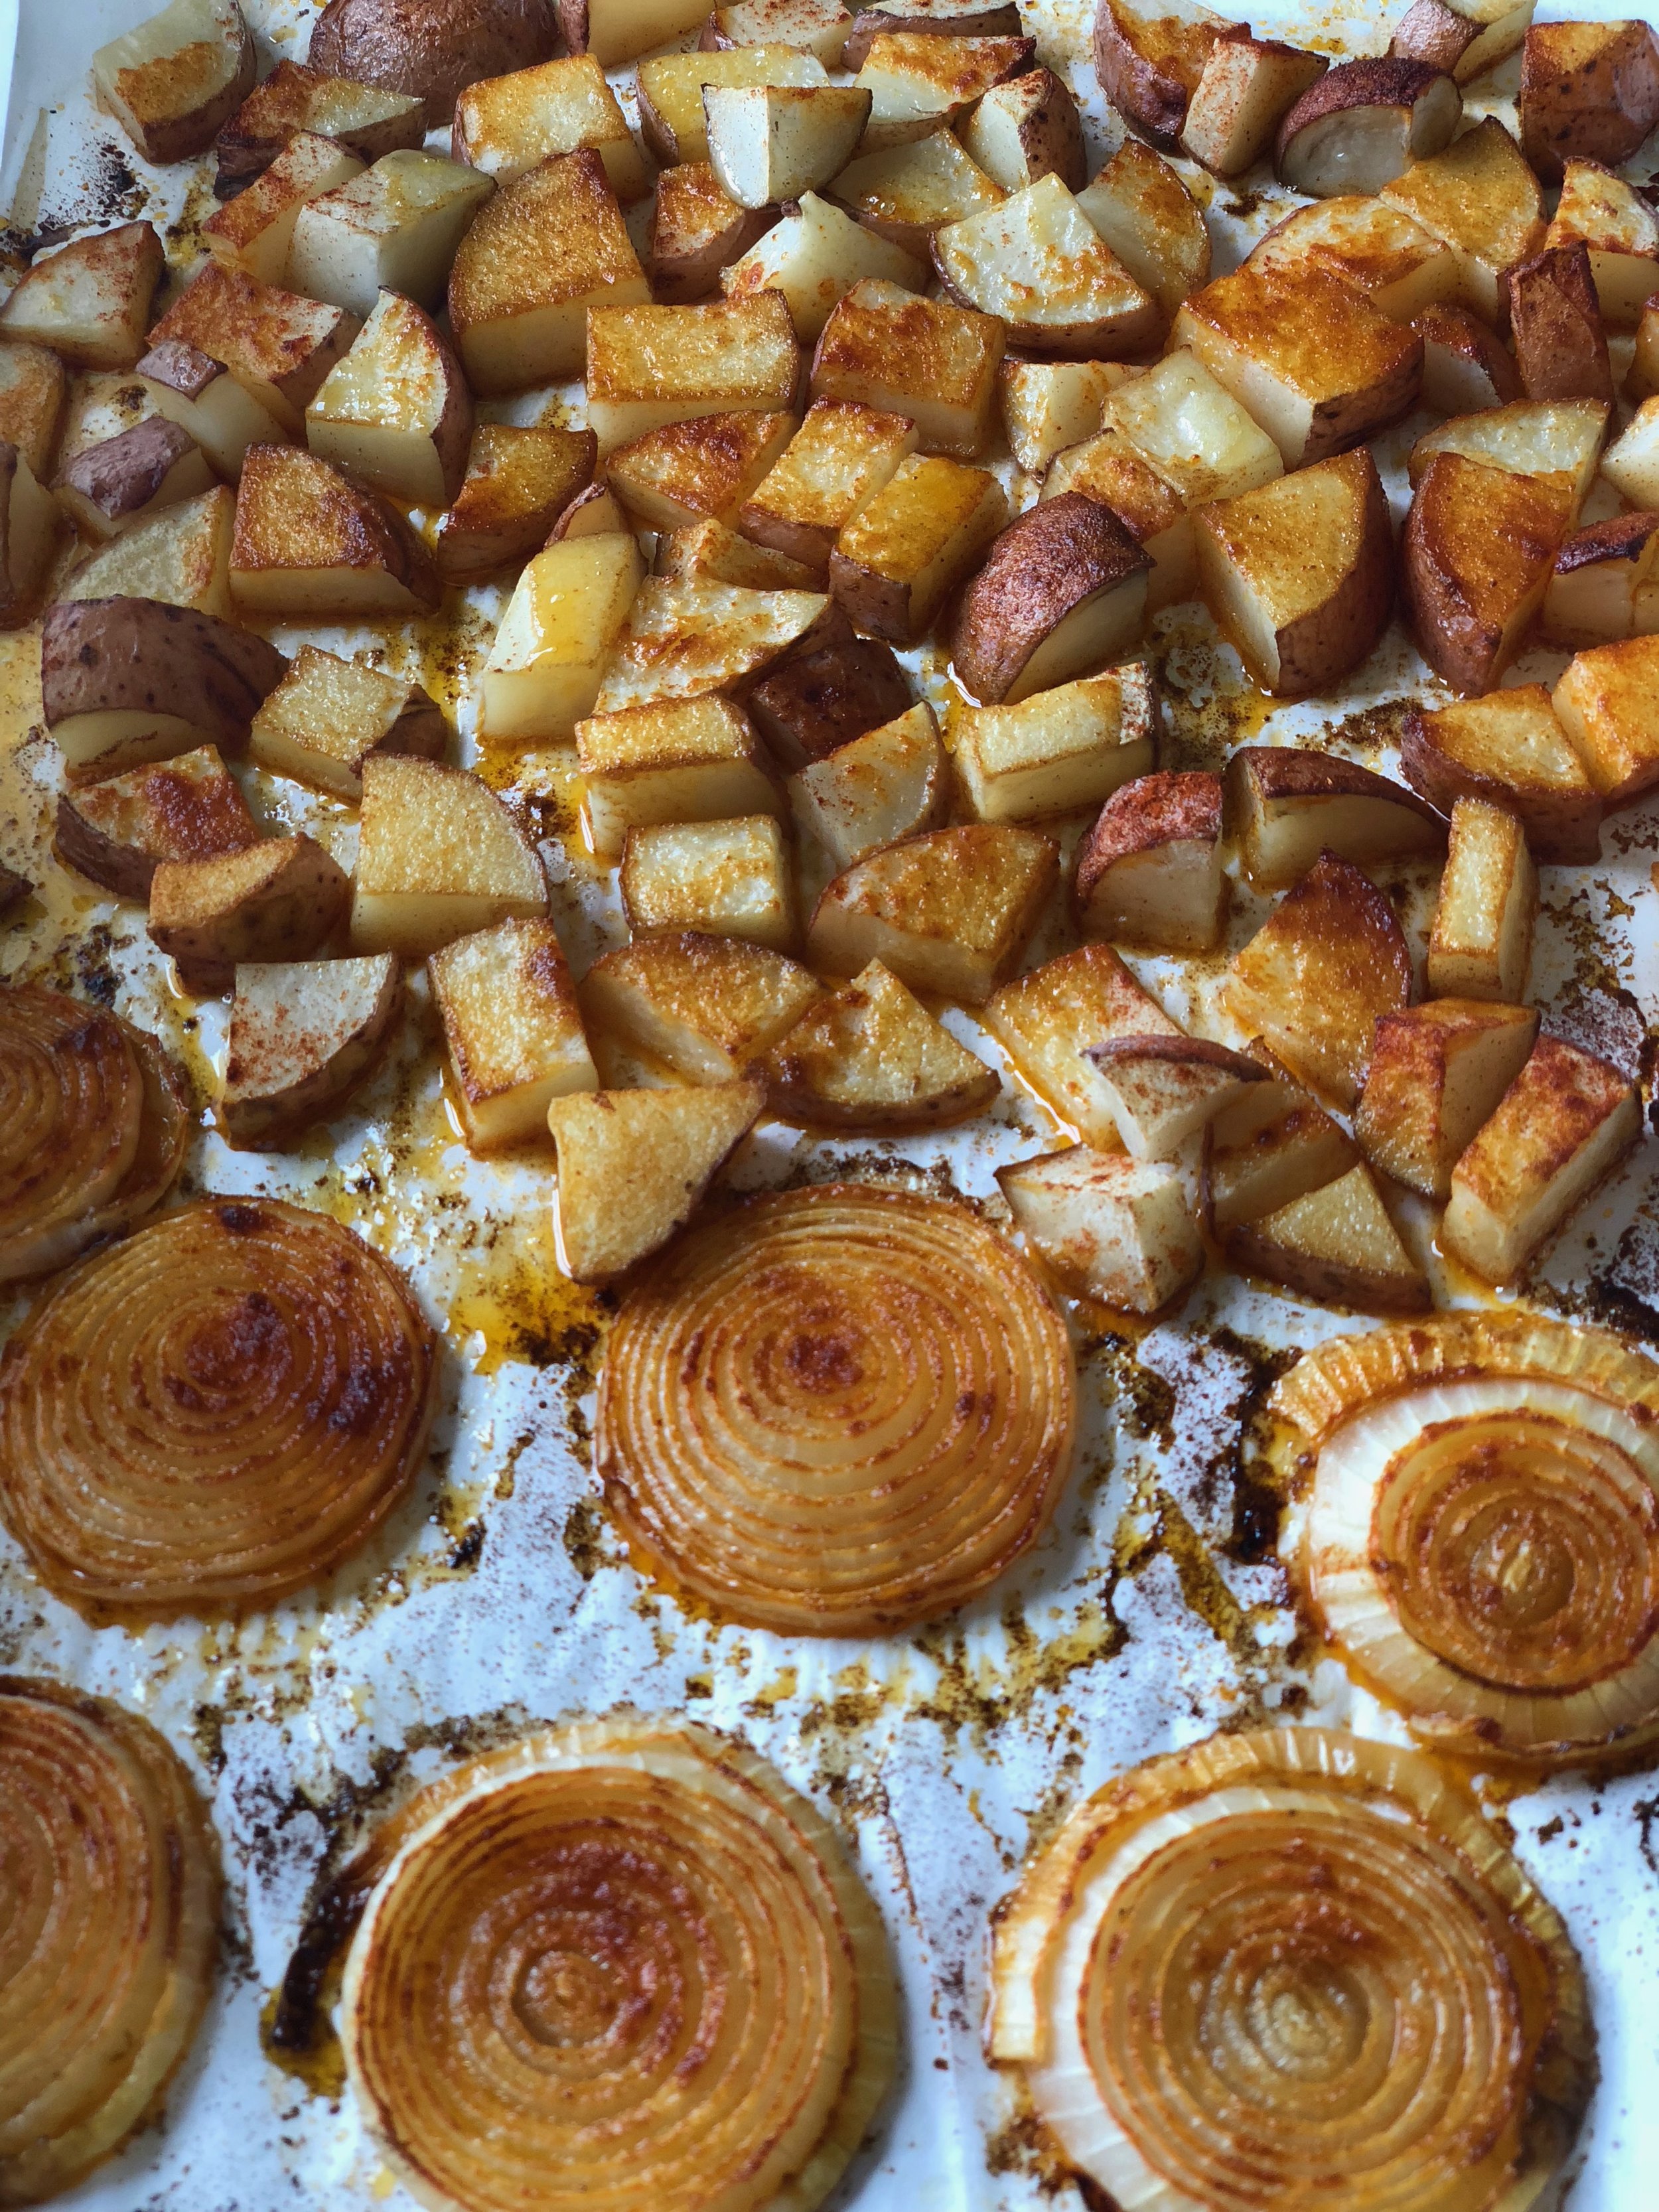
roasted onions and potatoes

1 pound of thin skinned potatoes (such as yukon gold), cut into 1 inch chunks
1 medium yellow onion, sliced into thin rounds
1 tablespoon paprika
3 tablespoons olive oil
6 large eggs
salt and pepper to taste

Method
1. Preheat the oven to 400 F.
2. Lay out the potatoes and onions on a baking sheet lined with parchment paper, drizzle with olive oil and sprinkle with paprika.
3. Roast for approximately 35-40 minutes or until the potatoes and onions are nicely browned on the edges.
4. In a separate bowl, scramble the eggs and add salt/pepper to taste. I added just under one teaspoon.
5. Combine the roasted vegetables with the eggs and pour into an oven safe dish. You can line the top with roasted onion rings to make it look pretty.
6. Bake for approximately 30 minutes or until the eggs are just set.

tortilla de papas

Cured Egg Yolks

cured egg yolk.jpg

The humble egg is a family favorite. It's a quick, healthy solution for breakfast. A reliable standby for lunch. A welcome change for dinner. When I came across something recently about cured egg yolks, my curiosity was peaked and I had to dive right in. I've tinkered with the original recipe from Bon Appetit slightly, and am looking forward to continuing to experiment with it. 

Cured yolks add a salty, creamy depth to dishes. I grate them over pasta, over salads, on simple steamed vegetables and on top of several types of toast. They add an umami dimension that is eminently satisfying. Here's my favorite part: you can use them in place of a hard, salty cheese to make a dish dairy free. I used four yolks each time I made this recipe, and because a little goes a long way, they last a long time. (Make sure to reduce the amount of added salt to a dish if you plan on adding cured egg yolks). You can see the step by step process that I used below, or follow along on my highlighted Instagram Story

Without further ado, here's my adapted recipe: 

INGREDIENTS

  • 1 2/3 cups kosher salt 

  • 11/4 cups sugar

  • 4 large egg yolks

  • 1 tablespoon lemon zest OR 2 tablespoons of fresh chopped dill (optional, or add your own fresh herb)

  • Nonstick vegetable oil spray

PROCESS

Whisk salt and sugar (and optional lemon zest or herb of choice) in a bowl to combine. Evenly spread out half of salt mixture in an 8x8" glass baking dish. Using the back of a tablespoon, create 4 depressions in salt mixture, spacing evenly. Carefully place an egg yolk in each depression. You can freeze the whites in an ice cube tray if you don't plan to use them immediately. Gently sprinkle remaining salt mixture over yolks and cover the dish with plastic wrap. Refrigerate for 2 days. (continued below)

IMG_3598.jpg
IMG_3600.jpg

Preheat oven to 150°F. My oven only goes as low as 170°F, so that's what I used. Brush salt mixture off each yolk, then carefully rinse under cold water to remove any remaining salt (yolks will be semi-firm, and bright, as shown below). Gently pat dry with paper towels. They'll look a lot like glacéd apricots. 

Generously coat a wire rack set inside a rimmed baking sheet with nonstick spray; place yolks on rack. Dry out in oven until opaque and texture is like a firm Gruyère cheese, about 80-90 minutes. You can experiment with the timing of this based on how firm or soft you'd like your yolks. When the cooking is done, let them cool. They will last up to a month in a refrigerated airtight container. 

Image-1.jpg
IMG_3730.jpg

Here are some of the ways that I used them: 

cured yolks in dishes.jpg

Top left: here we've got sourdough toast with labne, avocado, thin slices of cured egg yolks, microgreens and fresh ground pepper. 

Top right: simple salad with micro greens, baby arugula, purple radish and grated cured egg yolks. 

Bottom left: fresh pasta with oven roasted oyster mushrooms and baby kale with grated cured egg yolk and fresh pepper. 

sourdough toast with avocado, watermelon radish and grated cured egg yolk

sourdough toast with avocado, watermelon radish and grated cured egg yolk

DIY Toast with cured egg shavings, guacamole, radishes and lime.

DIY Toast with cured egg shavings, guacamole, radishes and lime.

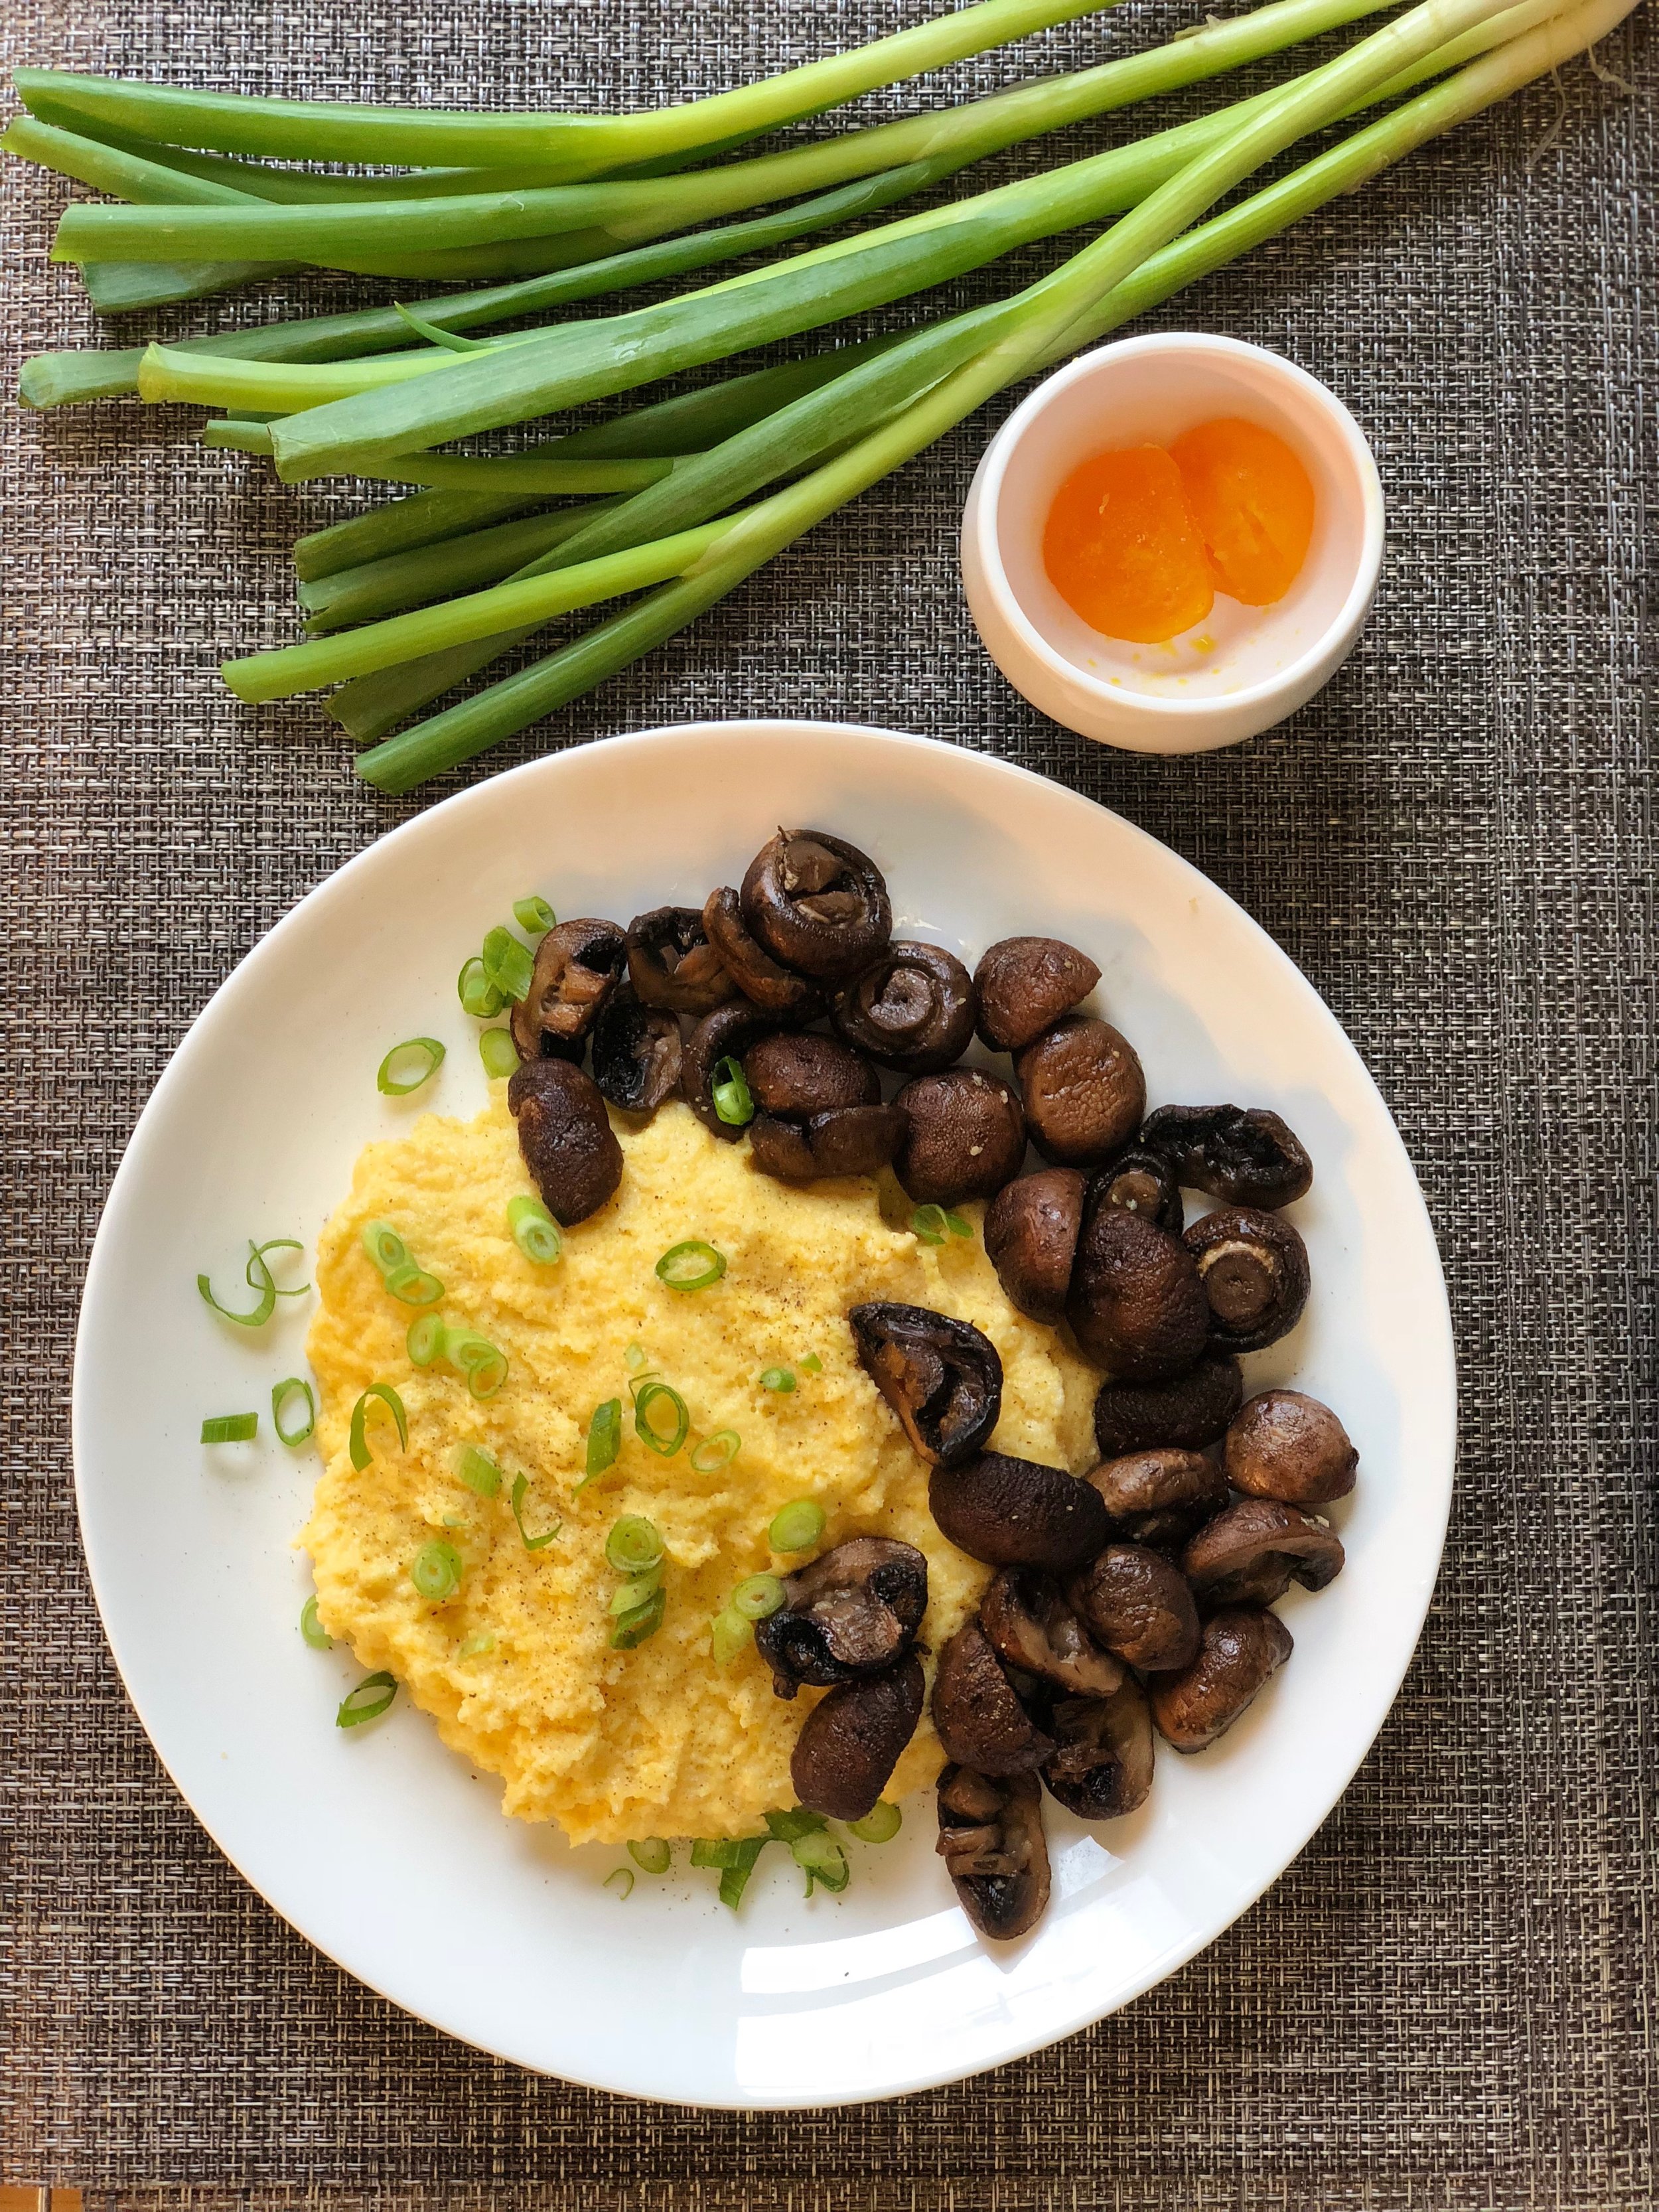
Polenta with roasted cremini mushrooms, scallions and cured egg yolk.

Polenta with roasted cremini mushrooms, scallions and cured egg yolk.

6 Ingredient Carrot Squash Soup

I am struck by fall every year. 

fall

Let's face it, the beauty of fall is complex and emotional, and perhaps that's part of it's allure. The whole notion of finding and appreciating such breathtaking beauty amid decay is complicated. The mood is such a departure from the carefree days of summer. 

farmers market squash

The food is also so different. Fall's harvest has such a different look and flavor profile from the bounty of produce that we pick in summer. Think of a delicate raspberry side by side with a hearty pumpkin. So when I stroll through the farmer's market and see long tables of squash and gourds, it officially hits me that summer is gone and it's time to usher in the new season. 

Nothing says fall like a flavorful soup made from root veggies, so that's exactly what I decided to make recently. But I don't want fall soups that put me into a winter hibernation. We're not there yet. I don't want fall soups that are too heavy or creamy. They should provide comfort to take the slight edge off of the newly chilly air. They also need to be easy and fast, because let's face it: with the general chaos of a new school year, there just isn't time for anything complicated. Carrot squash soup to the rescue!

carrots for soup

This soup has just 6 ingredients, it can be prepped and served in under an hour and though I made the most recent batch with chicken stock, this recipe can be made completely vegetarian.

carrot squash soup

6 Ingredient Carrot Squash Soup

Here's what you'll need:  
2 pounds of carrots, peeled and cut into chunks
1 pound of butternut squash chunks (from one medium butternut squash, or from a package of already prepped chunks)
1 medium yellow onion, chopped
2 tablespoons of olive oil
32 ounces of stock (chicken or vegetable) 
2 tablespoons of fresh sage, chopped
Salt and pepper to taste
Optional garnish: fresh sage and croutons

Here's what to do: 
In a soup pot on medium high heat, add the olive oil. After a few moments add the onions and reduce heat to medium. Stir until the onions are translucent, about 5-6 minutes. Add the carrots, squash and stock. Bring to a boil, stir, cover and simmer until the vegetables are soft (about 25 minutes). Add the sage. Using a stick blender, puree the soup right in the pot. If you don't have a stick blender, you can puree this soup using a traditional blender, working in batches. Add salt and pepper to taste if you'd like. 

Carrot Squash Soup