My grandfather was a textile wholesaler. As a kid, I used to think he just liked buying felt; he had what seemed like mountains of it in every color possible in his basement. Felt is soft, yet durable. It plays nicely with glue and the vibrant colors that you can find make it perfect for all kinds of crafts. So when it came time for me to design and create the day planner for my son (2.5 yrs old), felt seemed like the perfect fit.
What?! A day planner for a toddler? It probably sounds crazy, but this craft project is perfect for helping my little guy understand how his week is organized and helps solidify the foundation for understanding time and routine. Check it out:

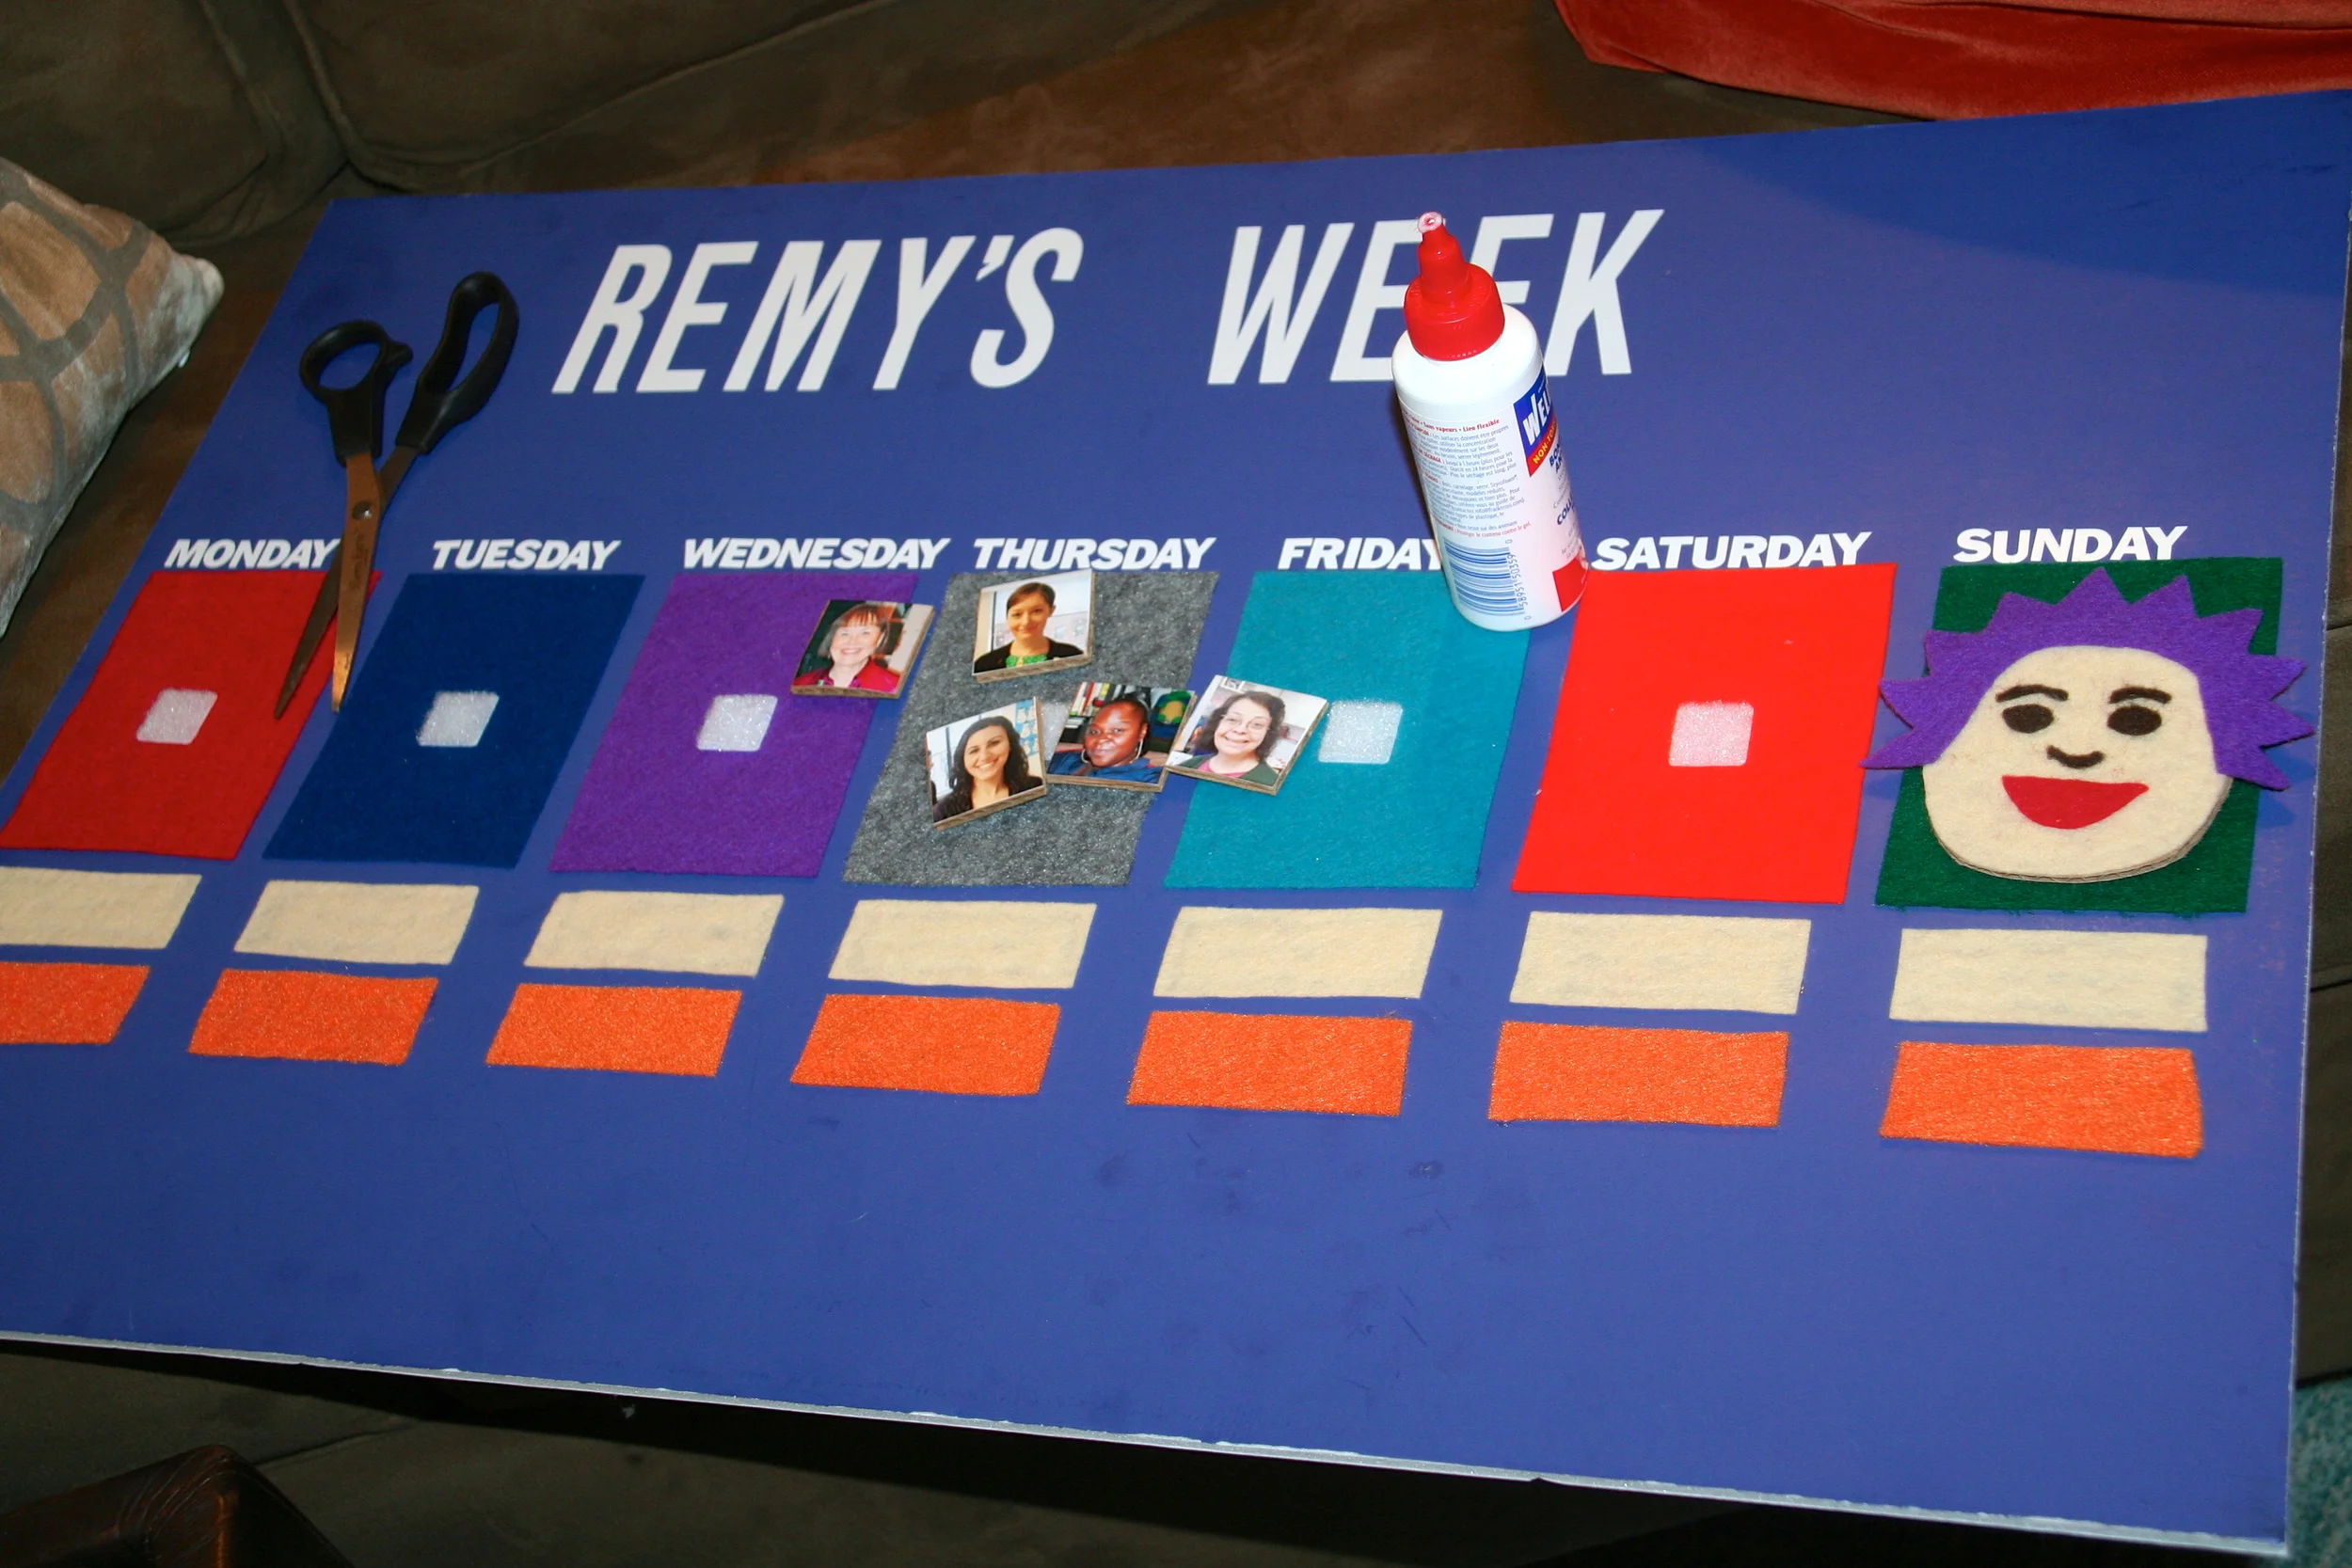
See the happy face with the purple rock star hair? That represents my son. His favorite color is purple. He hasn't yet decided whether that's hair or a funny hat. There's velcro on the back of that face and it can attach to each day of the week. My son moves the face to the appropriate place each morning to signify a new day. Yesterday he discovered the Y in Wednesday, "like the Y in Remy, Mama!" Awesome.
At the bottom are photos of all of his preschool teachers, his grandma and his babysitter - the people he sees regularly during the week. He attaches their photos to the velcro squares below the day rectangles to show that those people are part of that day. People who aren't part of that day are kept in the green area at the bottom. Over time, the repetition will help him understand the rhythm of the week, the names of each day and the flow of one day to the next: he goes to preschool on Tuesday, Thursday and Friday; Grandma comes on Wednesday; etc.
I created a project nearly identical to this for my daughter 4 years ago when she was the same age. She felt empowered when she could name the days of the week. She loved knowing what lie ahead on a given day. In some ways, this project was the precursor to LaLa Lunchbox – the sense of order, organization and time that my daughter learned early on helped make lunch planning really easy in our house. And in our house, of course, we're all about easy lunch planning. Perhaps there's an app for the Toddler Day Planner at some point?
Here's what you'll need:
- A 20x30 inch foam board. They come in lots of fun colors.
- Non-toxic glue - the kind that says something like "bonds most anything!"
- Vinyl letters. I used 1/2" for the weekday names and 3" for "Remy's Week"
- Felt! I used a different color for each day intentionally to underscore the distinction between each day. It's also great for color recognition. Each rectangular day measures 3 7/8" x 5". Each rectangle below the weekday measures 3" x 1 1/4" and the green rectangle that houses the photos measures 13" x 2 1/4". The diameter of the smiley face is 3".
- Cardboard. The smiley face felt is glued to cardboard. I intentionally made it a face and not an abstract shape to strengthen the connection for my son.
- Velcro. I opted for the basic (aka non-industrial strength) kind and attached with glue.
- Photos of your caregivers, teachers or anyone else who you want to associate the day with (1.5" x 1.5" mounted on cardboard). I could have used an icon, of course. Something to represent preschool. Something to represent a playground or some activity he might do with his babysitter. But life is all about people. It's made fuller by the people who we spend our time with, learn from and laugh with. Relationships matter. Children are nurtured and guided by grownups every day, so I chose the focus of this project to be all about the who - not the what or the where. I also chose not to have photos of our family. We are constants. We are a given. Every day, no matter what.
Here's how to assemble:
- Cut the felt to the appropriate sizes.
- Cut the cardboard for the face and the photos.
- Create the face design and glue to cardboard.
- Glue the felt rectangles to the foam board.
- Attach the vinyl lettering.
- Place the velcro squares on each day and on the rectangles below them.
- Print out the photos and glue to cardboard.
- Attach the felt at the bottom - it may be bigger or smaller than mine based on the number of photos you have.

Enjoy!